The Joomlashack Blog
Find and Edit Joomla CSS Problems
- Written by Steve Burge Steve Burge
- Published: 30 April 2010 30 April 2010
This purpose of this tutorial is to show you how to find and fix problems with your Joomla templates. We're going to focus on CSS (or Cascading Style Sheets) because they control very common issues such as fonts, colors and padding.
Download and Install Firefox
No question about it, Firefox is the best tool you can find for fixing problem on your website. Download from https://www.mozilla.com/firefox and install.
Install the Web Developer Plugin
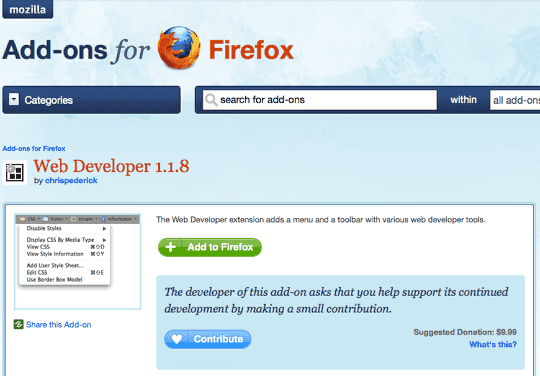
Firefox is useful for the same reason as Joomla ... it has 1000s of amazing addons. The one we're going to use is called "Web Developer". Visit https://addons.mozilla.org/en-US/firefox/addon/60 in your Firefox browser and click "Add to Firefox".
Visit Your Joomla Site
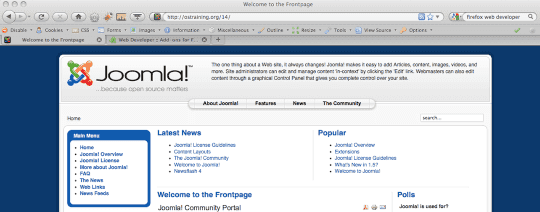
We're going to use the default Joomla for this tutorial.
Diagonse Your Problem

In this example, our welcome message is too small. We'd like to have "Welcome to the Frontpage" in larger text.
Start the Webdeveloper toolbar
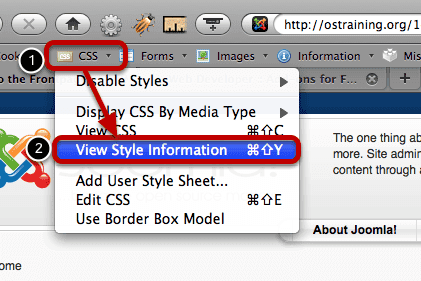
Click "CSS" in the toolbar and then click "View Style Information"
Click the item you want to edit
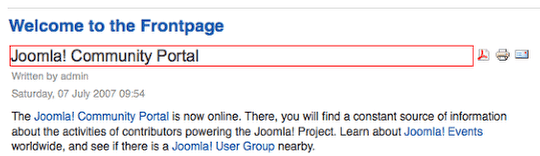
Hover your mouse over any part of the page and a red box will appear around it. Click on that area.
See the CSS Code at the bottom of the page
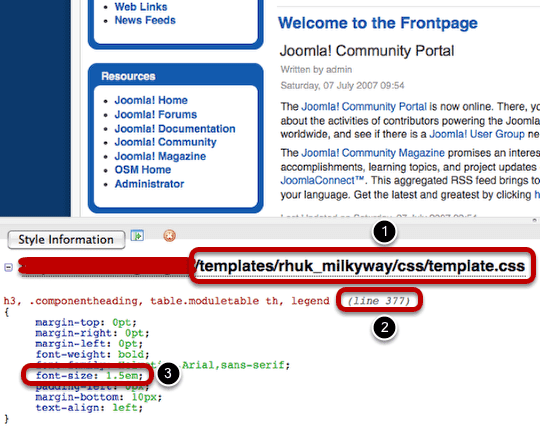
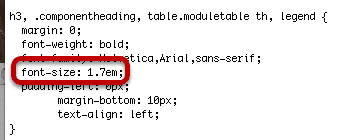
At the bottom of the page you'll get a lot of information about why that item on your site looks like it does. Here's what's controlling the "Welcome to the Frontpage" line:
1: The file with it's exact location
2: The exact line number inside that file
3: The code at that line number
In this case you can see that the font-size is 1.5em. We'll need to increase that number.
Login to Your Joomla Site
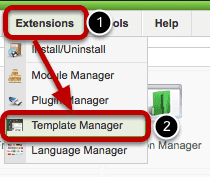
Go to Extensions >> Template Manager inside your site
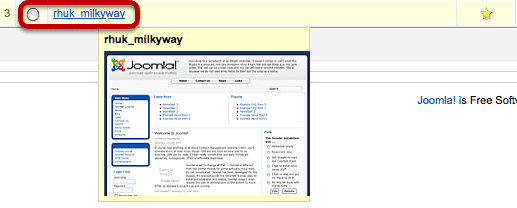
Click on Your Template Name
Click "Edit CSS"
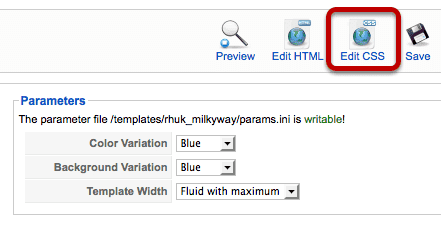
Open Your Template' CSS File

Browse down to find the template you saw in the previous step called "Find the CSS code at the bottom of the page". Click "Edit" in the top-right corner.
Copy Your Test into an Editor
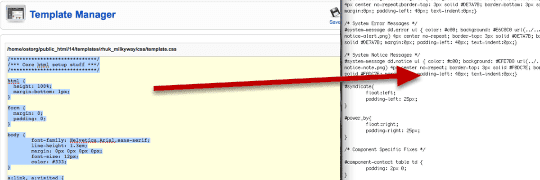
I'm using Notepad in this example, but any text editor will do. If you have a code editor with line numbers, even better!
Backup, backup, backup, backup, backup, backup!!!
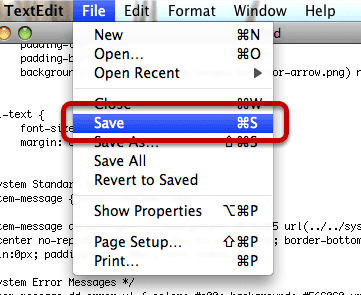
If you're doing this for the first time, you will make mistakes. Backup your file so that you can roll back those mistakes when they happen.
Find Your Code to Change
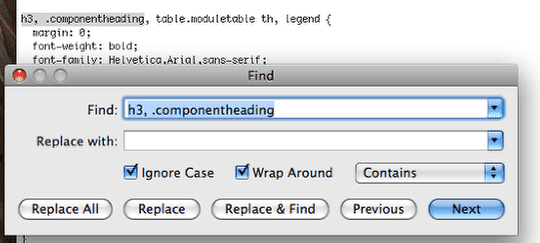
Search for the code that you find earlier in the tutorial.
Change the Code
Especially when you're getting started, this may involve some trial and error. In this example, I'm going to increase the font-size from 1.5 to 1.7.
Paste Back into Your Joomla Site
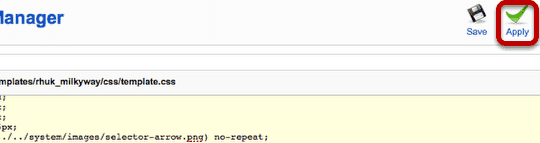
Paste the code back into your Template Manager and click "Apply".
Check the Change
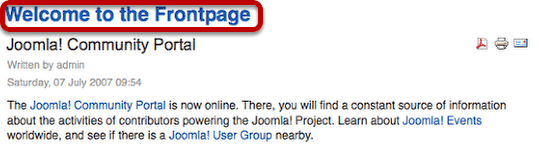
Great - in this case the change worked and text is larger. If you the change isn't just what you want, you'll need to go back a few steps to "Change the Code" and try again.
Some Notes
1) This is a process of trial-and-error. Don't expect to get it right first time, ever time.
2) Make one change then check. Make one change then check. If you do that, it's easy to spot a mistake. However, if you make wholesale changes before checking, it will be very difficult to find where you went wrong.
3) If you want to move faster, get an FTP Editor that will allow you to edit this files more quickly and accurately. That however, is for another tutorial :)
Change Joomla htaccess.txt file to .htaccess with CPanel
- Written by Steve Burge Steve Burge
- Published: 24 April 2010 24 April 2010
Changing your htaccess.txt file to .htaccess is important in Joomla because it allows you to enable Search Engine Friendly URLs. It's also an important step to help keep your site safe. Here's how to do it.
Login into your CPanel
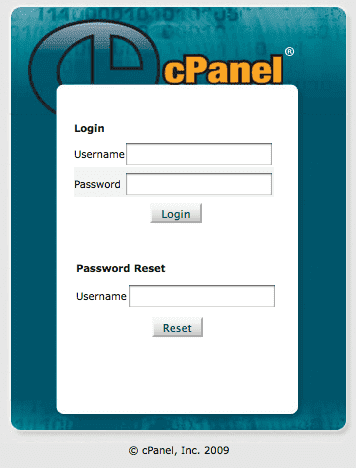
Often you can access your CPanel just by adding /cpanel to your domain name ... example.com/cpanel
Access the File Manager
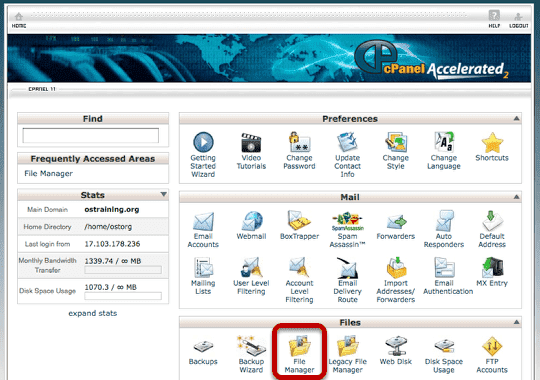
Although your screen may not look 100% identical to the one above, every version of Cpanel does come with a "File Manger" option somewhere.
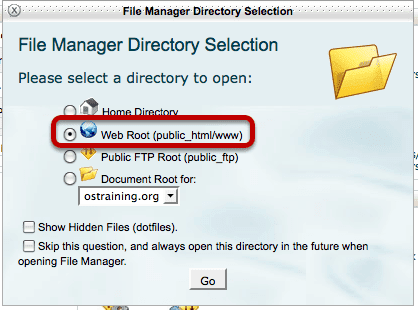
Choose to Go to the Webroot
Find htaccess.txt
Your files and folders will be listed alphabetically. Scroll down until you find htaccess.txt
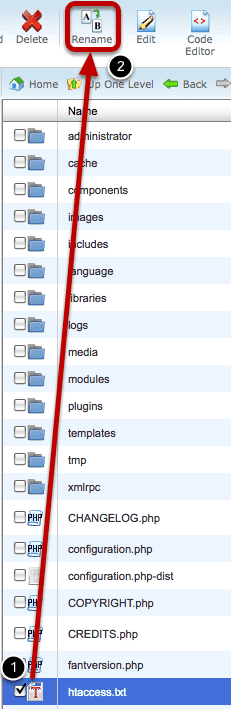
Check the box next to htaccess.txt and click "Rename" at the top of the page.
Change the file name to .htaccess

Enter .htaccess as the new file name and click "Rename File"
Showing a Google Calendar Inside Joomla
- Written by Ed Andrea Ed Andrea
- Published: 23 April 2010 23 April 2010
This tutorial will show you how to display a Google Calendar inside your Joomla website.
Go to Your Google Calendar
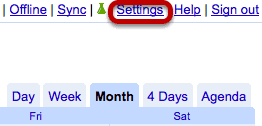
Go https://www.google.com/calendar, login and and click "Settings" in the top-right corner.
Find the Calendar ID
Click on "Calendars" and then click on the name of your calendar. Scroll down to "Calendar Address" and copy the "Calendar ID" to your notepad. It will have a long string of characters and then @group.calendar.google.com
Make the Calendar Public
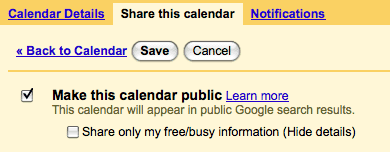
Click "Share This Calendar", check the box next to "Make this calendar public" and click "Save".
Download the GCalendar Component
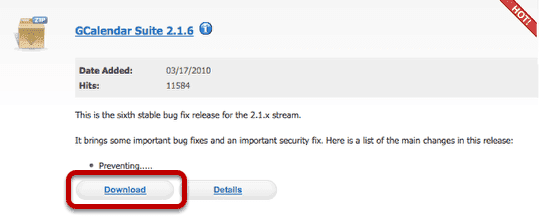
Now that you have your Google Calendar set up correctly, we're going to install the necessary Joomla component. Visit https://g4j.laoneo.net to download the GCalendar component
Extract the GCalendar Folder
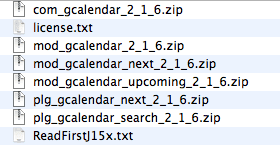
Click on the GCalendar folder and extract it so you can see the various extensions inside.
Install GCalendar
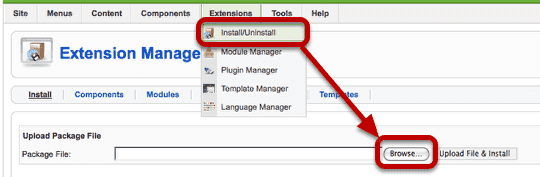
Go to Extensions >> Install/Uninstall and click "Browse" to upload com_gcalendar
Go to the GCalendar Component
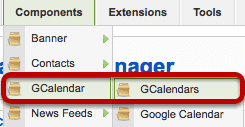
Go to Components >> GCalendar >> GCalendars
Creating a New Calendar
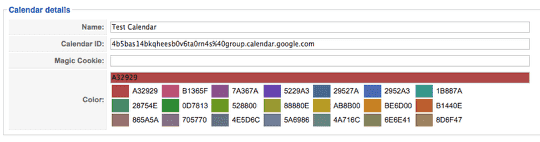
Click "New" in the top-right corner. You'll see three fields. You only need to give the calendar a title and enter the "Calendar ID" you found and saved earlier. Click "Save"
Make a Menu Link to the Calendar

Go to Menus >> Main Menu >> click "New" >> choose "GCalendar"
Choose the Calendar
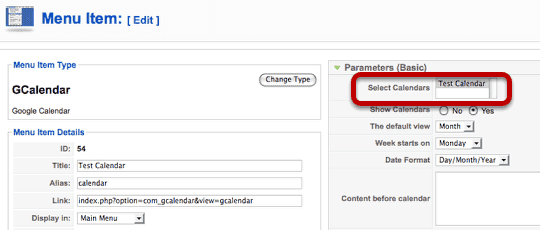
Choose the calendar you created and click "Save".
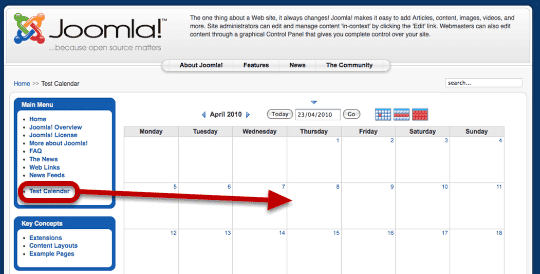
Your Calendar Should Be Ready ...
Using Docman to Handle Documents in Joomla
- Written by Steve Burge Steve Burge
- Published: 23 April 2010 23 April 2010
Docman is perhaps the most popular way to handle documents in Joomla. This tutorial will show you how to use it.
Download Docman

Visit https://www.joomlatools.eu/docman-14.html and download Docman v1.4.0. There is a more modern version of Docman that is commercial. We're using the free version in this tutorial.
Enable the Legacy Plugin
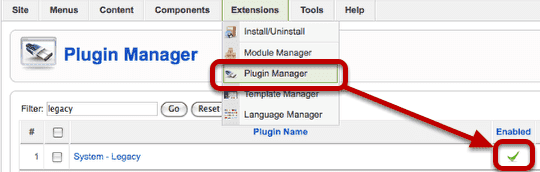
Login to the administrator area of your Joomla site and go to Extensions >> Plugin Manager. Click to enable the "System - Legacy" plugin.
Install Docman

Go to Extensions >> Install/Uninstall and click "Browse" to upload Docman
Add a New Category
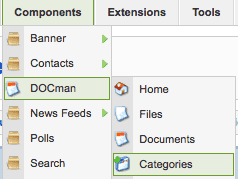
Go to Components >> Docman >> Categories and click "New" in the top-right corner.
Name and Save the Category
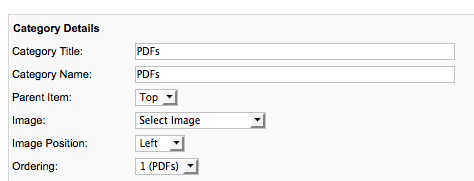
Give your new category a name and click "Save" in the top-right corner.
Start Uploading Documents

Click "Files" and then "Upload" in the top-right corner.
Choose Upload Option
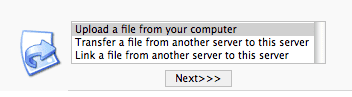
Normally you'll want to keep this option as it is and just click "Next>>>"
Upload Your File
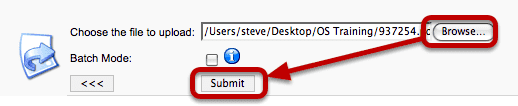
Browse to find your file and then click "Submit"
Choose to Make a New Document
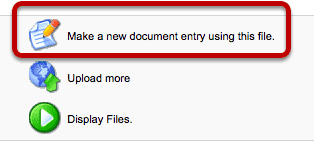
Once you have uploaded your file, the next step is to create a "Document" out of it. That simply means giving it a name, description and other details. Click "Make a new document entry using this file."
Add Details to the Document
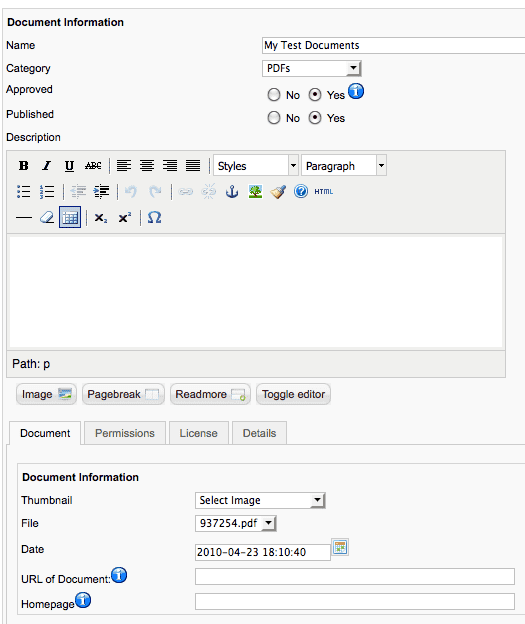
Make sure that both "Approved" and "Published" are set to "Yes". Then click "Save".
Verify that Your Document is Created

Hopefully your new document will appear as above.
Make a Menu Link to Docman

Go to Menus >> Main Menu >> click on "New" >> choose "Docman". Choose a title for your menu link and click "Save".
View Docman On the Front of Your Site
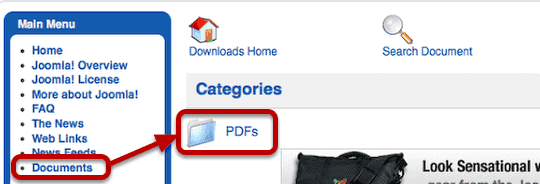
Click "Preview" in the top-right corner and you'll see your new menu link. Click on it and you'll see your Docman category. Open the category to see your file
Extra Feature: Docman Groups
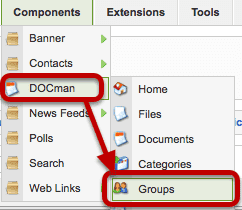
Docman also has a very powerful permissions system that allows you to control who can and cannot access documents. Start by going to Components >> Docman >> Groups
Creating a Docman Group
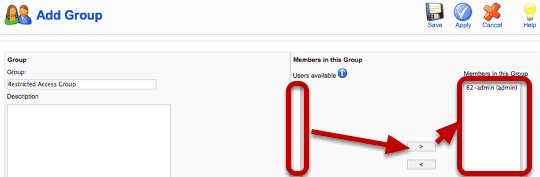
Click "Add" in the top-right corner". You can create a group of users simply by moving them from the "users available" list to the "Members in this Group" list.
Giving Groups Access to a Document

Now when you open up any document you can click "Permissions" and give access only to a certain group of users.
Place an Image Inside a Joomla Module
- Written by Steve Burge Steve Burge
- Published: 22 April 2010 22 April 2010
This lessons will show you how to insert an image into a Joomla module and make it appear to your site visitors.
Go to the Module Manager
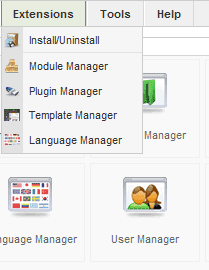
Go to Administrator >> Extensions >> Module Manager
Click to Create a New Module
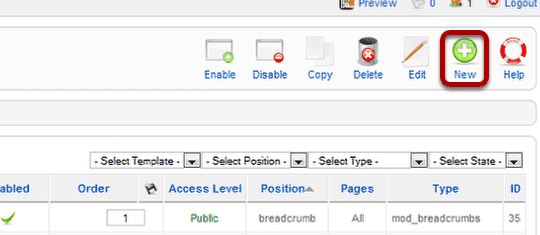
Click "New" in the top-right corner
Choose "Custom HTML"
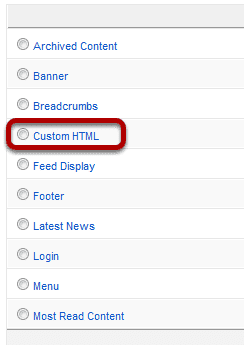
We can choose to create any kind of new module here. We'll choose "Custom HTML".
Find Your Image
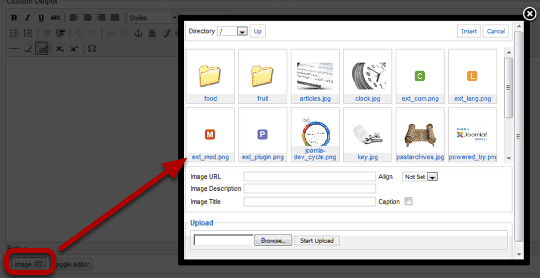
Click the Image button at the bottom of the page. You'll see a pop-up window. Either choose an image from here or click "Browse" and upload your image.
Insert Your Image
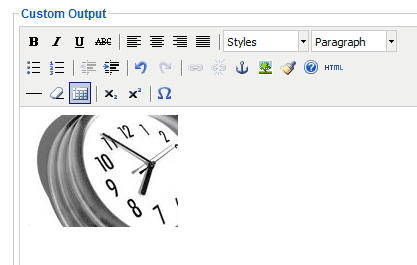
Click "Insert" and your image should be in the text editor.
Configure the Module
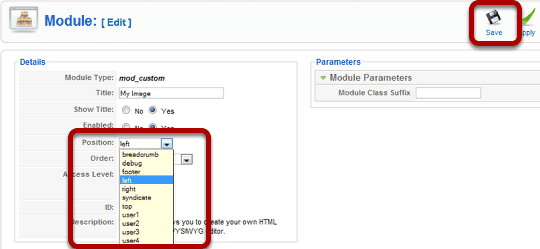
Choose your module position from the dropdown and then click "Save"
See the Image On Your Site
Visit the front of your site and the image should now appear on the page.
Changing the Joomla Homepage to a Different Component
- Written by Steve Burge Steve Burge
- Published: 19 April 2010 19 April 2010
This tutorial will show you how to place a shopping cart, photo gallery, video gallery or any other kind of component on your homepage, instead of the normal list of articles.
Step 1: Finding the Current Homepage
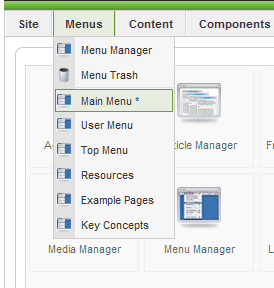
Login to your Joomla site administrator area and hover your mouse over "Menus". Click on whichever menu has the star beside it.
Step 2: Finding the Current Home Link
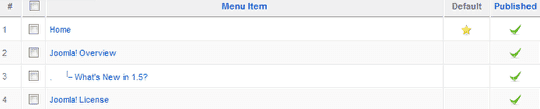
Look for the link that has the yellow star in the default column. That is your current homepage.
Step 3: Changing the Homepage
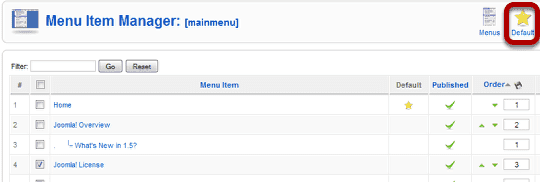
Check the box next to the link that you would like to be the homepage and then click "Default" in the top-right corner.
Step 4: All Done!

"Joomla License" is now your homepage.
Adding Downloadable Products to Virtuemart
- Written by Steve Burge Steve Burge
- Published: 19 April 2010 19 April 2010
This tutorial will show you how to add downloads to your Virtuemart products.
Access Your Virtuemart Configuration
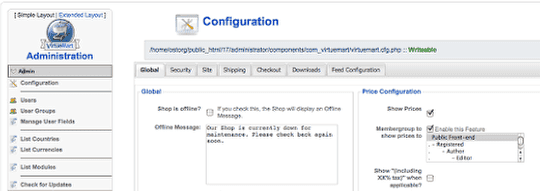
Go to Administrator >> Components >> Virtuemart >> Admin >> Configuration
Access the Downloads Tab
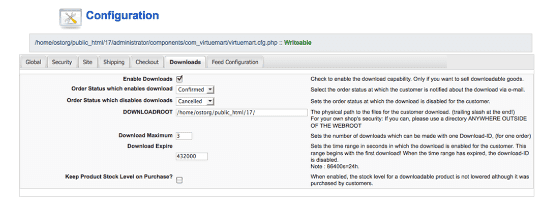
Check the box next to "Enable Downloads" and click "Save.
Open an Existing Product
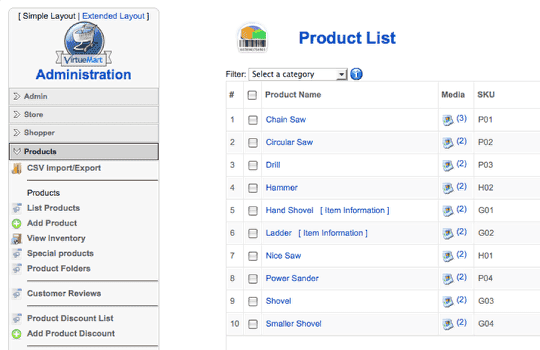
Go to Products >> List Products and click on an existing product.
Have a Virtuemart Product Open
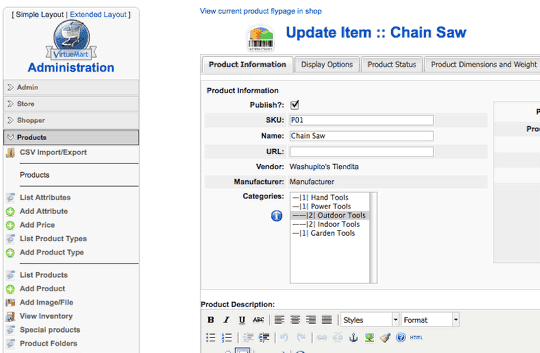
When the product is open, you'll see a new link on the left under Products. This new link will be called "Add Image/File". Click on it.
Upload Your File
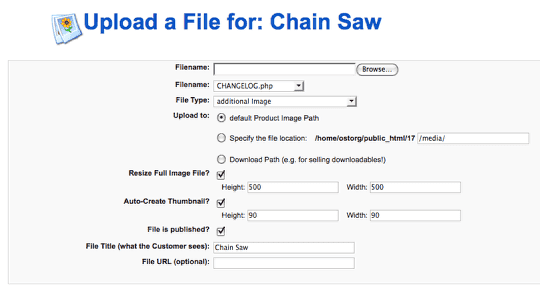
After clicking on "Add Image/File" you'll be taken to a screen like this where you can attach images to your product.
Seeing Existing Files
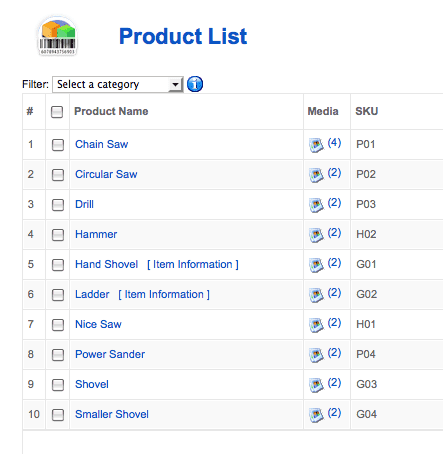
You can always check back and see which files are assigned to which products by going to Products >> List Products and clicking on the "Media" column.
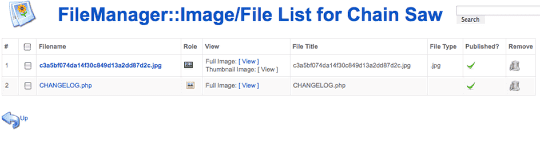
Managing Existing Files
UTF-8 in Joomla
- Written by James Karakaua James Karakaua
- Published: 18 April 2010 18 April 2010
Have you ever browsed to a website only to find that half the content is unreadable? Or that certain characters are being displayed in strange and mysterious ways? Or perhaps you wanted to enter a foreign or unusual character but found that the result was a garbled mess.
The chances are you have been subject to poorly managed character encodings. Joomla! extensions are no exception to these occurrences, but with a little bit of effort and some help from the Joomla! framework, we can avoid these problems with relative ease.
Place Joomla Images and Videos in a Pop-up
- Written by Steve Burge Steve Burge
- Published: 08 April 2010 08 April 2010
 This tutorial was requested by a Joomla training student in our forum. They wanted to make images and videos on their site more interesting by showing them in a pop-up.
Our advice was to try Rokbox from Rockettheme. This extension can place images, videos, audio files, flash files or even entire websites inside a pop-up. This plugin is also available for WordPress.
We're going to show you several ways to use Rokbox on your site:
Installing Rokbox
- Rokbox can be downloaded from the downloads section of Rockettheme.com.
- Download both the "Content" and the "System" plugins. If you're using Joomla 1.5, download the top two files. They will be named:
- Rokbox Content Plugin
- Rokbox System Plugin
- In your Joomla site, go to Administrator >> Extensions >> Install / Uninstall and upload both.
- Go to Administrator >> Extensions >> Plugin Manager and enable both.
Testing Rokbox
The normal way of using Rokbox will only work inside articles. Try using this simple example as a test:
{rokbox}images/save.png{/rokbox}
That should place Joomla's save button inside a pop-up for you and also generate a thumbnail for you to click on.
If that doesn't work, you may have a problem with generating thumbnails automatically. You can then try one of these two options:
- Use a text link: {rokbox title=|click here|}images/save.png{/rokbox}
- Use your own image: {rokbox thumb=images/save.png}images/save.png{/rokbox}
Using Rokbox in Articles
There are lots of examples on the Rockettheme demo site: Rocketwerx.com. These are very simple examples to get you started:
- Remote images: {rokbox}https://www.ostraining.com/logo.png{/rokbox}
- Audio files: {rokbox}images/audio/example.mp3{/rokbox}
- Flash files: {rokbox}images/flash/example.swf{/rokbox}
- Youtube videos: {rokbox}https://www.youtube.com/watch?v=4BY40QvWQKE{/rokbox}
- Another website: {rokbox}https://www.google.com{/rokbox}
Using Rokbox Outside of Articles
You can use Rokbox in your other extensions. The only thing you need to do is modify your links so that they contain rel="rokbox".
For example < a href="https://google.com" > becomes < a href="https://google.com" rel="rokbox" > (I've added a space after each < and before each > so you can see the code)
We've used this technique inside many different extensions.
Configuring Rokbox
There are three places where you can configure options for Rokbox:
1) Inside Extensions >> Plugin Manager >> Content - RokBox
Here you can change the settings for the thumbnails that Rokbox generates automatically:

2) Inside Extensions >> Plugin Manager >> System - RokBox
Here you can select from several different themes for Rokbox. The default is "Light" which provides a white background, but there are others:

If you enable "Legacy Parameters", you'll also get a much wider range of options. Full documentation on those is available on the Rocketwerx site.
3) For Individual Pop-Ups
We saw some examples earlier. Here are some ways you can modify individual pop-ups:
- Set files sizes: {rokbox size=|400 100|} ... this will show an image, flash or video file as 400px wide and 100 high.
- Set website sizes: {rokbox size=|65% 80%|} ... this will show a website as 65% of it's normal width and 80% of it's height.
- Custom thumbnail: {rokbox thumb=|images/example.jpg|} ... so you don't have to use the one automatically generated by Rokbox.
- Custom title: {rokbox title=|This is a cool image|} ... this is what people will click on to see the pop-up, or if there's a thumbnail, this is what they will see if they hover their mouse over the thumbnail.
Slicing up the Status Quo of Joomla Extension Design
- Written by TJ Baker TJ Baker
- Published: 05 April 2010 05 April 2010
 One of the greatest things about Joomla is it's extendability. If you need a forum, a shop solution, a module to display weather, etc., you can bet there's probably a solution available. With over 4,600 extensions listed in the Joomla Extensions Directory at the time of this writing, Joomla users are presented with a myriad of options to extend the base functionality of their Joomla powered site.
While having such choice is an awesome thing for the Joomla end user or site developer, it can at times present some 'formatting' issues. Often times the end user might find themselves out of luck, going back and forth between a template provider and extension developer for support, with each pointing the finger at the other as the cause of a formatting issue.
Perhaps it's time to start slicing up the status quo and approach extension 'design' from a new direction.
Read more: Slicing up the Status Quo of Joomla Extension Design