The Joomlashack Blog
Creating a New Joomla Offline Page
- Written by Steve Burge Steve Burge
- Published: 24 July 2010 24 July 2010
This is Part 3 of a series of tutorials on Joomla's offline page:
- Part 1 (Beginner): Take your Joomla site offline
- Part 2 (Intermediate): Customize your Joomla offline page
- Part 3 (Advanced): Create a new Joomla offline page
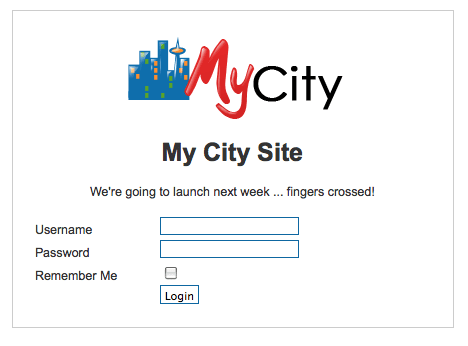
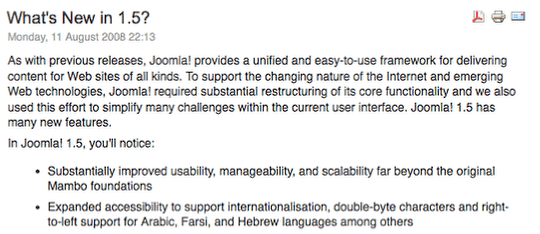
Joomla allows a site to be taken offline with a setting in the Administrator Global Configuration panel. When this happens, frontend access is no longer permitted and a special offline page is displayed.
How is the Offline Page Created?
By default, the offline page is created from the System Template. You'll find a file called offline.php in the /templates/system/ folder. The file itself is fairly straight-forward and can be divided into five parts:
Part 1. This single line provides error messages, for example if you try to login but enter the wrong information:
<jdoc:include type="message" />Part 2. This places a Joomla logo on the page:
<div id="frame" class="outline">

<img src="/joomla_logo_black.jpg" alt="Joomla! Logo" align="middle" />
Part 3. This places your site name on the page:
<h1>
 <?php echo $mainframe->getCfg('sitename'); ?>
 </h1>
Part 4. This places an offline message on the page:
<p>

<?php echo $mainframe->getCfg('offline_message'); ?>
 </p>
Part 5. This final and longest part of the code places a login box. This code runs from:
<?php if(JPluginHelper::isEnabled('authentication', 'openid')) : ?>
<?php echo JHTML::_( 'form.token' ); ?>
Creating Your Own Joomla Offline Page
You could of course just edit the default offline.php but you'd lose any changes as soon you upgraded your Joomla site. The best way to do this is to create a file called offline.php in your template folder. Copy the following files:
- /templates/system/offline.php
- /templates/system/css/offline.css
- /templates/system/css/offline_rtl.css
and add those file to:
- /templates/your_template/offline.php
- /templates/your_template/css/offline.css
- /templates/your_template/css/offline_rtl.css
This will give you a platform to safely customize the files.
An Introduction to MVC for Joomla Templates
- Written by Steve Burge Steve Burge
- Published: 23 July 2010 23 July 2010
MVC can be a scary acronym for the uninitiated. It stands for Model-View-Controller and the concepts behind MVC are responsible for the extra flexibility that is now afforded to the designer. While parts of the theory can be rather involved and complicated, the only part that the designer need worry about is the V for View. This is the part that is concerned with output.
Different extensions display output in different ways.
Components
Components are fairly complex and have the ability to display different information in different ways. For example, the Articles Component (com_content) is able to display a single article, or articles in a category, or categories in a section. Each of the ways of representing the different types of data (an article, or a category, or a section) is called a view (this comes from our MVC terminology). Most components will have many views. However, the view doesn't actually display the output. This is left up to what we call a layout and it is possible for a view to have a variety of layouts.
The main thing to remember here is that components can have multiple views, and each view can have one or more layouts. Each view assembles a fixed set of information, but each layout can display that information in different ways. For example, the Category view in the Articles component assembles a number of articles. These articles could be displayed in a list or in a table (and probably other ways as well). So this view may have a list layout and a table layout to choose from.
Modules
Modules, on the other hand, are very simple. They generally display one thing one way. Modules don't really have views but they do support a layout. Some developers might even support a choice of layouts through module parameters.
Template versus Layout
It is very important to distinguish between the role of template and the role of layouts. The template sets up a structural framework for the page of the Web site. Within this framework are positions for modules and a component to display. What actually gets displayed is governed by the module layout, or the combination of view and layout in the case of the component.
The following image shows the structural layout of a typical Joomla! template (rhuk_milkyway, the default for 1.5). The module positions are displayed by adding tp=1 to the URL (eg, index.php?tp=1). You can clearly see where the module output is contained within the overall template, as well as the main component output starting in the lower-centre region. However, what is actually output in those regions, is controlled by the layouts.

Ancillary Customisation
While not strictly related to the MVC, there are two other important areas to consider when looking at customising the output of Joomla!.
In addition to layouts, modules have what we call chrome. Chrome is the style with which a module is to display. Most developers, designers and probably some end-users will be familiar with the different built-in styles for modules (raw, xhtml, etc). It is also possible to define your own chrome styles for modules depending on the designer result. For example, you could design a chrome to display all the modules in a particular position in a fancy javascript collapsing blind arrangement.
In the screenshot above, you can just make out the names of some of the built-in module chrome used (rounded, none and xhtml).
The second area has to do with controlling the pagination controls when viewing lists of data.
Creating Tables Inside Joomla Articles
- Written by Steve Burge Steve Burge
- Published: 16 July 2010 16 July 2010
This tutorial will show you how to create tables inside Joomla articles. Because the default Joomla editor doesn't have a table-creation feature, we're going to recommend that you upgrade to Joomla Content Editor. Instructions on how to install it are here.
Getting Started
Open an article and put your cursor in the article where you'd like the table to be.
Insert a New Table
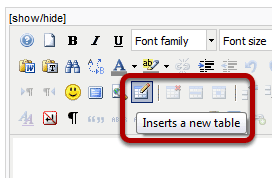
Click your mouse on the "Inserts a new table" button in the third row of your JCE Editor.
Choosing the Table Options
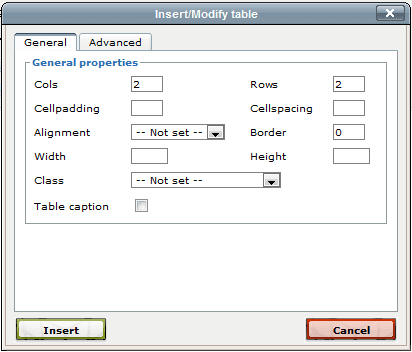
You'll see a pop-up looking like this. The first thing to do is choose the number of columns and row for your article. Cellpadding is the amount of space INSIDE each cell. Cellspacing is the amount of space BETWEEN each cell. Border will set a line around the outside of the whole table. Width and height allow you set fixed dimensions for the table, otherwise the table will adjust to fit the content inside. When you're done, click insert.
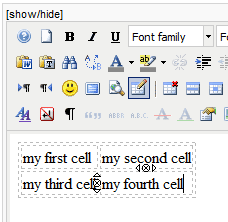
Writing Inside the Table
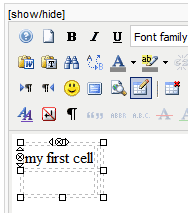
Click your mouse inside the table cells and start typing .... you should end up being able to fill in all the cells you need:
Modifying Your Table
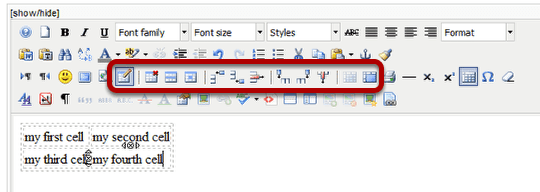
You'll notice that when your table is selected, many new buttons along the 3rd row will light up. These are extra options for modifying our table. From left to right they are:
- delete table
- table row properties
- table cell properties
- insert row before
- insert row after
- delete row
- insert column before
- insert column after
- delete column
- split merged table cells
- merge table cells
Adding a Custom HTML Module in Joomla
- Written by Steve Burge Steve Burge
- Published: 12 July 2010 12 July 2010
Custom HTML modules are a very useful feature in Joomla. You can insert any code you like from articles to photos to code. Here's a video explaining how it's done:
- Login to your Adminstrator area.
- Go to Extensions >> Module Manager.
- Click on the "New" button.
- Select "Custom HTML".
- Enter your code and click "Save".
Video on Adding a Custom HTML Module in Joomla
Joomla Article Layout Options From the Menu
- Written by Steve Burge Steve Burge
- Published: 02 July 2010 02 July 2010
This tutorial came from a question in our support forum: "How do I know what the menu links to articles look like?" That's a good question. If you make a new menu link and choose "Articles", you're faced with 8 different types of layout. These are the 8 you'll see:
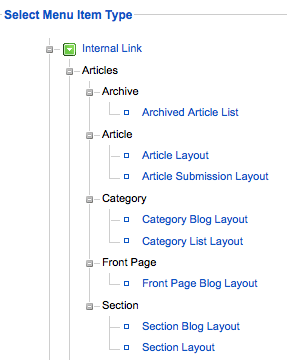
So what do they all do? Read on ...
Archived Article List

Joomla's archive system is not very sophisticated. If you choose "Archived Article List" you'll be take a search form like this. All articles that have been archived can be found here.
Article Layout
Article Layout is a fairly simple option: it links to the full text of one single article.
Article Submission Layout
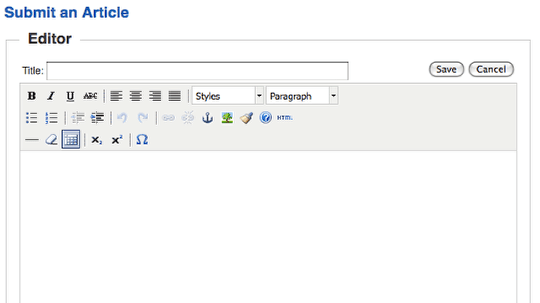
Article Submission Layout allows anyone who is at the "author" level and above to submit articles.
Category Blog Layout
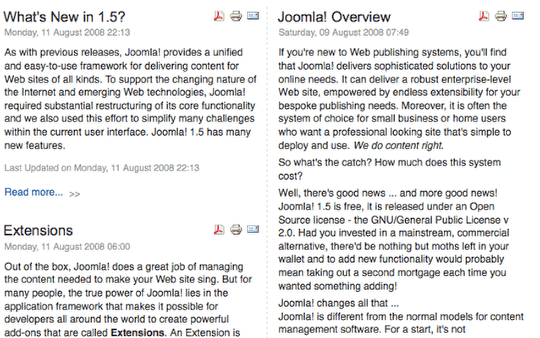
Category Blog Layout shows all the articles in one category. It shows them in a blog layout which means that you can use the "Read More" link to split the articles and show only teaser text.
Category List Layout
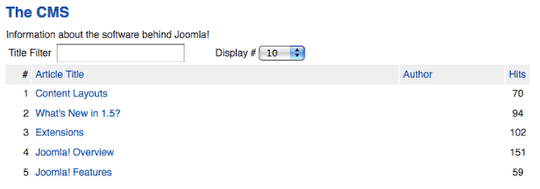
Notice that the articles in this Category List Layout are identical to those in Category Blog Layout above. The important difference is that they're shown in a list and people have to click on the article titles to read the text.
Front Page Blog Layout
This is very, very similar to Section Blog Layout and Category Blog Layout. Really the only difference is that the articles come from Content >> Frontpage Manager rather than from just one section or category.
Section Blog Layout
Section Blog Layout shows all the articles in one category. It shows them in a blog layout which means that you can use the "Read More" link to split the articles and show only teaser text.
Section Layout

Section Layout shows all of the categories in one section. Click on the category name and you'll be taken to a Category Blog Layout page (see above).
What is the Joomla Itemid?
- Written by Steve Burge Steve Burge
- Published: 01 July 2010 01 July 2010
One of the most frequently asked questions on the Joomla forums is "What is the Itemid and what does it do?". I thought a quick tutorial would be useful because it's important for displaying both modules and templates:
If you have a brand-new Joomla installation that will be a big help in following along
Brand-New Joomla Site

If you have a brand new Joomla site installed, browse around and look at the URLs. For example, click on "Joomla Overview".
Joomla Overview URL
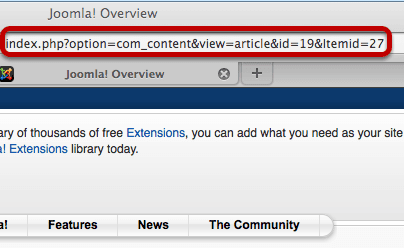
You'll notice the URL ends with Itemid=27. Try clicking on the next link down under "Main Menu". It should be called "Joomla License".
Joomla License URL
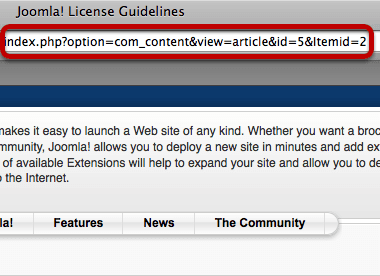
This time you'll notice the URL ends in Itemid=27. Try this on other pages and you'll see that each page is going to have a different Itemid at the end. The one you might be able to the see is the frontpage - the Itemd for that is always 1.
Where Else Can You See Itemids
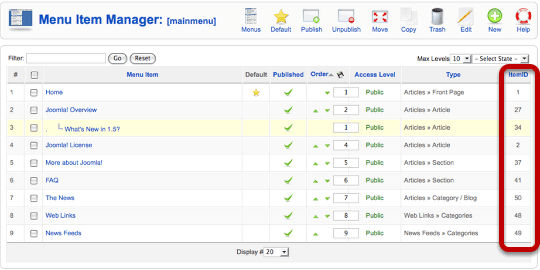
Inside each menu there will be a column on the right-hand side listing Itemids
So What Do Itemids Do?
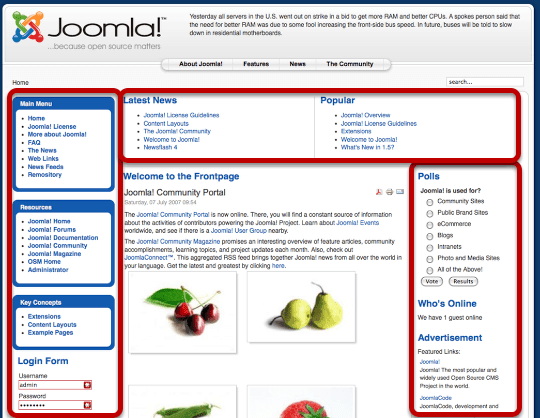
So we come to the key question .... notice on the frontpage, with an Itemid of 1, that there are lots of modules on the left, top and right. Now click on "Joomla License" which has an Itemid of 2:
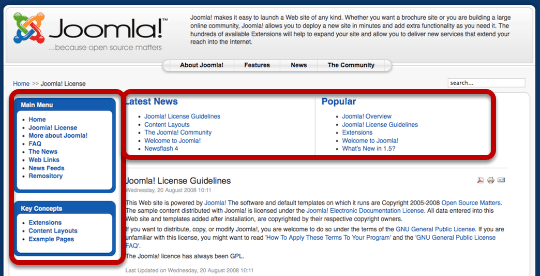
Lots of those modules have vanished. However, let's just change the Itemid from 2 to 1:

And after doing that you'll see that all the frontpage modules have re-appeared. The Itemid controls which modules (and which templates) appear on a particular page:
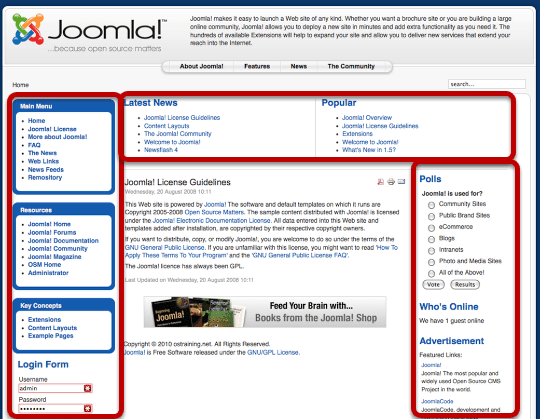
Try going around the rest of your site and changing the Itemids on the URLs. See how the modules shift around. This is how Joomla controls which modules and templates appear on some pages but not others. If you have a problem with the modules appearing or not appearing where they should, it's very likely to be an Itemid issue.
Conditional Statements in Joomla Templates
- Written by Steve Burge Steve Burge
- Published: 28 June 2010 28 June 2010
When you're building a Joomla template you'll often need to make the design flexible. That means that areas of the site can be shown or hidden on different pages. The solution is to use conditional statements and this tutorial will introduce you to what they are and how they're used:
This tutorial is part of our full Joomla Template Class available to all members. Click here to find out more.
Session Notes for This Tutorial
Here is the code we used in this tutorial:Index.php Code
Template.css Code
 #wrapper { width: 900px; text-align: left;	/*margin: 0 auto; padding: 0px; */}

img {border: none;}
The 5 Building Blocks of Every Joomla Template
- Written by Steve Burge Steve Burge
- Published: 24 June 2010 24 June 2010

Joomla templates are not rocket science. You can learn how to build and modify them. We can show you how. Interested? Read on ...
In order to get started, you'll need to understand the 5 essential building blocks of every Joomla template. In the 5 tutorials below we guide you through them all:
- Part 1: Template setup and templateDetails.xml
- Part 2: Index.php
- Part 3: CSS / Cascading Style Sheets
- Part 4: Images
- Part 5: Security
These tutorials are part of our full Joomla Template Class available to all members. Click here to find out more.
Part 1: Template Setup and templateDetails.xml
Part 2: index.php
Part 3: CSS - Cascading Style Sheets
Part 4: Images
Part 5: Security
We need to make sure that our template is secure and not easily hacked.
There are two essentials steps we need to make that happen:
- Add this line to the very, very top of index.php. This means that only Joomla can run commands on the file – no outside scripts:
- Add a blank file called index.html to each folder. That means the main /test/ folder, plus /css/ and /images/. Why? To hide your folder contents. Without an index.html, anyone could see and browse all your files.
These tutorials you've just seen are part of our full Joomla Template Class available to all members. Click here to take your Joomla template skills to the next level.
Joomlashack University Deal: 1 month for $42; or just $35 when you buy a template
- Written by Shawn Fields Shawn Fields
- Published: 22 June 2010 22 June 2010
We've got a great deal for you this week at JoomlaShack University:
Buy a 1 month subscription for only $42, or, get it for $35 when you also buy a Joomlashack professional template at the same time.
Joomlashack University is your #1 online source for Joomla training and it's simply the fastest, easiest way to learn how to build successful Joomla websites. Period. All the tips, tricks & techniques of Joomla website development--from beginner to advanced concepts--are taught at Joomlashack University by top Joomla experts.
And now, for a limited time, you can save almost 40% and get instant access to a growing library of Joomlashack University lessons, like "An in-depth tour of Joomla 1.6", "Customizing Joomla templates", "learning K2", "mastering Jomsocial" and much more. New lessons are added every few weeks!
Joining JoomlaShack University has never been easier. But please hurry! This special introductory offer of 1-month for $42 ($35 with the purchase of a pro template) won't last forever, so check out all the details and learn more here.
Avoid Pasting Word Articles Into Joomla
- Written by Steve Burge Steve Burge
- Published: 15 June 2010 15 June 2010
Word produces horrible code that makes a mess of almost every web page. I'd definitely recommend that you avoid pasting Word documents directly into Joomla articles. Here's an explanation:
Creating a Web Page with Word
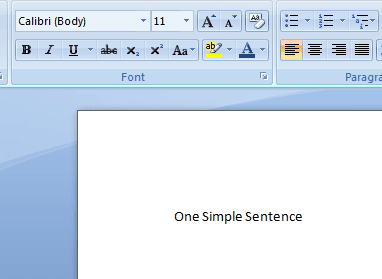
Using Word, write just one line. In this example I've written "One Simple Sentence".
Save as a Web Page
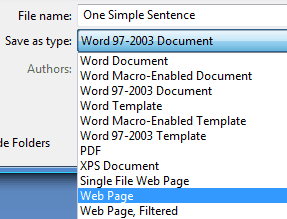
Go to File >> Save As and choose to save the file as a "Web Page".
Open the Web Page in Your Browser
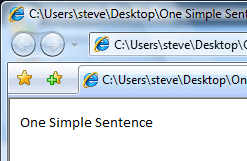
I've double-clicked on the file I saved and it's open in my web browser.
View the Source Code
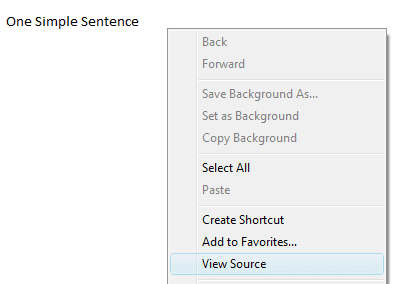
Right-click on the screen and click on "View Source"
Browse Through the Code
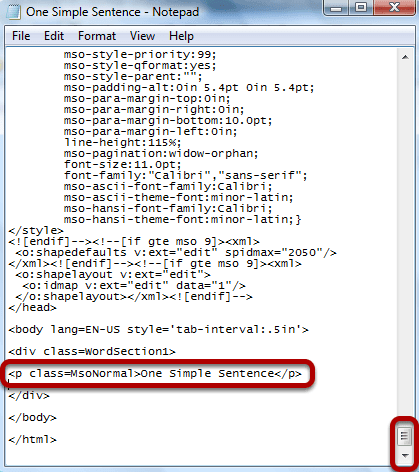
Scroll and scroll and scroll and scroll. Finally at the very bottom of the page you'll find the code that puts "One Simple Sentence" on the page. Everything else is junk. Our recommendation is to cut-and-paste your Word document into Notepad or Wordpad first and then into Joomla. There are lots of other alternatives, but please avoid pasting directly from Word into Joomla. You'll avoid having pages and pages of extra code to struggle with.