Step 4: Joomlafy
The next step is to "Joomlafy" our 'index.php' and 'template_css.css' files. Here is the XHTML markup, Joomlafied:
XHTML Markup
Now that we have our "Joomlafied" XHTML markup, let's take a look at what's different. In the header, I have added the following code:
"defined( '_VALID_MOS' )..."
The first line, "defined( '_VALID_MOS')...", prevents direct access to the 'index.php' file.
mosShowHead
Another important part to note is the line that says "mosShowHead". I have used this in place of my "title" and "meta" tags because Joomla! uses this function to automatically show the site's title along with important meta tags.
initEditor
The third part I would like to point out is "initEditor". This function initializes the WYSIWYG editor for the front end of your site. It is inside a conditional statement that tests whether or not the user is logged in. The conditional statement improves load time for users who are not logged in, because it prevents Joomla! from executing the initEditor function when it is not necessary.
echo $mosConfig_live_site
You should also note that the link element has been changed to use an absolute href for the template's CSS file. Using $mosConfig_live_site along with the path to the template (templates/redspheres...), your template now knows exactly where its corresponding CSS file is.
Now let's take a look at what else we've added to "Joomlafy" our 'index.php' file.
Left Module Position
The following code is used to 1) determine whether or not there are modules published to the "left" module position, and 2) load those modules in the "left" module position with a style of -2. (see "mosLoadModules - An Explanation")
Main Body
The following code is used to load the Main Body of your Joomla! template. This is where all content items and components are loaded for your Joomla! site.
CSS Code
* {
  margin: 0;
  padding: 0;
}
body {
  background-color: #fff;
  color: #666;
  font-family: Arial, Helvetica, sans-serif;
  font-size: 12px;
}
a, a:link, a:visited {
  color: #900;
  text-decoration: none;
}
a:hover {
  text-decoration: underline;
  color: #000;
}
h1#sitetitle {
  padding: 100px 0 0;
  background: #fff url('../images/logo.png') center top no-repeat;
  font-size: 20px;
  font-weight: bold;
  text-align: center;
  color: #000;
}
h1#sitetitle a, h1#sitetitle a:link, h1#sitetitle a:visited {
  text-decoration: none;
  color: #000;
}
h1#sitetitle a:hover {
  text-decoration: none;
  color: #000;
}
h2#siteslogan {
  font-size: 14px;
  font-weight: bold;
  margin: 0 0 10px;
  text-align: center;
  color: #000;
}
#sidebar {
  width: 215px;
  margin: 10px 0 10px 10px;
  float: left;
  color: #000;
}
#mainbar {
  margin: 10px 10px 10px 235px;
}
/* Joomla Elements */
/* Moduletable DIV's */
#sidebar .moduletable {
  margin: 10px 0;
}
#sidebar .moduletable h3 {
  border-bottom: 1px solid #ccc;
  font-size: 18px;
  font-weight: bold;
  margin: 0 0 10px;
  padding: 0 0 0 5px;
}
/* Main Menu */
ul {
  padding: 0 0 0 5px;
}
li {
  list-style-type: none;
  padding: 3px 0 3px 18px;
  background: #fff url('../images/bullet.gif') 0 5px no-repeat;
}
ul#mainlevel a, ul#mainlevel a:link, ul#mainlevel a:visited {
  text-decoration: none;
  color: #900;
}
ul#mainlevel a:hover {
  text-decoration: underline;
  color: #000;
}
/* Login Form */
#mod_login_username {
  width: 205px;
  margin: 0 5px 5px;
  border: 1px solid #ccc;
}
#mod_login_password {
  width: 205px;
  margin: 0 5px 5px;
  border: 1px solid #ccc;
}
#mod_login_remember {
  margin: 0 0 0 5px;
}
input.button {
  border: 1px solid #ccc;
  background-color: #eee;
  color: #666;
  padding: 3px;
  margin: 5px;
  font-size: 10px;
}
label {
  margin: 0 0 0 5px;
}
/* Search Form */
#mod_search_searchword {
  width: 205px;
  margin: 0 5px 5px;
  border: 1px solid #ccc;
}
/* Main Content Area */
.componentheading {
  display: block;
  font-size: 20px;
  color: #666;
  font-weight: bold;
  border-bottom: 1px solid #ccc;
  margin: 0 0 10px;
}
.contentheading {
  font-size: 20px;
  color: #900;
  font-weight: bold;
  margin: 0 0 2px;
}
.small, .createdate, .modifydate {
  font-size: 10px;
  font-weight: normal;
}
a.readon {
  display: block;
  padding: 3px 0 3px 18px;
  background: #fff url('../images/bullet.gif') left center no-repeat;
  margin: 5px 0 0;
}
.article_seperator {
  display: block;
  height: 10px;
}
We also Joomlafied our CSS code. Everything below "Joomla Elements" was added to the CSS for Joomla!-specific elements. I will not take time to discuss the Joomla!-specific CSS elements, but rather I will just give you a link to "A Blank Template CSS file for Joomla" from CompassDesign.
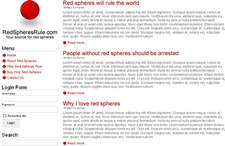
Step 5: Create a Thumbnail
This step is not entirely necessary. Your template will load and run properly with or without a thumbnail. This just gives you a quick look at the template from the template manager.
The dimensions of a thumbnail do not have to meet specific requirements, but they should be around 225 pixels wide by 150 pixels high. Give your thumbnail the name 'template_thumbnail.png'.
Here is my thumbnail:
Step 6: Create "templateDetails.xml"
The next step is to create the 'templateDetails.xml' file. Here is the XML markup that goes into this file for our template:
	redspheres
	09/26/2006
	Cory Webb
	Copyright 2006 - Cory Webb, Released under GNU/GPL
	your email here
	www.howtojoomla.net
	1.0
	RedSpheres is a sample Joomla! template for the purpose of instruction. I hope we all learn something.

		index.html
		index.php
		template_thumbnail.png
		templateDetails.xml
		css/index.html
		css/template_css.css
		images/index.html
		images/logo.png
		images/bullet.gif
It is important that every file in your installation package has a corresponding filename tag in the 'templateDetails.xml' file.
Step 7: Zip It
All of your template files should be in a folder that is named with your template name. Use a file compression application, like WinZip, to create a ZIP file with your template files. This ZIP file is your installation file.
Step 8: Install It
In your template manager, install your new template, and set it as your default template.
Step 9: Modify It
Nobody's perfect. We all make mistakes. For that reason, you should be prepared to check your template for errors, browser compatability, and overall quality. Using the Joomla! template manager, you can modify your template 'index.php' and 'template_css.css' files right from the browser. You can make changes, save them, and immediately see the result by previewing your site.