In some use cases, you may want to customize the styling of emails sent by your Shack Form. You can achieve this by creating in for Shack Forms your own HTML email templates.
This is a two-step process:
- Create an HTML email template for your Shack Form.
- Set this new template in your Shack Form settings.
Step #1. Create an HTML email template for your Shack Form
The technique to achieve this step is called a "Joomla templates override".
- In your Joomla control panel, go to Extensions > Templates > Templates:
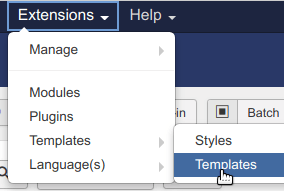
- You will now see the "Templates: Templates (Site)" screen.
- click the "Details and Files" link for your template. In this tutorial, I clicked on "Js_elan Details and Files":
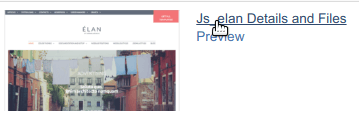
- You will be taken to the "Templates: Customise" page.
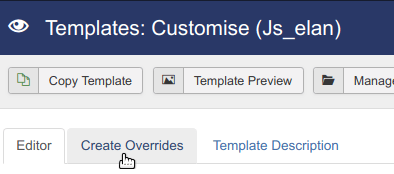
- Click the "Create Overrides" tab:
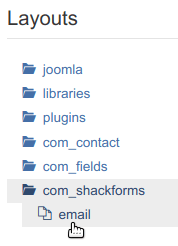
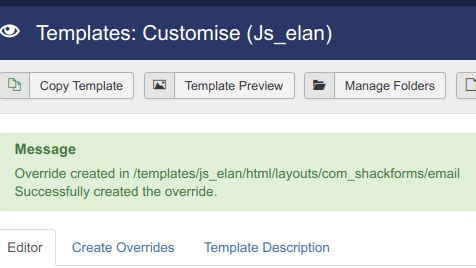
- Under the "Layouts" column, click "com_shackforms", then click "email":
- You will see the "Successfully created the override" message. This message shows the location of your new file. If you want to, you could also create this override manually by placing your override in this folder.
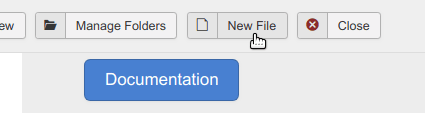
- At the top of the page, click "New File":
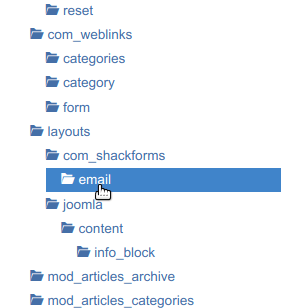
- You will see the "Create or Upload a new file" box. Go to html > layouts > com_shackforms > email:
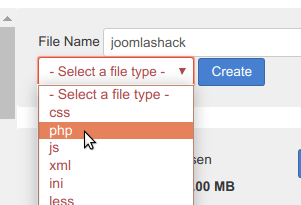
- Enter a file name into the "File Name" box. As you can see on the screenshot below, for my tutorial, I called my file "joomlashack".
- Select .php from the drop-down select list of file types.
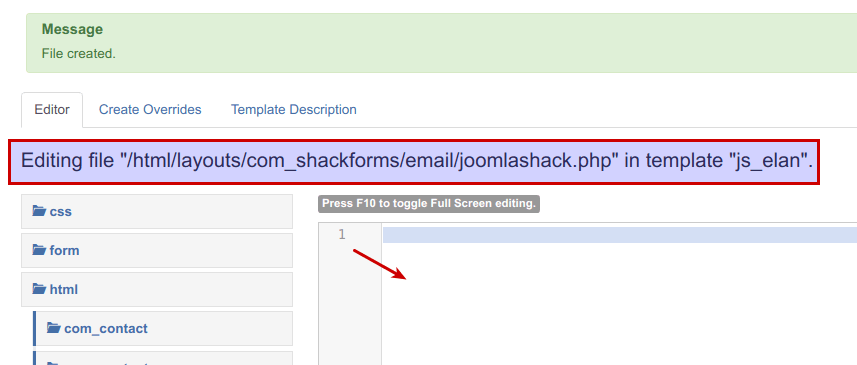
- Click "Create":
- You will see the "File created" message. There will also be the /html/layouts/com_shackforms/email/<your_html_template_file_name>.php path to the newly created file of your HTML email template:
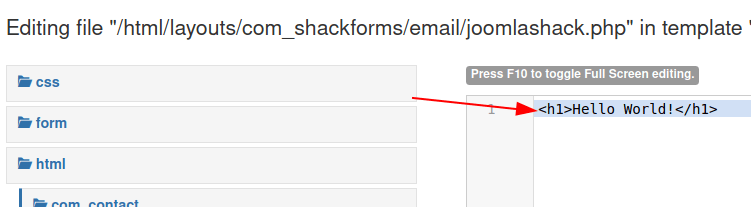
- Open your HTML email template in a code or text editor, such as Notepad. Copy the template's code.
- Go back to the "Template: Customize" screen. Paste your HTML email template code into the code area. For my example, I added just "Hello World!" between the <h1> HTML tags, as you can see on the next image. But you can be as creative here as you see fit:
- Once you finished creating your Shack Forms email HTML template, click "Save & Close".
Good job! You can now start selecting this email HTML template for your Shack Form email notifications.
Let's take a look at how to do that.
Step #2. Select your newly created HTML email template in Shack Forms settings
You can use your newly created HTML email template for the following three types of notifications:
- For notifications sent to administrators.
- For notifications sent to user
- For notifications sent as auto-replies
Note: a Shack Form administrator is either:
- The one your set in Joomla's System > Global Configuration > Server > "From email" or
- The one you set in your Shack Form module > tab Email > parameter "Email to" or
- The one you set in your Shack Form module > tab Email > parameter "Mail to list".
If in your Shack Forms module you entered an email address in the "Email to" or/and "Mail to list" fields, then Shack Form won't send notifications to the email address set in Joomla's Global Configuration.
Here is how to use your newly created Shack Form HTML email template for notifications sent to administrators:
- Under the "Email Template" tab, go to the "Emails Sent to Admins" setting and click "Administrator":
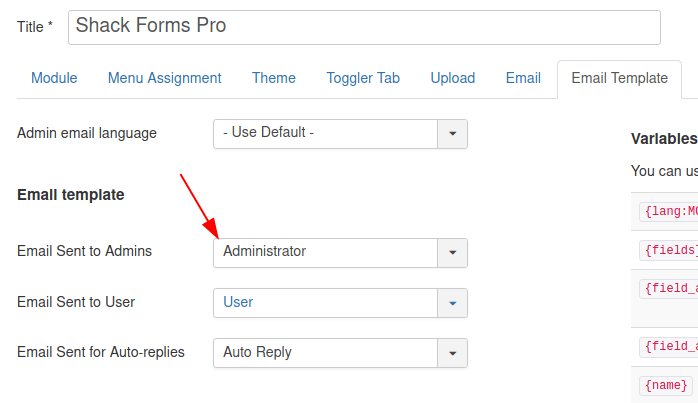
- From the drop-down list of options, click on the name of the PHP file you creted for your email HTML template in Step 1. For my demonstration, I click "Joomlashack":

- Click "Save" or "Save & Close".
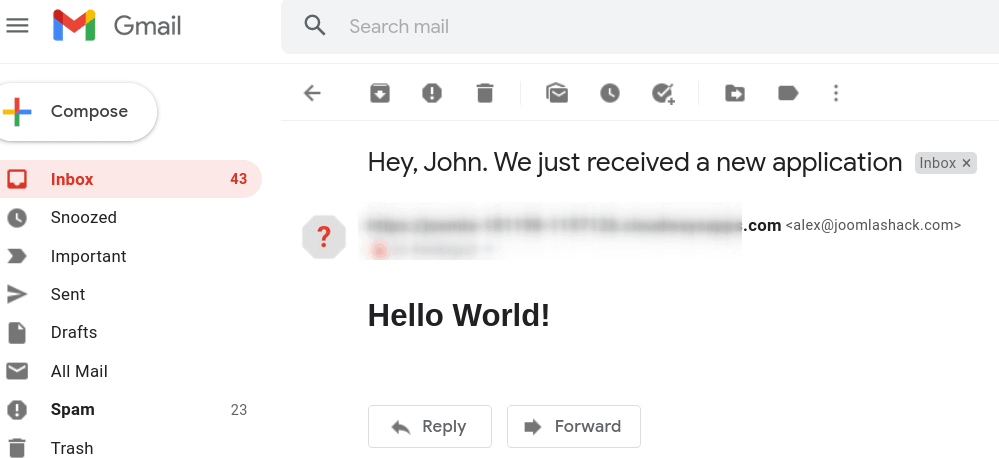
Now, every time someone submits a Shack Form on your Joomla site, your Shack Form adminstrator will receive notifications, formated with your newly created email HTML template.
Here is a notification with the email HTML template I created for the domonstration purposes in Step 1:
Repeat these steps to set your new email HTML template for notifications being sent to user (setting "Emails Sent to User") or as auto-replies (setting "Emails Sent as Auto-replies").