Woopra is a SAAS platform that allows you to track, analyze and optimize how visitors and customers engage with your Joomla site.
In this document, you will learn how to connect the Woopra platform with your Joomla site using Shack Analytics. To create such a connection, you need to install a Woopra tracking code to your site.
This is a two-step task:
- Copy the code snippet from your Woopra account
- Create a global tracking tag with the code snippet in Shack Analytics Pro.
Let's take a look at this process in detail.
Step #1. Copy the code snippet
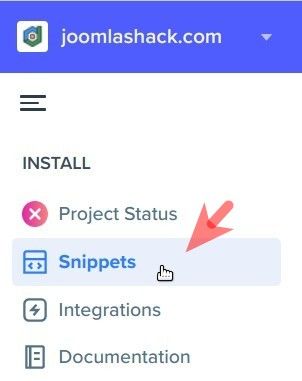
- In your Woopra account, on the left side of the screen, click "Snippets":
- You will be taken to the "Snippets" screen. Click "JS":

- This will bring you to the "JavaScript" page with the code snippet, required to connect your Joomla site to the Woopra platform. Click on the "Click to Copy" blue button to copy the snippet:

Good job! You are done with the first step. Now you can move to your Shack Analytics Pro Joomla extension to finish the task.
Step #2. Create a global tracking tag
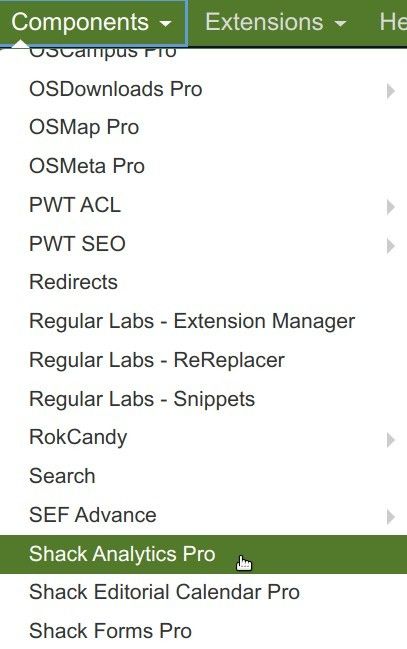
- In your Joomla administrator panel, go to "Components" > "Shack Analytics Pro":
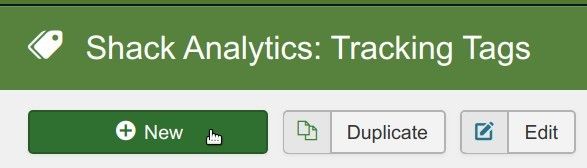
- You will be taken to the "Shack Analytics: Tracking Tags" screen. In the top left corner, click "New" to create a new tracking tag:
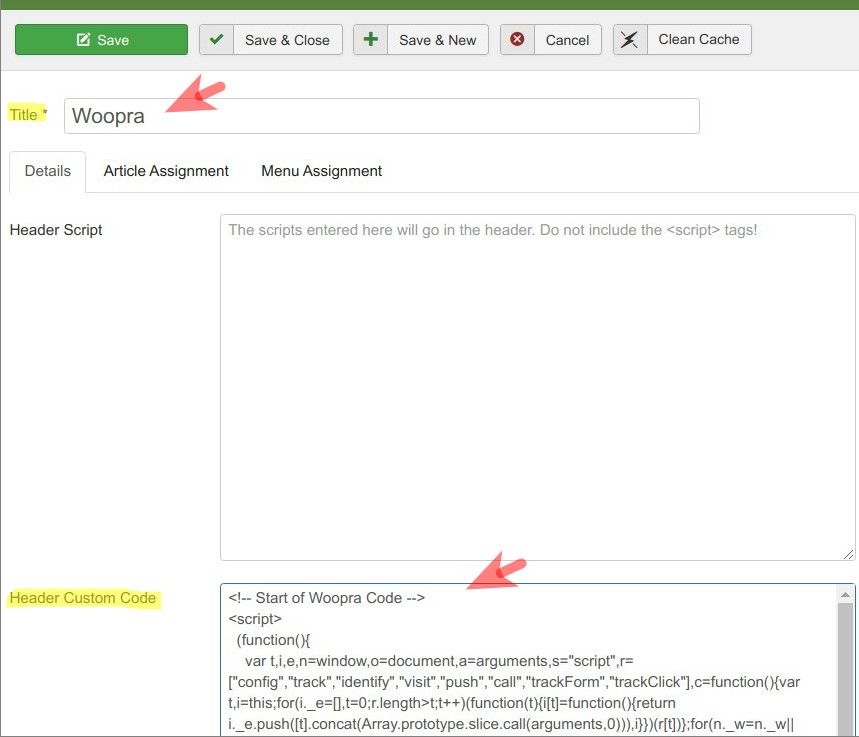
- This will open the "Shack Analytics: New Tracking Tag" screen for you. Enter "Woopra" into the "Title" field and paste the code you copied in the previous step into the "Header Custom Code" box:
- Click "Save & Close". You will see the "Woopra" tag listed:
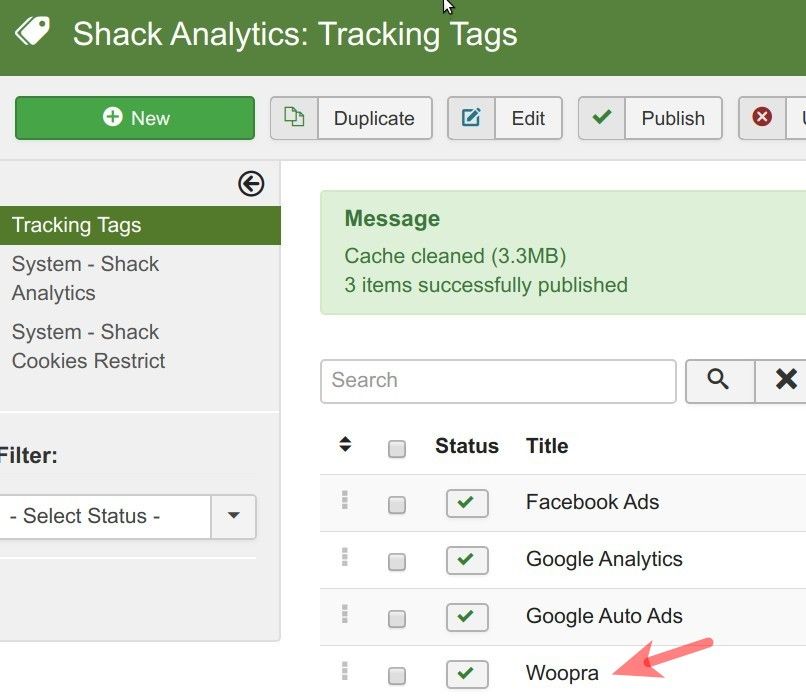
So far so good. You created the tracking tag but it is not at work yet. To rectify this, you need to assign this tag as a global tag for your Joomla site.
- In the top right corner, click "Options":

- You will see the "Shack Analytics: Configuration" screen. Click inside the "Global Tracking Tag" box and then - on your "Woopra" tag:
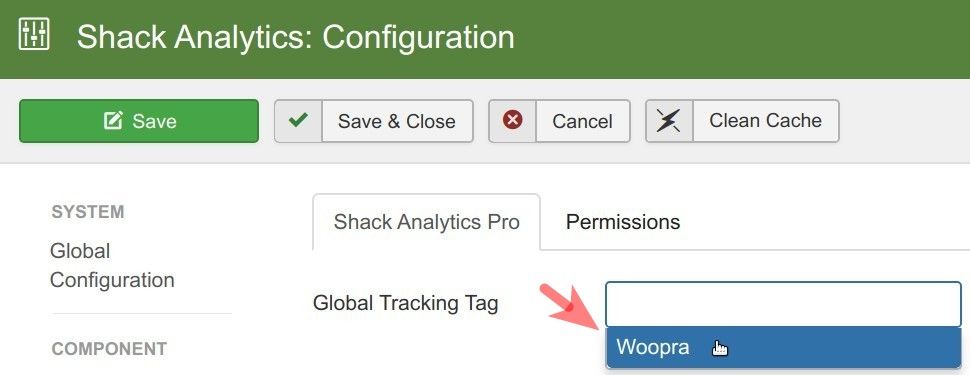
- Make sure the "Woopra" tag took place inside the "Global Tracking Tag" box:

- Click "Save" or "Save & Close".
- Now check the HTML source code of your Joomla site. You should see the code snippet from Woopra embedded between the <head> and </head> HTML tags:

Excellent! Your Joomla site is now connected to your Woopra platform.