Documentation for Joomla 3
With Shack Analytics Pro, you have an option to add Google Analytics to selected pages of your Joomla site.
This is a three-step process:
- Prepare your website Google Analytics Tracking Code.
- Create a Google Analytics tracking tag.
- Add the tracking tag to the required page(s).
Let's take a look at this process in more detail.
Step #1. Prepare your website Google Analytics tracking code
- Sign in to your Google Analytics account. Please, visit this tutorial on how to create a Google Analytics account, if you still don't have one.
- In your Google Analytics dashboard, click Admin:
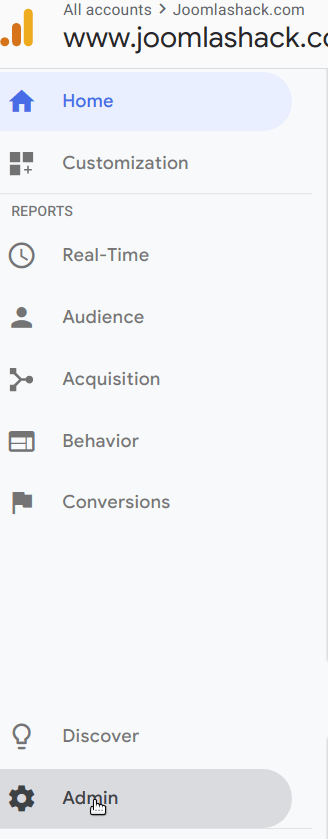
- You will see the new columns. In the Property column, click Tracking Info:
![]()
- In the drop-down list, click Tracking Code:
![]()
- You will see your site's Google Analytics Tracking ID and tracking code loaded on the right side panel. Copy the tracking code between the opening and closing
scripttags:
![]()
Excellent! With your site's Google Analytics tracking code copied, you are now ready to move to the next step.
Step #2. Create a Google Analytics tracking tag
- In your Joomla control panel, go to Components > Shack Analytics Pro:
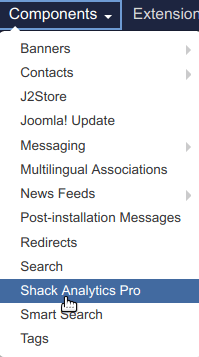
- You will be taken to the Shack Analytics: Tracking Tags administrative page. Click New to create a new tracking tag:
![]()
- You will see the Shack Analytics: New Tracking Tag screen. Create a new Google Analytics tracking tag:
- Title: Enter your tag title.
- Header Script: Paste here the tracking code you copied a minute ago in the previous step.
- Footer Script: Leave empty:
![]()
- Click Save & Close.
Good job! You created a Shack Analytics tracking tag with your Google Analytics tracking code. You can now add this tracking tag with the tracking code to all the pages of your Joomla site.
Step #3. Add the tracking tag to the menu item of the required Joomla 3 page
- Open up the menu item of a required Joomla page for editing. Click the Shack Analytics Tag tab:
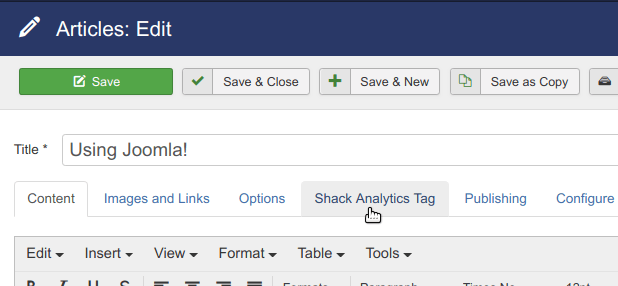
- Click Select a Tracking Tag and in the drop-down list click the tracking tag you created a minute ago in the previous step:
![]()
- Click Save & Close.
- Check the source code of your website pages. You will see your Google Analytics tracking code added:
![]()
Documentation for Joomla 5
With Shack Analytics Pro, you have an option to add Google Analytics tracking to selected pages of your Joomla 5 site.
This is a three-step process:
- Prepare your website Google Analytics Tracking Code.
- Create a Google Analytics tracking tag.
- Add the tracking tag to a menu item of the required Joomla 5 page.
Let's take a look at this process in more detail.
Step #1. Get Google Analytics tracking code
- Sign in to your Google Analytics account. Please, visit this tutorial on how to create a Google Analytics account, if you still don't have one.
- In your Google Analytics dashboard, click Admin:

- You will see the new columns. In the Property column, click Tracking Info:
![]()
- In the drop-down list, click Tracking Code:
![]()
- You will see your site's Google Analytics Tracking ID and tracking code loaded on the right-side panel. Copy the tracking code between the opening and closing
scripttags:
![]()
Excellent! With your site's Google Analytics tracking code copied, you are now ready to move to the next step.
Step #2. Create a Google Analytics tracking tag with Shack Analytics Pro
- In your Joomla 5 admin dashboard, go to Components > Shack Analytics Pro > Tracking Tags:
![]()
- You will be taken to the Shack Analytics: Tracking Tags admin page, as shown in the next image. Click New to create a new tracking tag:
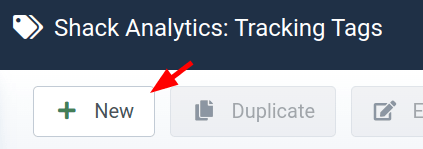
- You will see the Shack Analytics: New Tracking Tag screen. Create a new Google Analytics tracking tag:
- Title: Enter your tag title.
- Header Script: Paste here the tracking code you copied a minute ago in the previous step.
- Footer Script: Leave empty:
![]()
- Click Save & Close.
Good job! You created a Shack Analytics tracking tag with your Google Analytics tracking code. You can now add this tracking tag with the tracking code to all the pages of your Joomla site.
Step #3. Add the tracking tag to the menu item of a Joomla 5 page
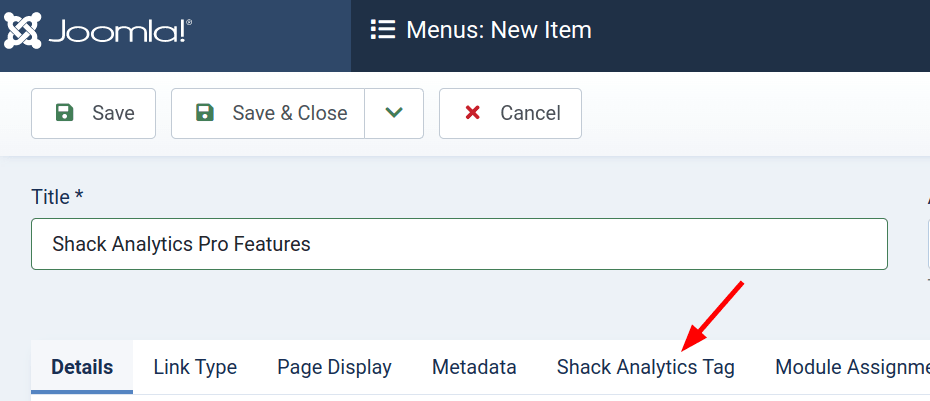
- Open up the menu item of the required Joomla 5 page. Click the Shack Analytics Tag tab:
- Inside the "Tracking Tag" field, click Select a Tracking Tag, and in the drop-down list click the tracking tag you created in the previous step:
![]()
- Click Save & Close.
- Check the source code of your website pages. You will see your Google Analytics tracking code added:
![]()
