You can sell PayPal subscriptions for your OSCampus Pro classes with almost any Joomla membership extension. In this tutorial we'll choose one of those extensions and show how to ingrate OSCampus with the Membership Pro subscription management extension.
This integration is an eight-step process:
- Sign up for a PayPal Developer account.
- Create a custom Access Level and User Group for your OSCampus Pro subscribers for every class.
- Create your OSCampus Pro Pathway, Class and Lessons.
- Create your Membership Pro Subscription Plans.
- Create a menu item by the Membership Pro "Pricing Table Layout" menu item type.
- Set the Membership Pro PayPal plugin to the Sandbox mode.
- Test the subscription process in the Sandbox mode.
- Switch the Membership Pro PayPal payment plugin to the Live mode.
Step 1. Sign up for a PayPal Developer account
When you register for a PayPal Developer account on the developer site, the PayPal sandbox creates two sandbox accounts. You use both of them to test a typical PayPal transaction:
- A business account. For example,
This email address is being protected from spambots. You need JavaScript enabled to view it.. It mimics a PayPal merchant account. - A default personal account. For example,
This email address is being protected from spambots. You need JavaScript enabled to view it.. It mimics a PayPal buyer account.
Let's get started.
- Go to developer.paypal.com. You will see two options:

- The first is to click the Login button and log in with your existing personal or business PayPal account.
- The second is to click the Signup button to create a free developer account. It's super easy to set up and has built-in restrictions to prevent you from accidentally sending real money.
So, if you have not done so yet, create a PayPal Developer account.
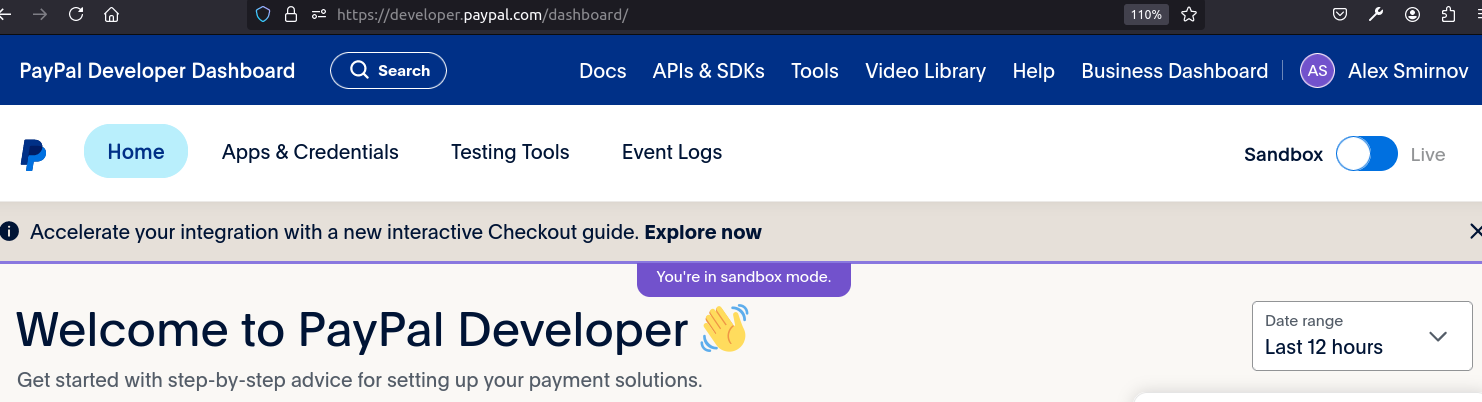
Once you are signed up, you will be taken to your PayPal Developer dashboard:
- Go to Testing Tools > Sandbox Accounts:
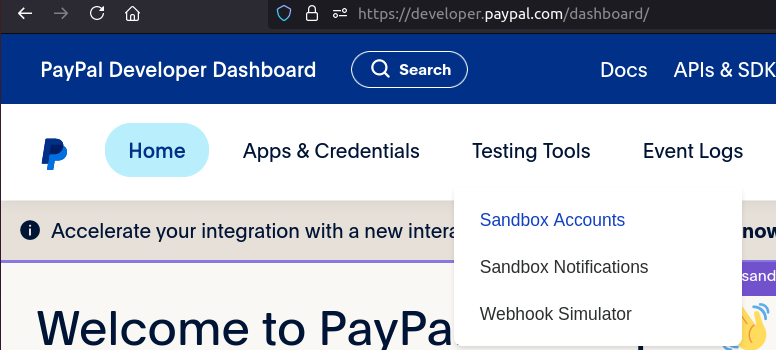
You will notice that you have two sandbox accounts already created for you.
Excellent! You now have a PayPal buyer and a PayPal merchant Sandbox account.
Step 2. Create a custom User Group and Access Level for your OSCampus Pro subscribers
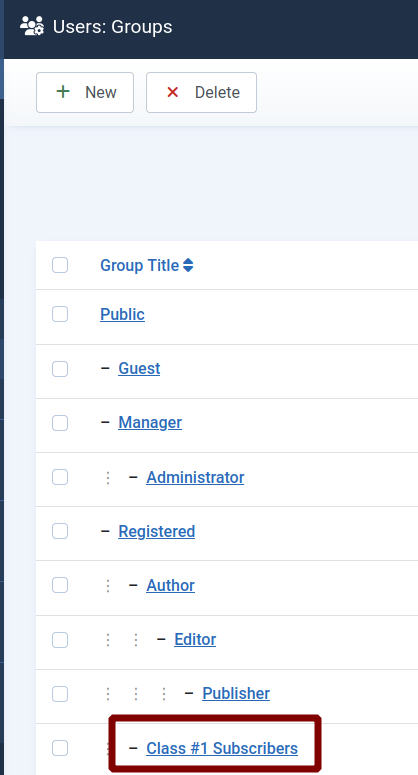
- In your Joomla admin dashboard, go to Users > Groups > New.
- Create a new Joomla user group. This new custom group will be assigned to paid subscribers of your OSCampus Pro classes. For this tutorial, we will call our new group "Class #1 Subscribers":
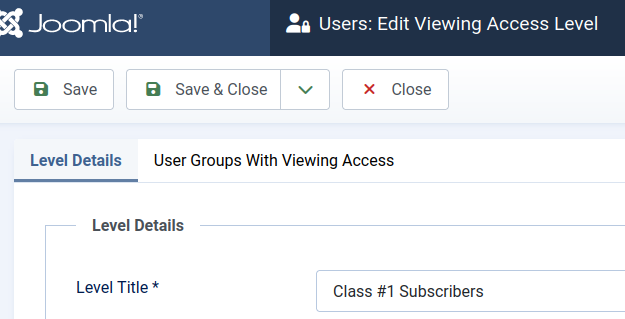
- Go to Users > Access Levels > New.
- Create a new Joomla Access Level. This new access level will be assigned to paid subscribers of your OSCampus Pro classes. For this tutorial, we will call our access level "Class #1 Subscribers", as you can see in the next image:
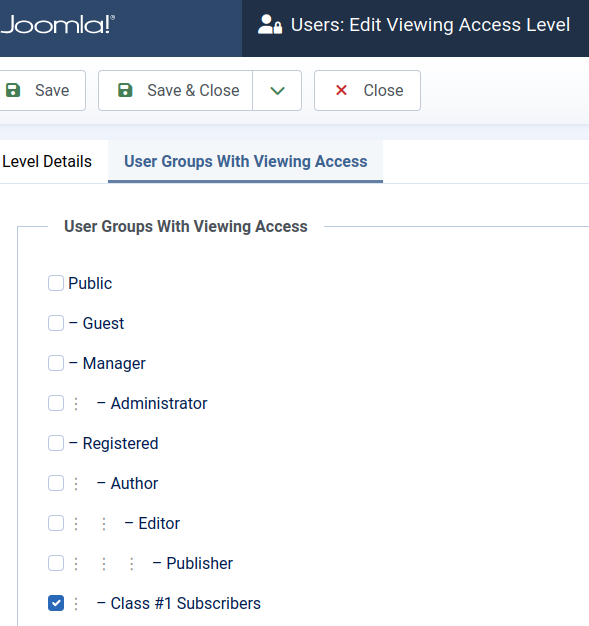
- Click the "User Groups With Viewing Access" tab.
- Click inside the checkbox next to the "Class #1 Subscribers" user group to select it, and click inside the "Registered" group to unselect it, as shown in the next image:
- Click Save & Close.
Important!
Add the newly created subscribers' user groups to your Joomla site Superuser account. Otherwise, you won't be able to test your training subscriptions at the front end.
You are ready to move to the next step.
Step 3. Create your OSCampus Pro Pathway, Class and Lessons
- Create OSCampus Pro pathway, class and lessons as required.
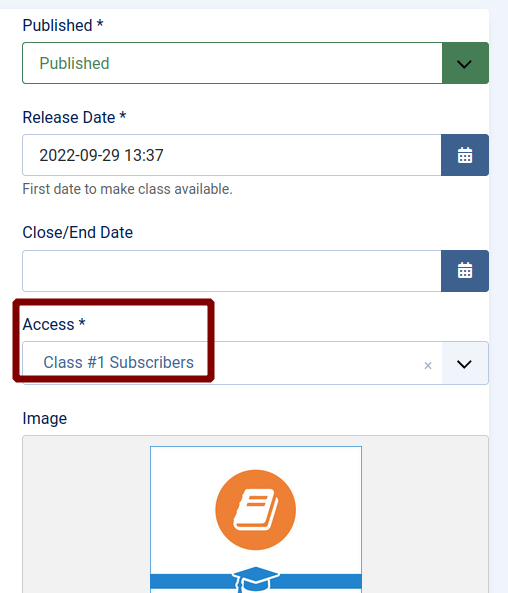
- Set their Access Level to the one you created in the previous step. For our tutorial, we set it to "Class #1 Subscribers", as you can see in the next image:
- Create a menu item of the OSCampus Pro "Pathway" menu item type. Create one pathway for each class you plan to sell.
- Set its Access Level to the one you created in the previous step.
Good job. You can now move on to creating Membership Pro paid subscriptions for your OSCampus Pro online classes.
Step 4. Create your Membership Pro Subscription Plans
- Go to Components > Membership Pro > Categories.
- Create one or more Membership Pro categories to intuitively group your subscription plans. Organizing them in categories will help you manage them more efficiently. We created a Membership Pro category named "Class #1" for our tutorial.
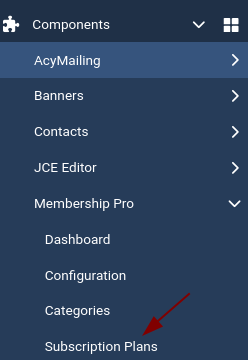
- Go to Components > Membership Pro > Subscription Plans:
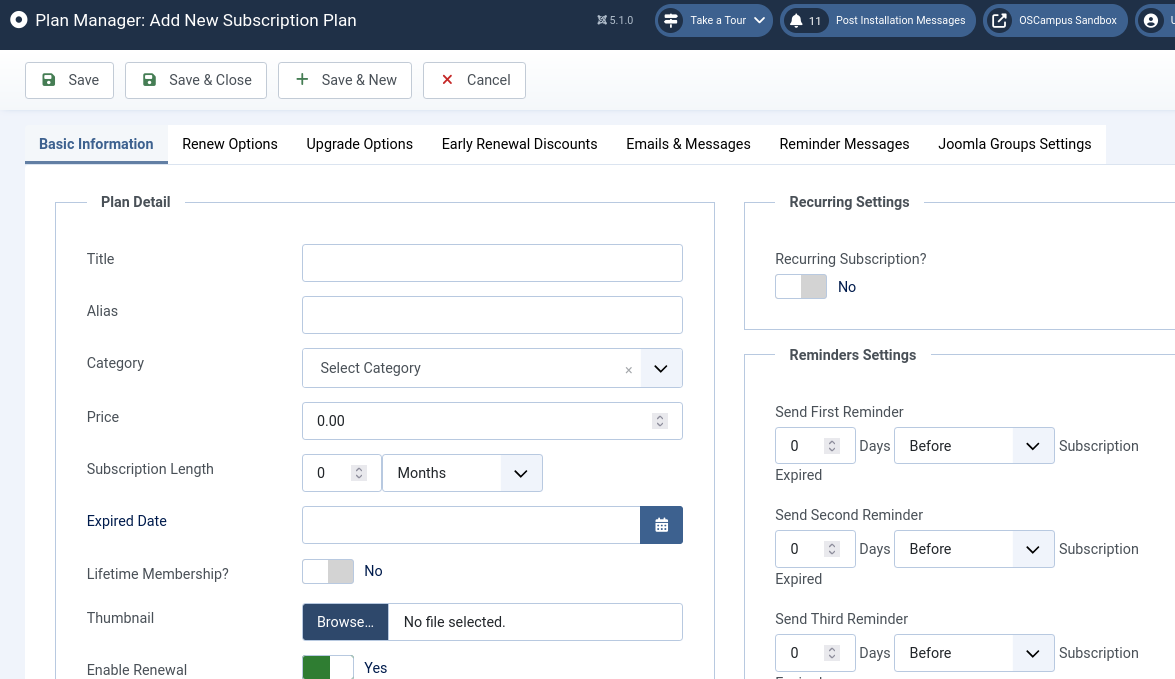
- You will taken to the "Plan Manager: Plans" admin area. In the top-left corner, click "New".
- This will open the "Plan Manager: Add New Subscription Plan" screen.
- Set the subscription basic information on the "Basic Information" tab and the rest of the tabs per your requirements:
Important!
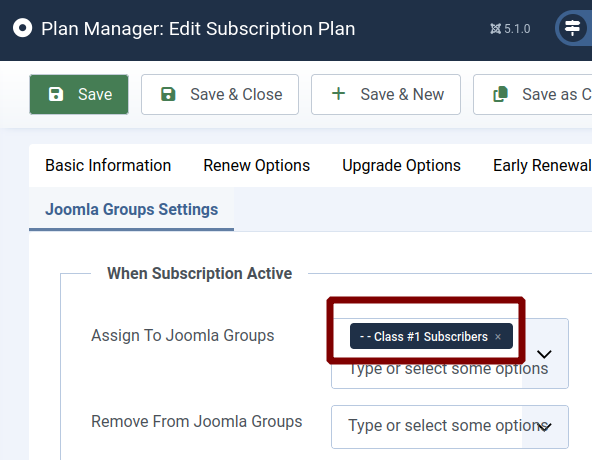
Remember to enable the "Membership Pro - Joomla Groups" plugin, go to the "Joomla Groups Settings" tab in each of your Membership subscription plans, and tell the Membership Pro component what Joomla user group it should assign to subscribers. In our tutorial, we set it to the "Class #1 Subscribers" user group that we created in one of the previous steps:
- Repeat this step to create a Membership Pro subscription plans for every OSCampus Pro class.
Wonderful! You are ready to display the newly created Membership Pro/OSCampus Pro subscription plans to your site visitors.
Step 5. Create a menu item using the Membership Pro "Pricing Table Layout" menu item type
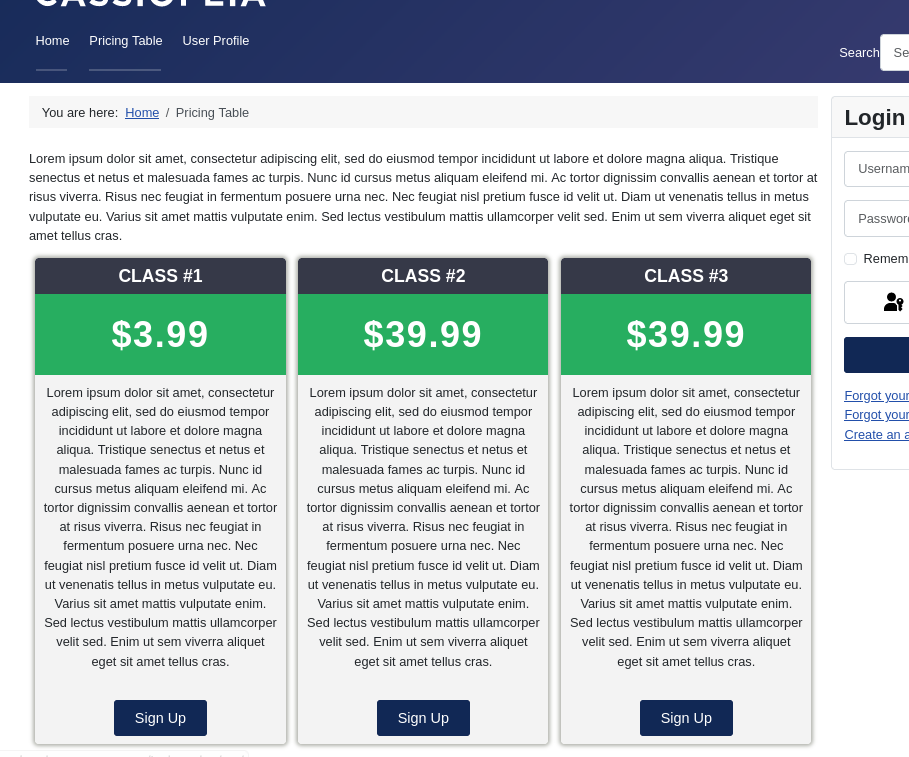
In this step, you will display a pricing table with the subscription plans for your OSCampus Pro classes and the "Sign-up" button.
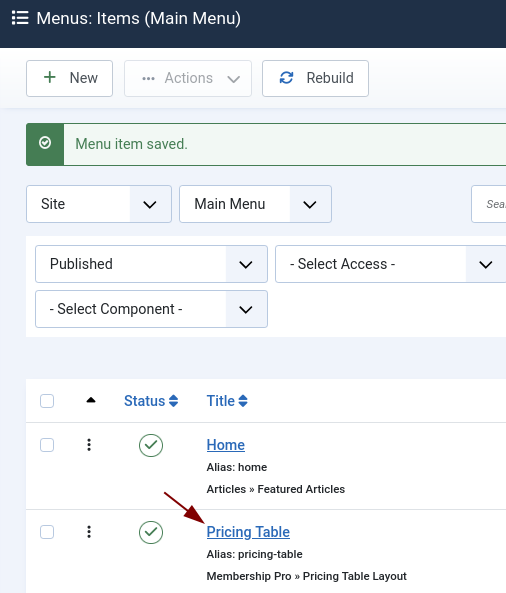
- Go to Menus > <Your Required Menu> and create a new menu item by the Membership Pro > Pricing Table Layout menu item type:
- By default, this menu item will render a page with a table layout of your subscription plans:
Excellent! This finalizes setting up paid subscription plans for your OSCampus Pro online classes using the Membership Pro subscription management extension.
You are almost ready to test the purchasing subscription process using your PayPal Developer sandbox buyer and merchant accounts.
To run the testing, you must set the Membership Pro PayPal payment plugin to the Sandbox mode.
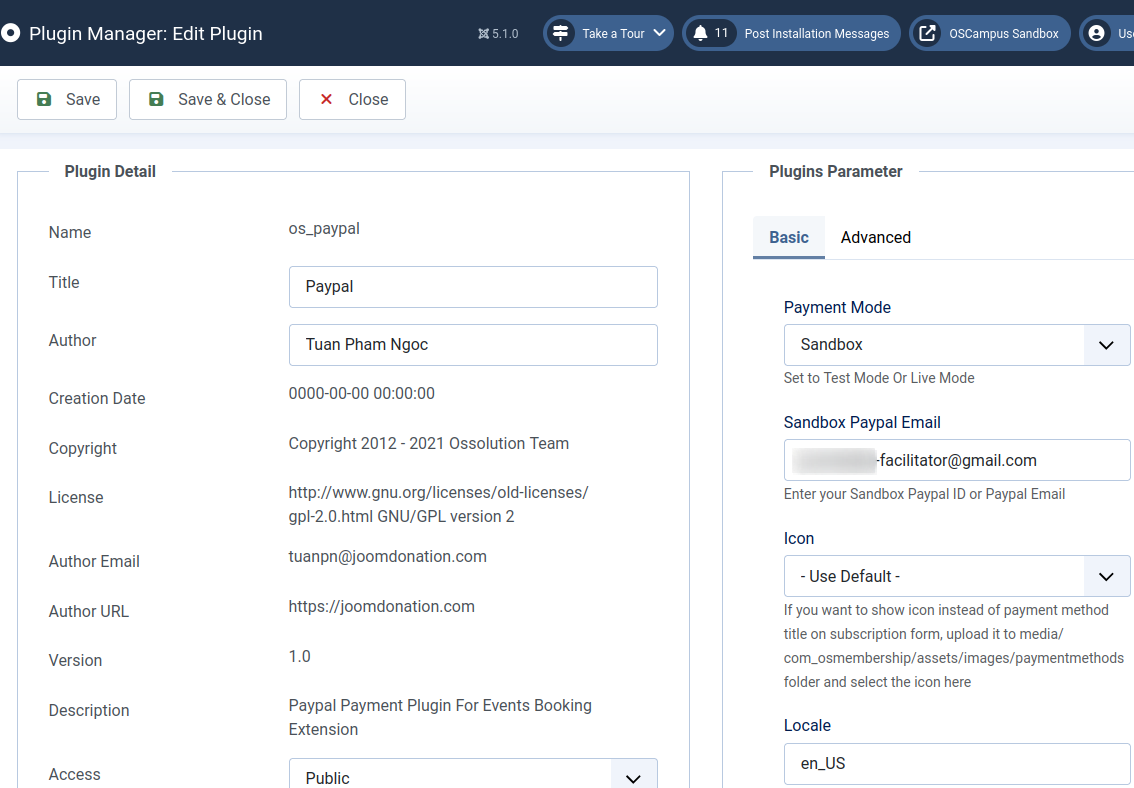
Step 6. Set the os_paypal PayPal payment plugin to the Sandbox mode
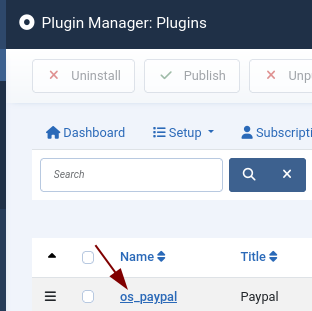
- Go to Components > Membership Pro > Payment Plugins.
- You will see the "Plugin Manager: Plugins" screen, as you can see in the next image. Click os_paypal:
- This will take you to the "Plugin Manager: Edit Plugin" screen. Set the "Payment Mode" parameter to the "Sandbox".
- Enter the email of your PayPal Sandbox merchant in the "Sandbox Paypal Email" field:
Step 7. Test the subscription process in the Sandbox payment mode
- Log into your Joomla site front end as a user of the Registered user group.
- Go to the page with the subscription pricing plans for your OSCampus Pro classes.
- Click on the "Sign-up" button of one of the subscription plans.
- You will see the form with the "<Name of your OSCampus Pro class> Subscription" heading:
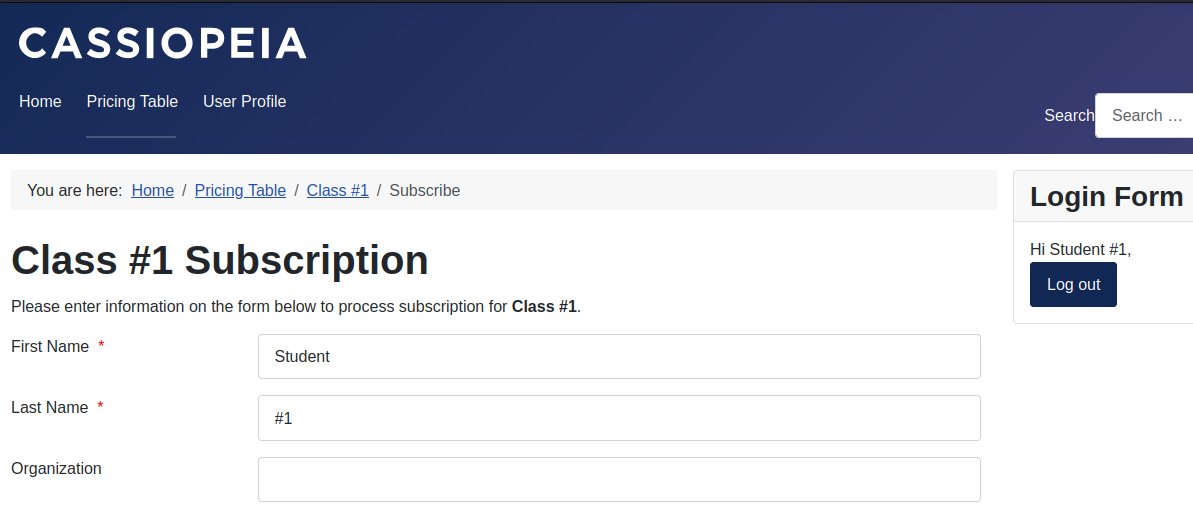
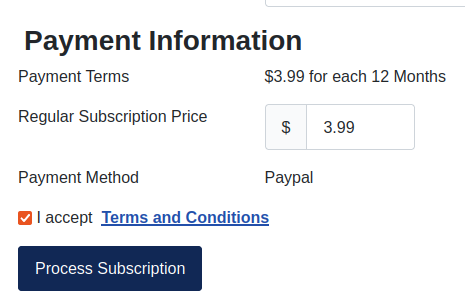
- Fill in the mandatory fields, click inside the "Terms and Conditions" checkbox and click the "Process Subscription" button:
- You will be taken to the PayPal Sandbox customer login page:
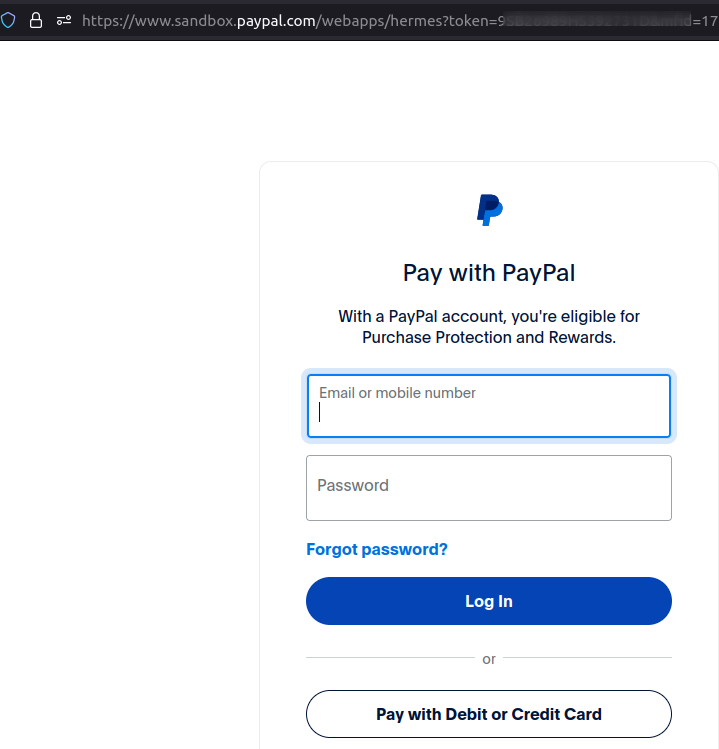
- Log in with your PayPal Sandbox customer email address and password:

- This will bring you to the PayPal Sandbox checkout review page:
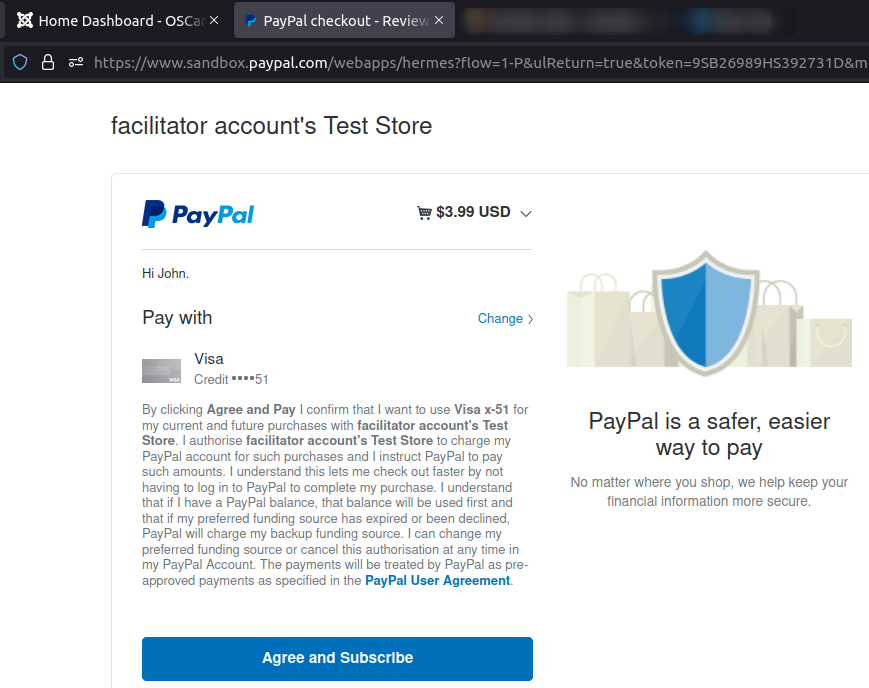
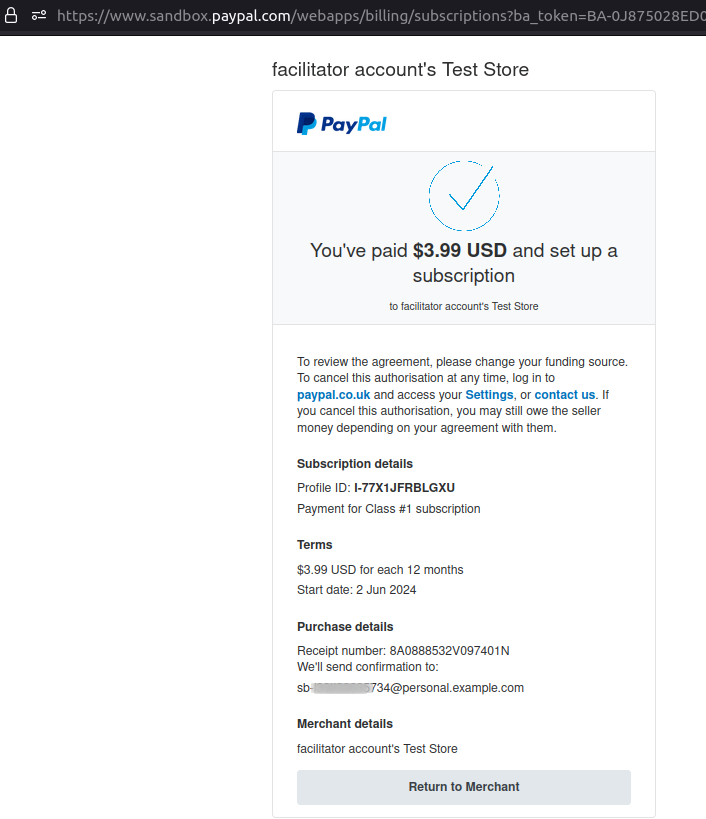
- Click the "Agree and Subscribe" button. You will see the subscription order confirmation page:
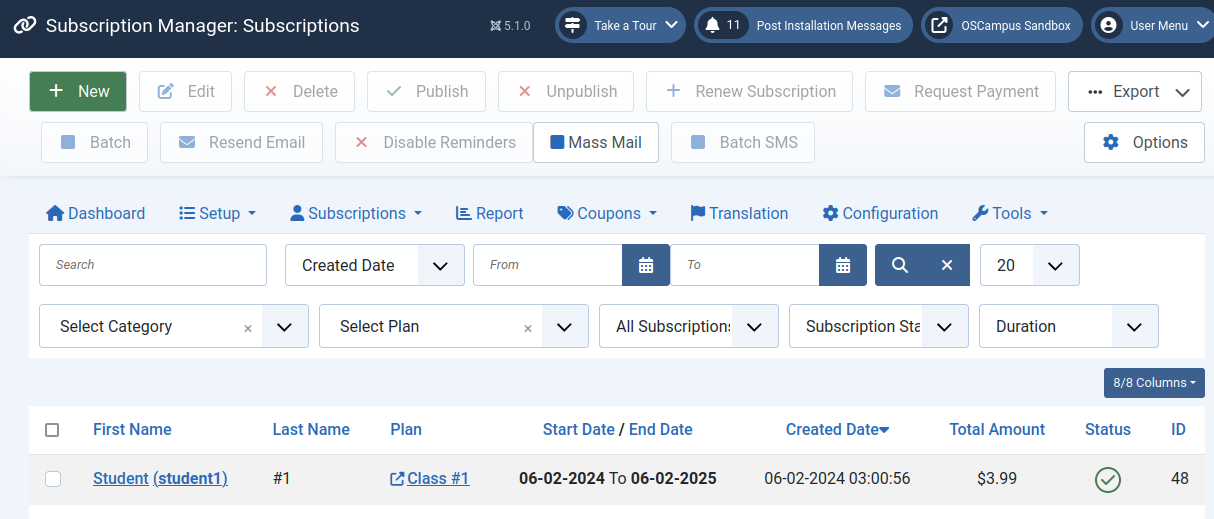
- Go to your Joomla admin dashboard > Components > Membership Pro > Subscriptions. You will see this newly created subscription listed:
- Go to Users > Manage. You will notice that the user group you created for your subscribers has been added to this user:

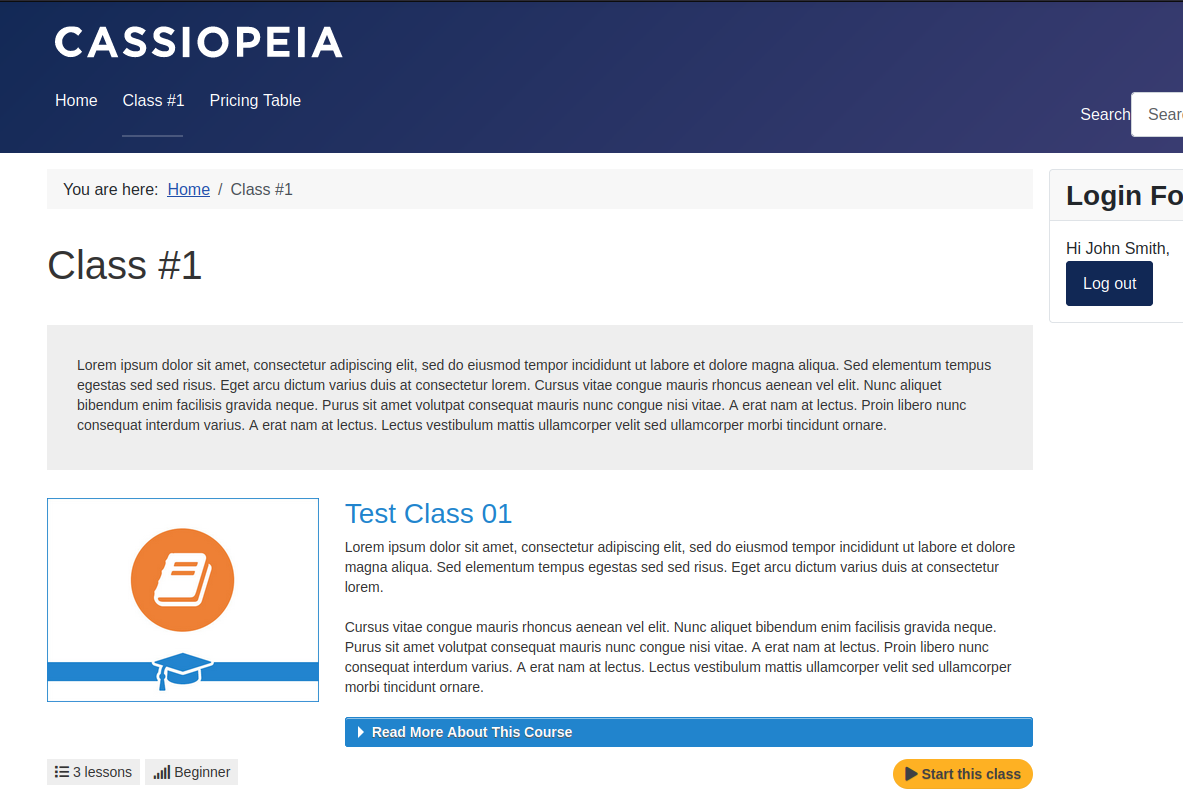
- Log into the site front-end as this user. You will see that this user now has access to the online OSCampus Pro class to which they subscribed:
Step 8. Switch the Membership Pro PayPal payment plugin to the Live payment mode
- Once you are happy with the subscription process in the Sandbox payment mode, switch the Membership Pro PayPal plugin "Payment Mode" parameter to "Live".