Your jInbound landing page has two areas. One area - to enter the page content. Another area - a form, to collect some basic data from the landing page viewer and convert them to a lead.
Forms in jInbound can be protected with one of the two Captchas built into Joomla core. Here is a screenshot that was taken with the jInbound form protected by the "Captcha - Invisible reCAPTCHA":
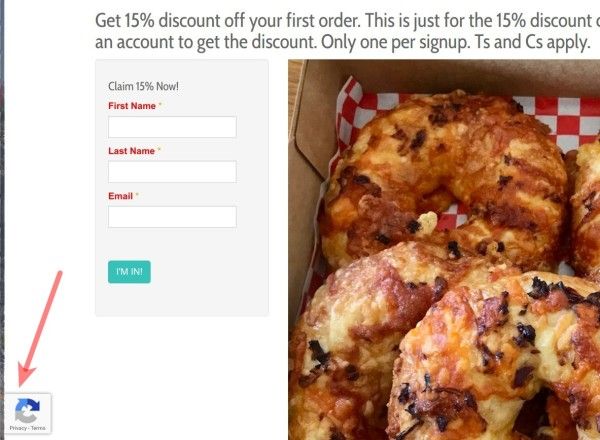
Here is how to set it up:
- Submit your site with Google Recaptcha and get your Site Key and Secret Key
- Create the "captcha" field in jInbound
- Add this field to the form of your jInbound landing page
- Enable a ReCaptcha plugin of your choice in Joomla. For my demonstration, I choose to enable the "Captcha - Invisible reCAPTCHA".
Let's take a look at how to protect your jInbound landing page with Google Invisible ReCaptcha.
Step #1. Generate your Site Key and Secret Key with Google Recaptcha
- See Step #1 of this tutorial on how to register your Joomla site with Google Recaptcha free service and generate your Site and Secret Keys.
Step #2. Create the "captcha" field in jInbound
- In Joomla administrator panel, go to "Components" > "jInbound Pro" > "Fields":
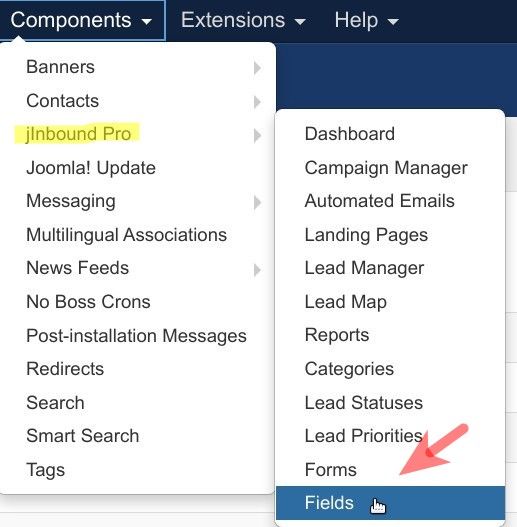
- You will be taken to the "Fields Manager: jInbound" administrative screen. In the top left corner, click "New":

- You will see the "Fields Manager: Add A New jInbound Field" screen. Click within the "Field Type" parameter and on the displayed list of field types click "captcha". You will see that the "Field Type" parameter has been set from the default "aliastag" to "captcha":
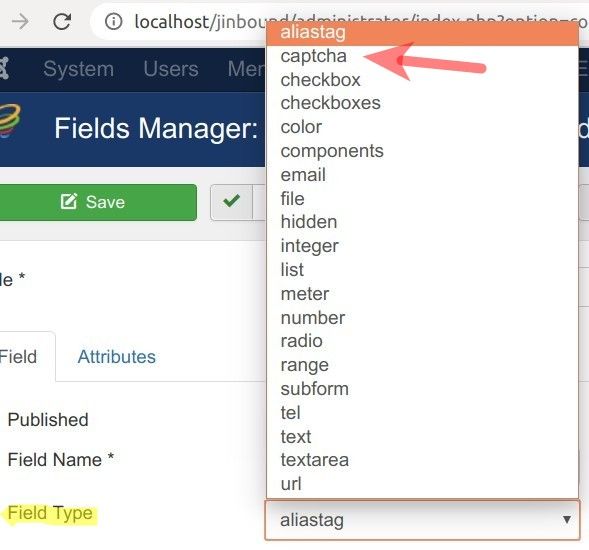
- Click the "Attributes" tab:
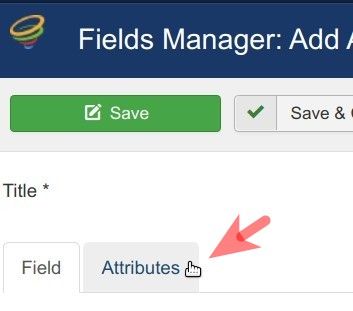
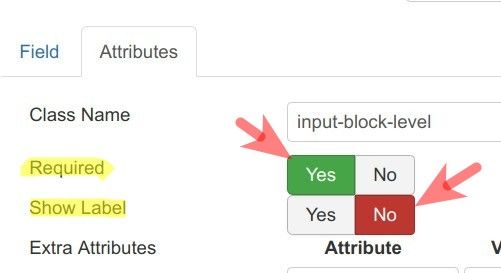
- Set the "Required" to "Yes" and "Show Label" to "No":
- Enter an informative title into the "Title" field:

- Click "Save & Close".
That's all for this step. In the next step, you will add this new "captcha" field to the form that you use with your jInbound landing page.
Step #3. Add this field to the form of your jInbound landing page
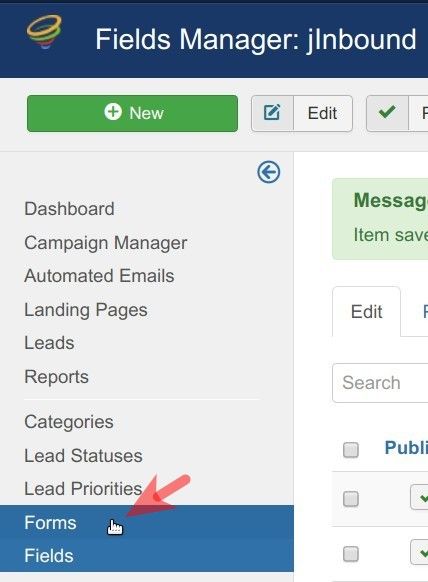
- On the left side of the screen, click "Forms":
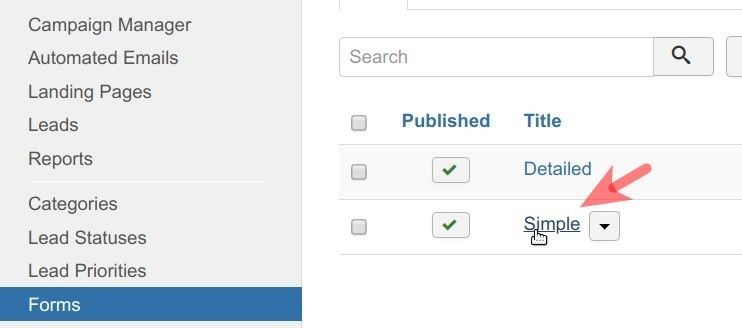
- You will see the screen listing the forms of your jInbound landing pages. Click on the required form. For my demonstration, I click on the "Simple":
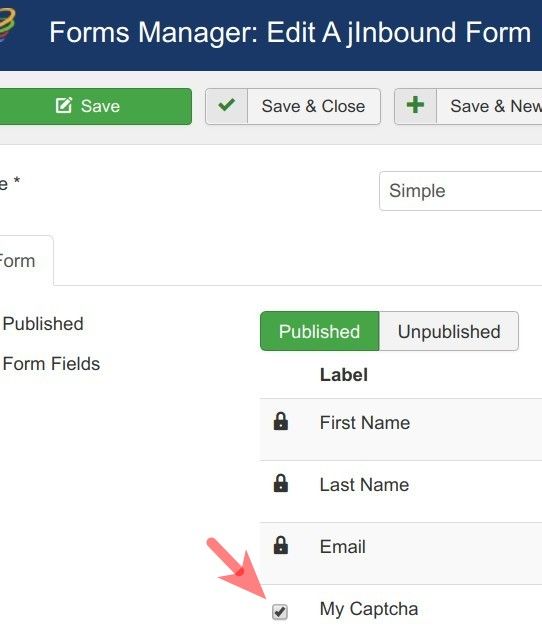
- This will open up the "Form Manager: Edit a jInbound Form" screen for you. Find the "captcha" field you created in the previous step and click inside its checkbox:
- Click "Save & Close".
Good job! Your jInbound landing page now has the "captcha" filed to protect the form of the page from spam. But this "captcha" field works based on Joomla's core "Captcha" two plugins.
In the next step, you will enable one of them. For my demonstration, I selected "Captcha - Invisible reCAPTCHA".
Step #4. Enable a ReCaptcha plugin of your choice in Joomla
- Go to "Extensions" > "Plugins":
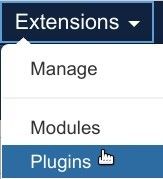
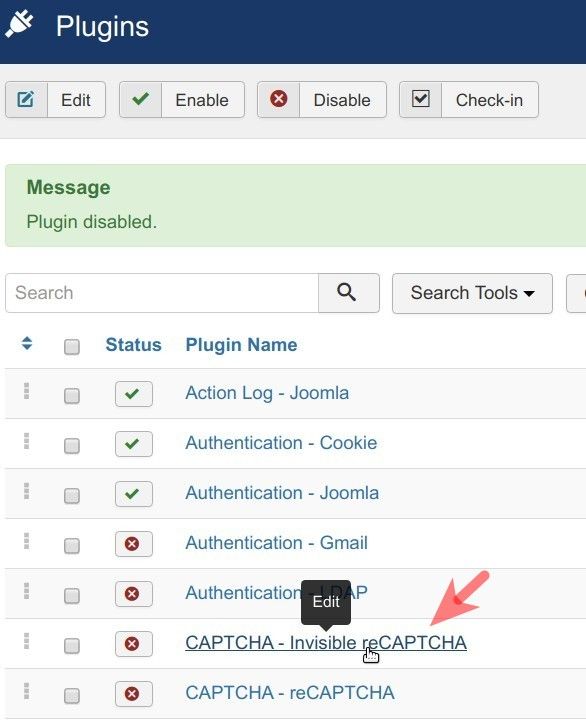
- This will bring you to the "Plugins" screen with the list of Joomla plugins. Find the "Captcha - Invisible reCAPTCHA" and click on its title to open it up for editing:
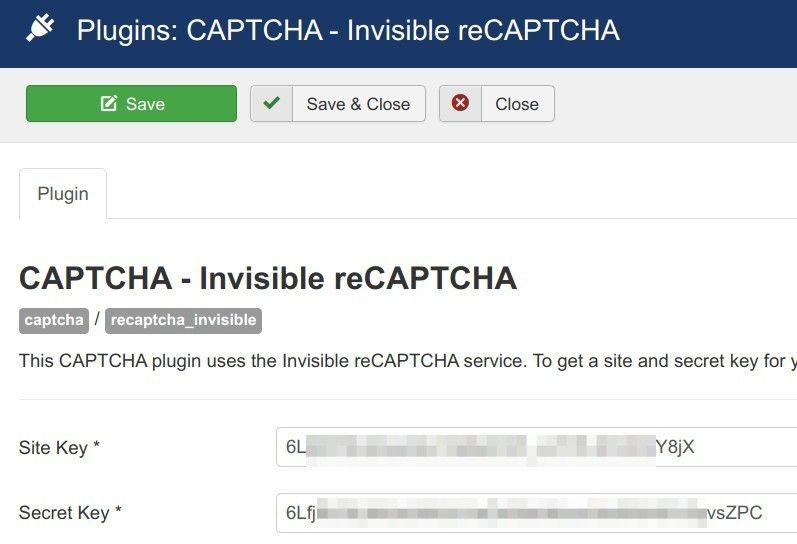
- You will see the "Plugins: CAPTCHA - Invisible reCAPTCHA" screen. Enable the plugin and enter the Site and Secret Keys into their respective fields:
- Check the jInbound landing page at the frontend of your Joomla site. You should now see the Google Invisible ReCaptcha protecting your form from spam:

