A custom font family will add a vital extra touch to your site feel and look. It will make its design look more professional and appealing to its visitors.
It will also demonstrate that you care about the viewing experience of your site visitors. They, in turn, will pay you back with their trust and return visits.
In this blog post, you will learn how to easily add a Google Font family of your choice to our Wright Framework or any other of the Joomlashack templates.
The technique you will learn in this tutorial is creating a custom.css file for your own style rules. You will learn how to create this file for your Wright Framework on any other Joomlashack template.
You will then be able to easily specify a Google Font family to a preferred HTML element on your pages. For this tutorial, we will add the Roboto Google Font family to the h2 heading tag.
Do I Really Need to Create an Extra File for My Joomla Site?
It may sound logical to find an existing CSS style with a font family rule and change the font family to your preferences. This approach, though, has two major disadvantages.
Firstly, editing modern Joomla CSS files is not a straightforward task. It is very easy to make a mistake while working with them:
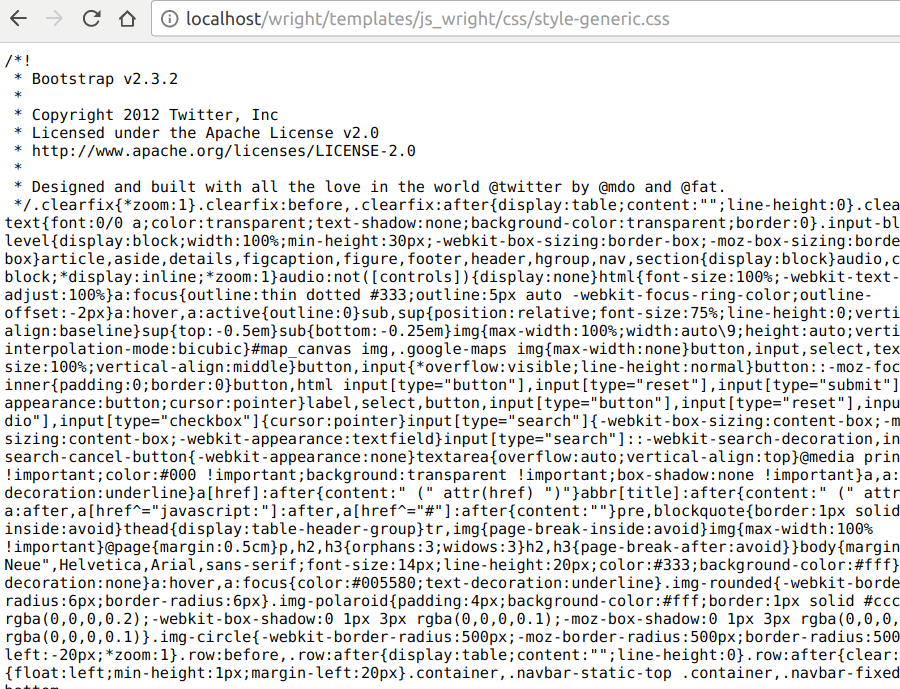
The image above displays the style_generic.css file from the Wright Framework. As you can see, it is not particularly editor-friendly.
Secondly, and most importantly, even if you manage to edit this file, you will lose your changes next time you update your template.
We suggest you create a new, empty CSS file for your Wright or any other Joomlashack template, call it custom.css and add in there your Google Font family.
For the purpose of this tutorial, I installed a Joomla site with the "Learn Joomla Sample data", running the Wright Framework.
You will learn how to add the Roboto Google Font family to the h2 tag of the Joomla articles titles.
Let's get started.
Step #1. Create the custom.css file
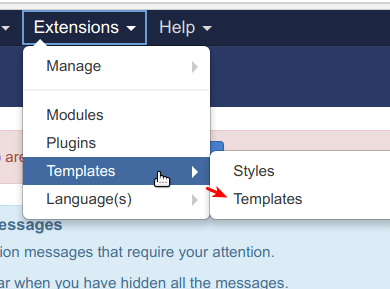
- In your Joomla administrator panel, go to Extensions > Templates > Templates:
You will be taken to the Templates: Templates (Site) screen.
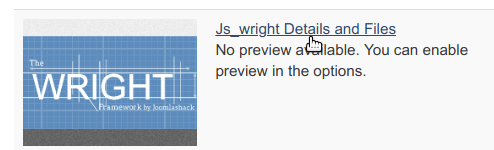
- Locate the Wright template.
- Click the Js_wright Details and Files link:
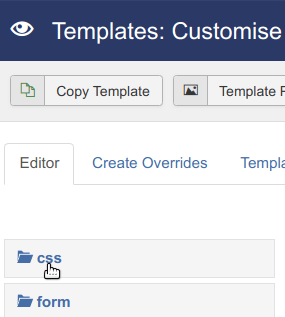
You will see the Templates: Customise (Js_wright) page. It displays all the files and folders of your Wright template.
- Click CSS:
- Click New File:
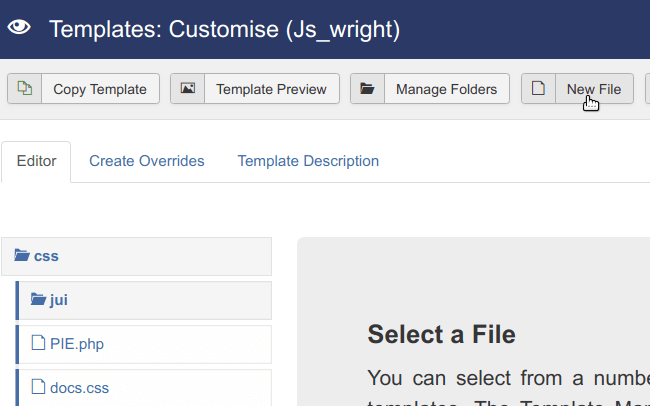
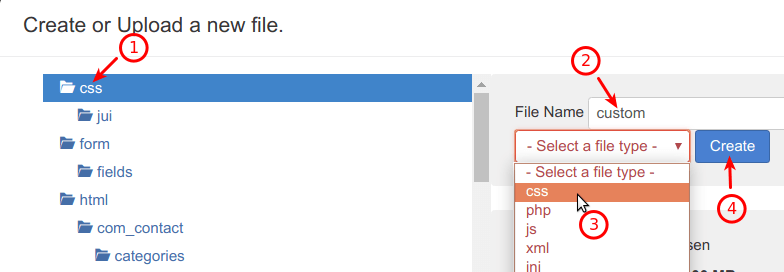
You will see the Create or Upload a new file white modal box opened up.
- Make sure the css folder is selected
- Enter custom into the File Name box
- Click Select a file type and select css
- Click Create:
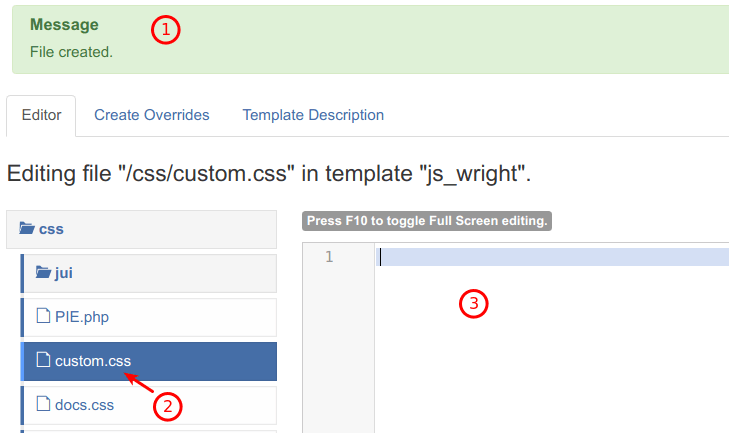
You will see the File created message (1) and the custom.css file displayed (2). On the right-hand side, you will see the code editing area (3).
Good job! Your custom.css file is now ready.
It is placed outside your Wright template file structure. This means, next time you update the Wright framwork, this custom.css file will be left intact.
Next, you need to get the CSS code to copy into it. Keep this screen open and move to the next step.
Step #2. Select a Google Font family of your choice
For the purpose of this tutorial, I will add the Google Font family called Roboto. I will add it to my article headings h2 tag.
- Go to Google Font site
- Click on the required font-family. For my example, I click on the Roboto, as you can see in the next image:

- You will see a list of the Roboto Styles. Click the "Select this style" link displayed next to your preferred style. For my example, I will select the "Thin 100", as you can see in the next image:

- This will open up the "Selected family" sidebar, as you can see in the next image. Click the "@import" radio button:
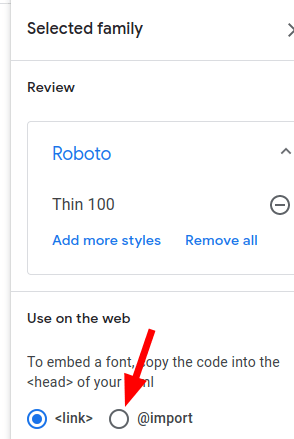
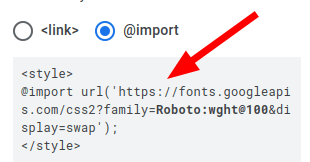
- Copy the code between the <styles> tags:
Excellent! You are ready to move to the next step.
Step #3. Apply the Google Font CSS rules to the custom.css file
Now you need to add two lines of the CSS code to your custom.css file.
- Paste the
@import url('https://fonts.googleapis.com/css2?family=Roboto:wght@100>&display=swap');into your custom.css file - Go back to the sidebar with the "Roboto" @import code. Copy the
font-family: 'Roboto', sans-serif;CSS rules that specify the Roboto font-family:
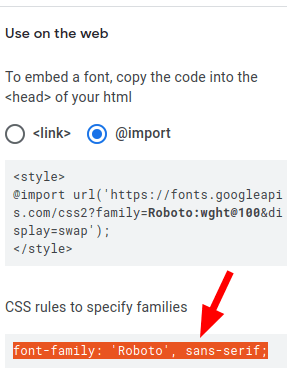
- Paste it into your custom.css file adding the curly brackets before and after this line
- Add
h2CSS code before the first curly bracket, to apply the Roboto Google Font family to your articles h2 heading:

- Click Save.
Excellent! Next, let's check how your new Google Font family works on your site.
Step #4. Test your Joomla articles h2 headings
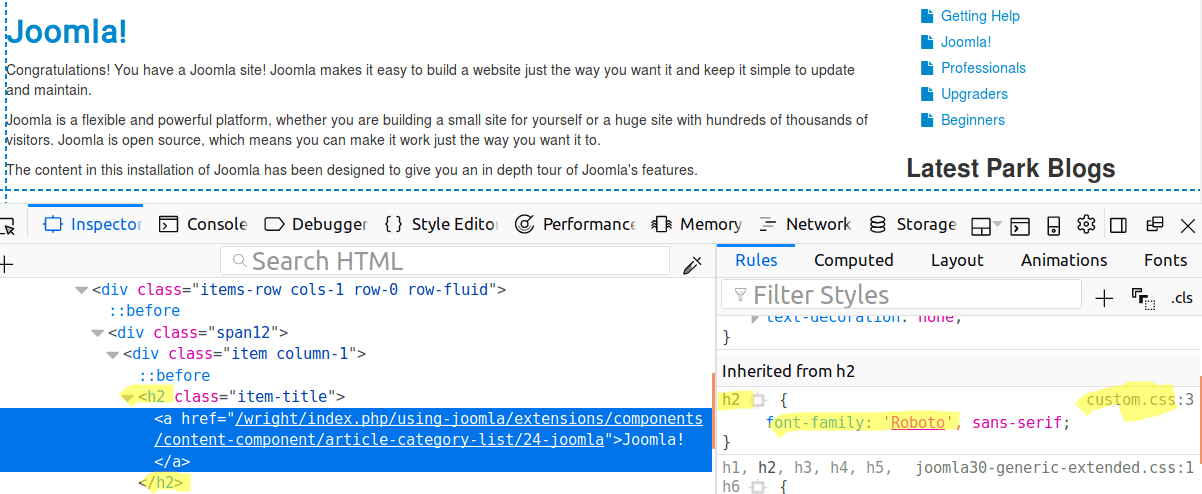
- Go to the front end of your site and refresh its main page.
If you inspect your articles headings, you will see that they gracefully accepted the Roboto Google Font family:
Additional Reading
What's Next
Save $1,000's when you sign up to Joomlashack's Everything Club.
You will get access to all our 32 extensions, and legendary support!