In order to use a Suckerfish Dropdown menu, or Dropline menu, it is first necessary to set up your menu to have 'Parent / Child' relationships. The 'Child' item is the one that you will see 'drop down', or as a 'sub menu' item.
This tutorial covers how to make it happen.
(this example uses Joomla 1.5 - although the backend looks a bit different in 1.0, the concepts are the same)
Step 1: Access the Menu Manager
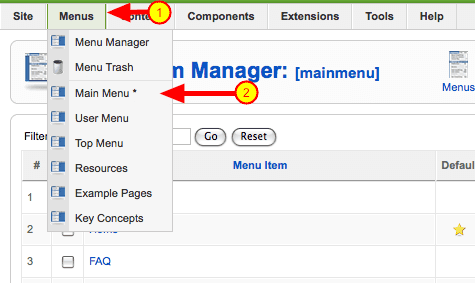
Select the menu you wish to set up parent / child relationships in. In this example, we are going to use the Main Menu
No parent / child relationships
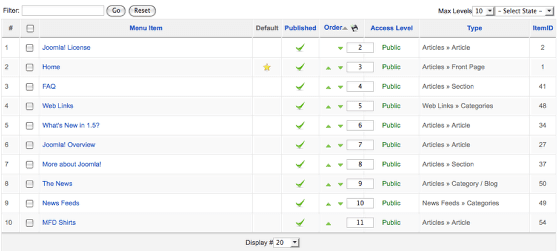
This image shows a menu with no parent / child relationships.
Access the Menu Parameters

Once you've accessed the menu, click on the menu item you wish to make a 'child' item in your menu. You will see the 'Parent Item' parameter on the left side of the screen. This is where you will assign a parent item, thus making the menu item we are editing the 'child' item.
In this case, we are going to set the parent item to be 'What's New in 1.5?" - see below
Select the 'Parent Item'
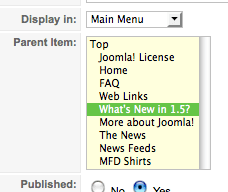
Select the item you wish to be the Parent Item. In this exaample we are setting the 'What's New in Joomla 1.5?" link to be the parent of the 'Joomla! Overview' link.
Save the Changes
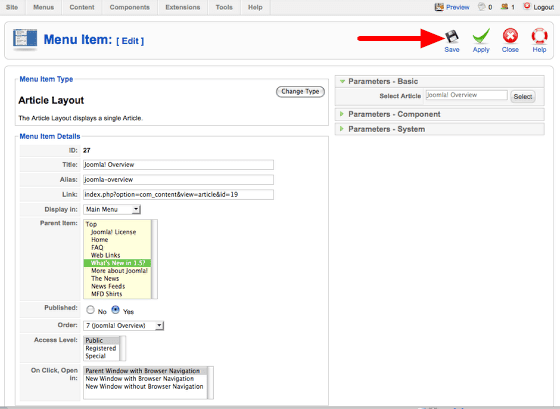
Click on Save to apply the changes.
Parent / Child relationship is set!
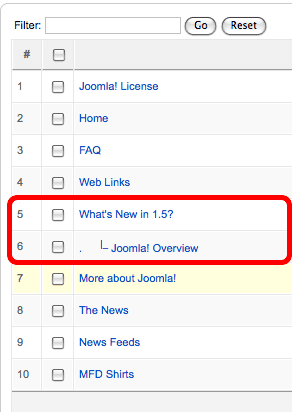
You'll see after saving that the parent / child relationship has been set. Child items are shown indented with a connection to the parent item. You can do this for as many links as you need, as many levels deep as you need. Although, the template must accomodate the levels. Joomlashack's templates will accomodate up to 3 child items.
Step 2: Set up the Menu Module
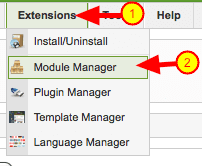
Access the menu module by going to the Extensions -> Module Manager, and select the menu module you wish to use. In our example, we are using the already existing 'Main Menu' module. So we click on the module name to open it.
Setting it up.
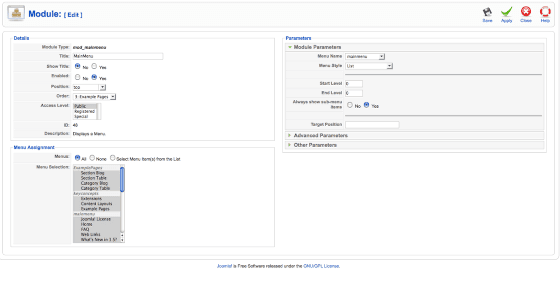
Upon opening our menu module, you will see some parameters that must be set properly for the menu to operate as a suckerfish or dropline menu.
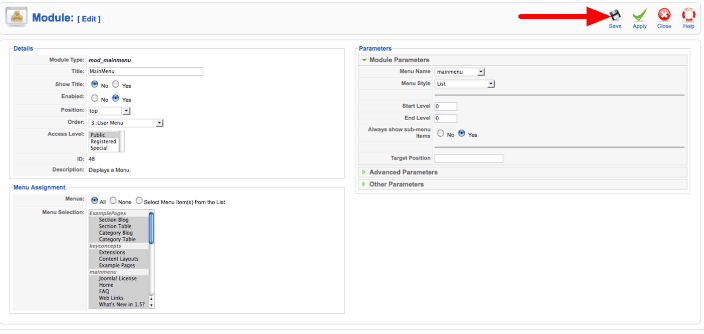
Set the 'Details'
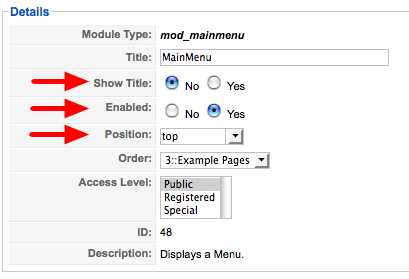
In the Details area of the module settings (top left), set the parameters as seen above, and listed here:
Show Title = No
Enabled = Yes
Position = Whatever position you are setting up the suckerfish / dropline menu to be displayed in. Check your template documentaiton, found in the template demo, for the location to use suckerfish / dropline menus in.
Set the 'Parameters'

In the Parameters area of the module settings (top right), set the parameters as seen above, and listed here:
Menu Name = mainmenu (choose the name of the menu you wish to use to populate the suckerfish / dropline menu with -- in our case, we've set up the 'mainmenu' to have the parent / child relationships and will be using that menu)
Menu Style = List
Always show sub-menu items = Yes
You do not need to change any of the other parameters, unless otherwise noted in the docuementation for the template.
Preview your site to see your work!
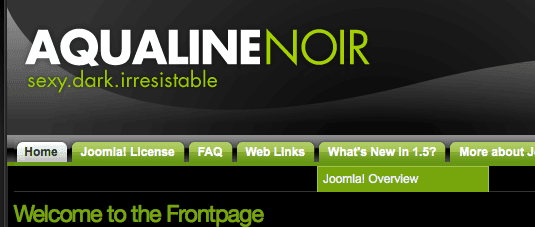
If all settings have been done properly, you should now have a fully functional Suckerfish or Dropline menu set up, with the Joomla! Overview being the child item of the What's new in 1.5? parent.
Repeat the First Step to set up more items for the menu.
As stated above, this tutorial uses Joomla 1.5, however, the concepts are the same for Joomla 1.0 - it's just a bit different in where and how you do things.
If you have any questions or need further assistance, please visit the Community Forum and post to an appropriate thread.