One of our customers asked whether it is possible to connect a Joomla site to Mautic. Mautic is a server-side PHP/MySQL self-hosted marketing platform.
You can quickly install it using your hosting control panel. After the installation, you will be able to log into your Mautic administrator dashboard and copy the tracking code.
Then paste this code in the Shack Analytics extension on your Joomla site, and that's it!
Let's take a look at how to do this in more detail.
Step #1. Install Mautic
Mautic platform software is free. If you manage your Joomla site using the popular hosting control panel "cPanel" then you can install Mautic using Softaculous.
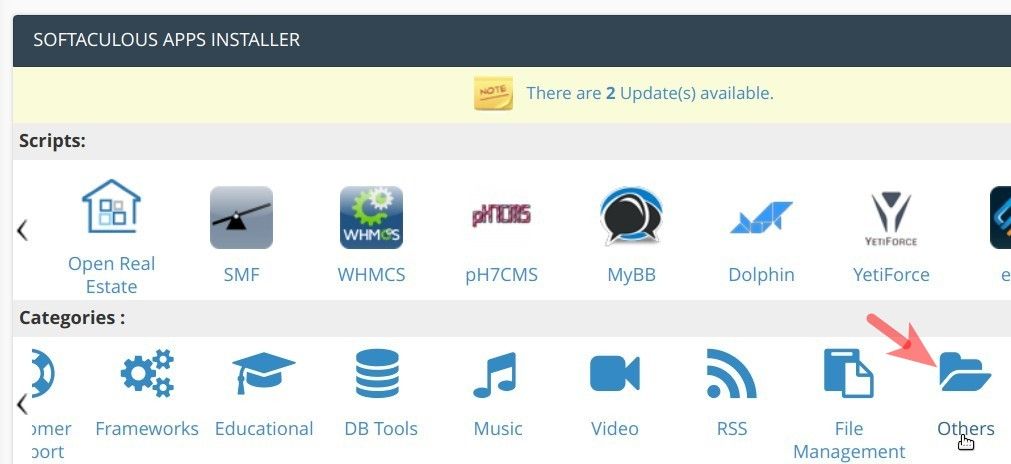
Once you are in your hosting control panel, you need to find the "SOFTACULOUS APPS INSTALLER" section. In this section you want to click "Others":
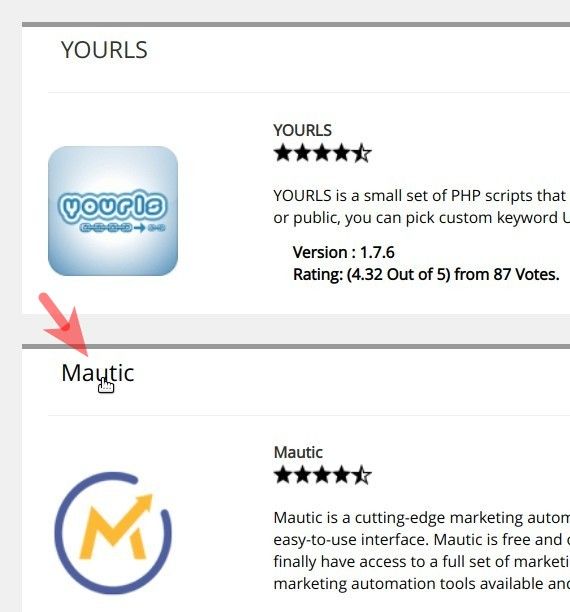
On the next screen, you want to scroll slightly down and click "Mautic":
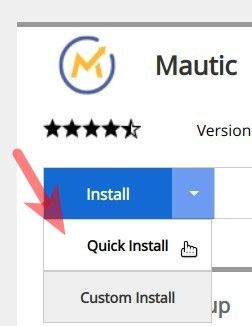
This brings you to the "Mautic" installation screen. You start by clicking the little arrow to the right of the "Install" button:
![]()
You will see a dropdown list of the installation options. You want to click "Quick Install":
This will open a few new fields on your installation screen for you to fill in.
The first one is "Choose Installation URL". You can safely leave here the default "mautic" in the directory field:

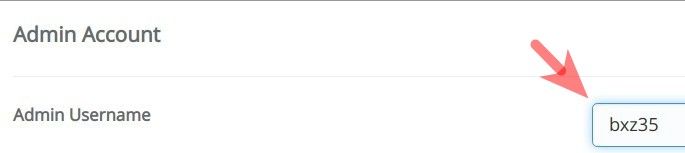
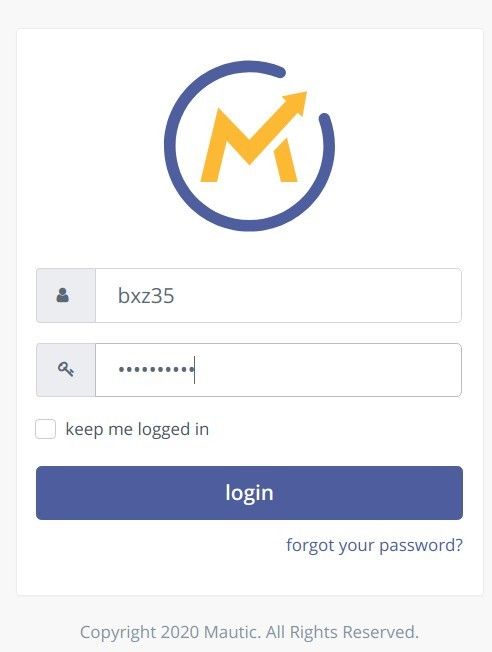
The next field is "Admin Username". Either enter there your own admin username or leave the default "admin". For this blog post, I entered "bxz35":
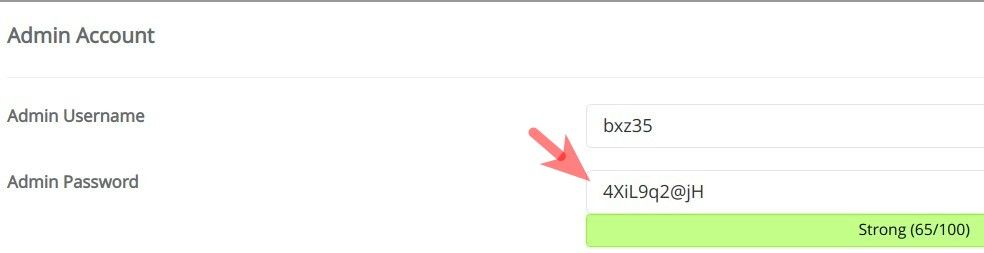
The next field is "Admin Password". To harden the security of your Mautic installation, you definitely want to replace the default "password" with a hard to guess password:
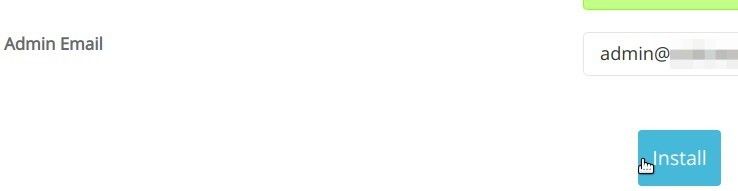
And the final field will be "Admin Email". You want here either to leave the pre-set default admin email or enter a new one:

Great! Now would be a good time for you to click "Install" to initiate installation:
It may take about a minute for the installation to finish but eventually, you will see the message stating that your Mautic installation was successful:
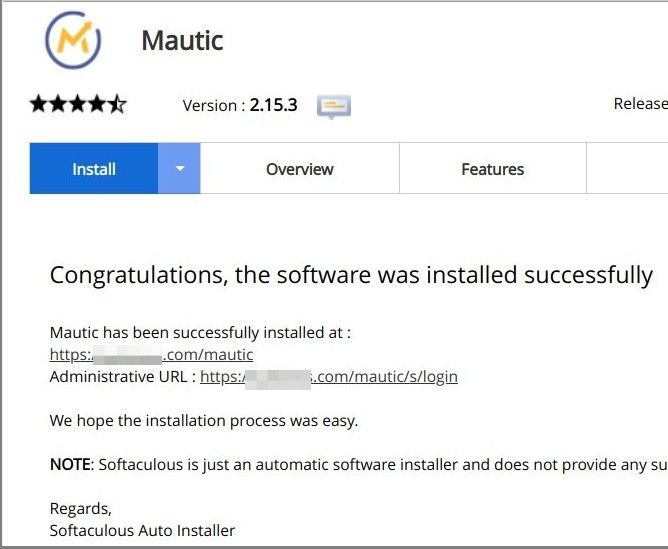
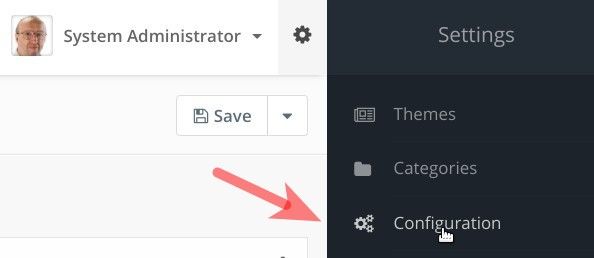
Excellent! Now would be a good time you visit the administrative URL of your Mautic installation and log into your Mautic administrator dashboard:
Once there, in the top right corner, you want to click the little cogwheel icon:
![]()
This will open for you the "Settings" sidebar. You want to click "Configuration":
This will bring you to the "Configuration" administrative screen. On the left side, you want to click "Tracking Settings":
![]()
On the next screen, you would copy the code under the "Mautic tracking settings":
![]()
Excellent! You are now ready to move to your Joomla site to connect it to your Mautic marketing platform.
Step #2. Create a Mautic global tracking tag in Shack Analytics
The man in the middle connecting your Mautic marketing platform with your Joomla site is the Shack Analytics Pro Joomla extension. In Shack Analytics, you firstly create a tracking tag with the Mautic tracking code you just copied. Then, still in Shack Analytics, you assign this tracking tag to your Joomla site.
Let me show you this in a bit more detail.
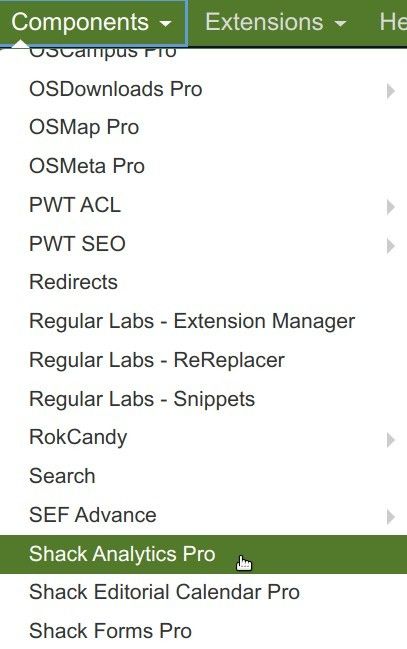
Let's firstly open Shack Analytics. In your Joomla administrator panel, you would go to "Components" > "Shack Analytics Pro":
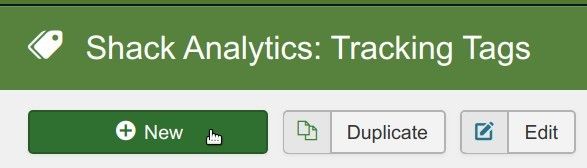
This will bring you to the "Shack Analytics: Tracking Tags" screen. In the top left corner, you want to click "New" to create a new tracking tag:
This will open up the "Shack Analytics: New Tracking Tag" screen. Here you want to enter "Mautic" into the "Title" field and paste the code you copied in the previous step into the "Footer Script" box:
![]()
Wonderful! You are done with creating your Mautic tracking tag. Now would be a good time to click "Save & Close". You will see your newly created tag listed:
![]()
So far so good. You created your Mautic tracking tag but it is not at work yet. You would need to assign this tag as a global tag for your Joomla site.
To do this, in the top right corner, you want to click "Options":

You will see the "Shack Analytics: Configuration" screen. Here you want to click inside the "Global Tracking Tag" box and then - on your Mautic tag:

You will see your Mautic platform tracking tag inside the "Global Tracking Tag" box:
![]()
At this point, the job is done. Now would be a perfect time to click "Save" or "Save & Close" last time.
Now you can go ahead and check the HTML source code of your Joomla site. You should see the tracking code of your Mautic platform nicely embedded between the <body> and </body> HTML tags:

Fantastic! Thanks to Shack Analytics, your Joomla site is now connected to your Mautic marketing platform.
What's Next?
What's Next?
Save $1,000's when you sign up for Joomlashack's Everything Club.
You will get your hands on our extensive range of over 20 extensions, plus legendary support!
Click here to join the Everything Club
About the author