jInbound is a great Joomla extension to generate leads and convert them to customers. You achieve this by setting a landing page with a web form. But according to DataProt, "45% of all emails are spam".
Last week, one of our customers asked how to protect their jInbound form from spambots. This is a four-step process:
- Generate your Joomla Site and Secret Keys with Google Recaptcha free service.
- Create a new jInbound field by the "captcha" type.
- Add this new field to your iInbound form.
- Enable a Joomla Captcha plugin of your choice. For my demonstration, I selected the "Captcha - Invisible reCAPTCHA".
In this blog post, I'll give you a walkthrough of this process.
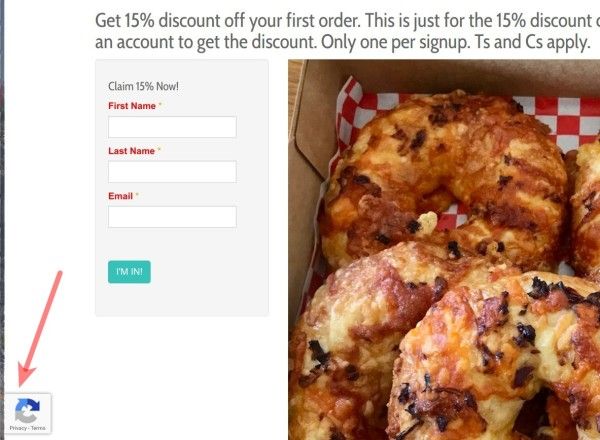
Here is a screenshot that was taken with the jInbound form protected by the "Captcha - Invisible reCAPTCHA":
Let's take a look at how to implement this anti-spam protection.
Step #1. Generate your Site Key and Secret Key with Google Recaptcha
Please, check out Step #1 of this tutorial to learn how to register your Joomla site with the "Google reCAPTCHA" free service. Once you sign up, you will be able to generate your Site and Secret Keys.
You will need to copy them in Step #4.
Step #2. Create the "captcha" field in jInbound
In this step, you are moving to your Joomla site and create the "captcha" type field in jInbound.
In Joomla administrator panel, you want go to "Components" > "jInbound Pro" > "Fields":
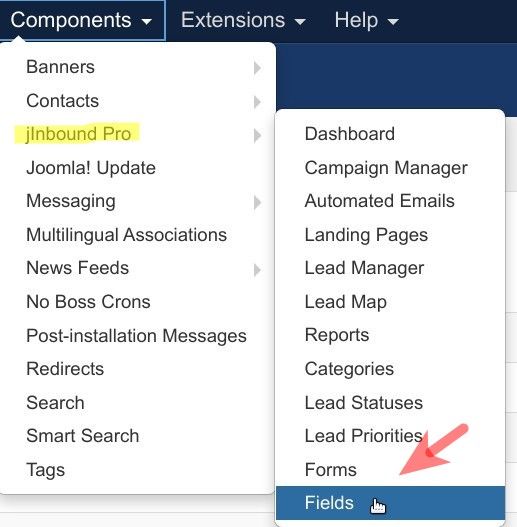
This will bring you to the "Fields Manager: jInbound" administrative screen. In the top left corner, you want to click "New":

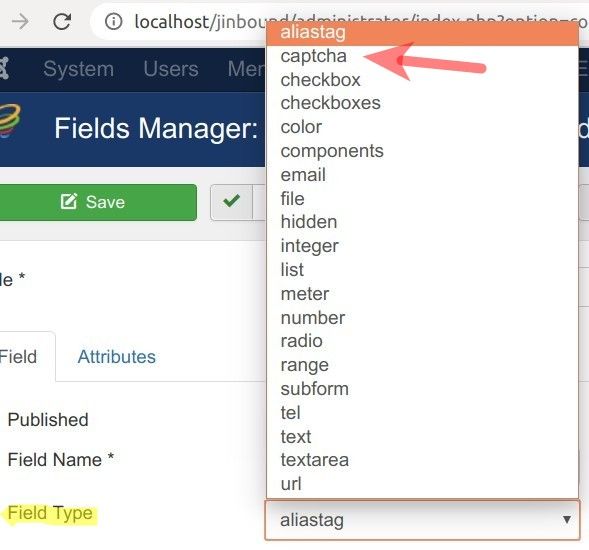
You will see the "Fields Manager: Add A New jInbound Field" screen. You need to click within the "Field Type" parameter, as in the image below.
This will bring up a list of field types. You want to click "captcha". You will see that the "Field Type" parameter has been set from the default "aliastag" to "captcha":
Moving forward, you want to click the "Attributes" tab:
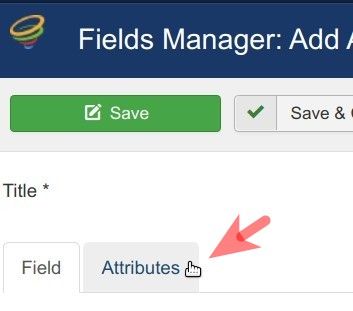
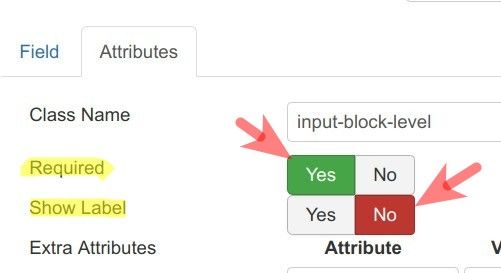
Set the "Required" to "Yes" and "Show Label" to "No":
You want to enter an informative title into the "Title" field:

Excellent! You can now click "Save & Close" to save your job.
That's all for this step. In the next step, you will add the new "captcha" field to the form assigned to your jInbound landing page.
Step #3. Add this field to the form of your jInbound landing page
On the left side of the screen, you want to click "Forms":
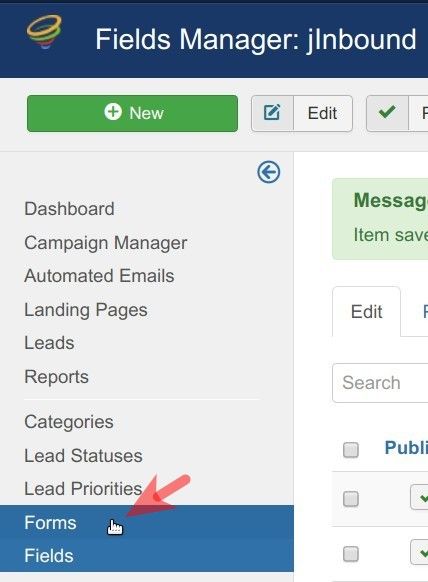
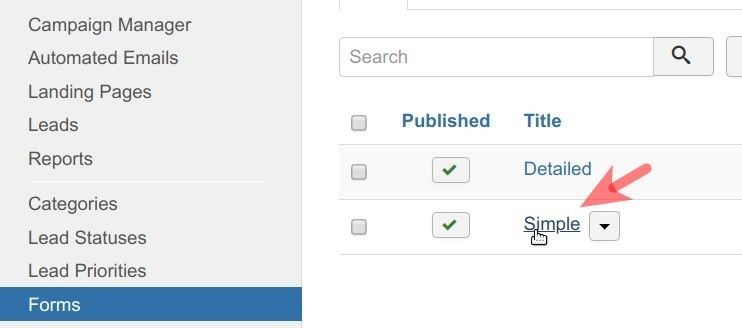
You will see the screen listing the forms that you can assign to your jInbound landing pages. You want to click on the required form. For my demonstration, I clicked on the "Simple":
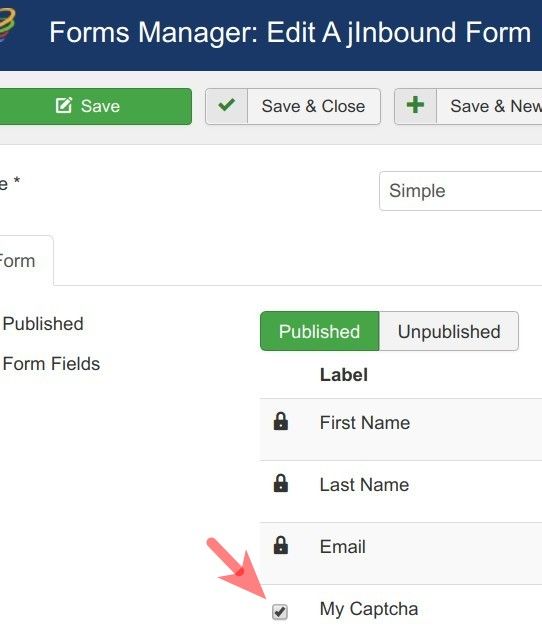
This will bring up the "Form Manager: Edit a jInbound Form" screen. You want to find the "captcha" field you created in the previous step and click inside its checkbox:
Now would be a good time to click "Save & Close".
Good job! At this point, your jInbound landing page has the "captcha" filed to protect a form of a jInbound landing page from spam. But the "captcha" field works based on one of the two Joomla's core "Captcha" plugins.
In the next step, you will finish this process by enabling one of them. For my demonstration, I selected "Captcha - Invisible reCAPTCHA".
Step #4. Enable a ReCaptcha plugin of your choice in Joomla
You want to go to "Extensions" > "Plugins":
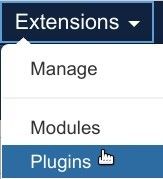
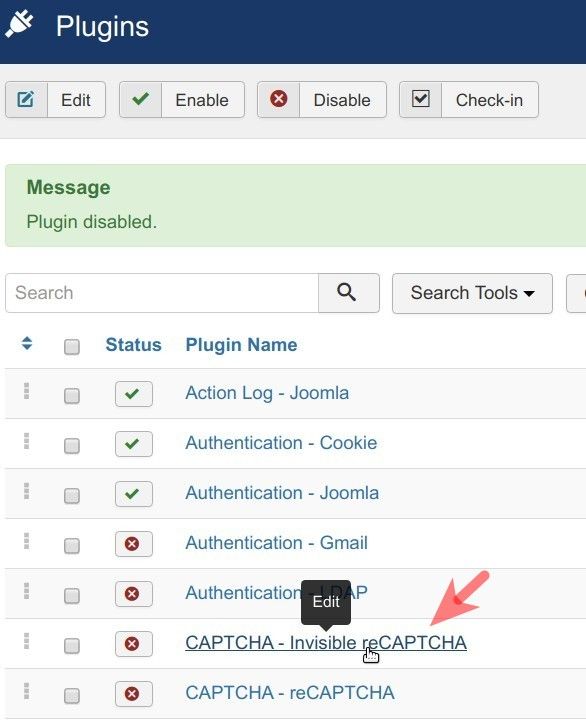
This will bring you to the "Plugins" screen with the list of Joomla plugins. Here you need to find the "Captcha - Invisible reCAPTCHA" and click on its title to open it up for editing:
You will see the "Plugins: CAPTCHA - Invisible reCAPTCHA" screen. Enable the plugin and enter the Site and Secret Keys into their respective fields:
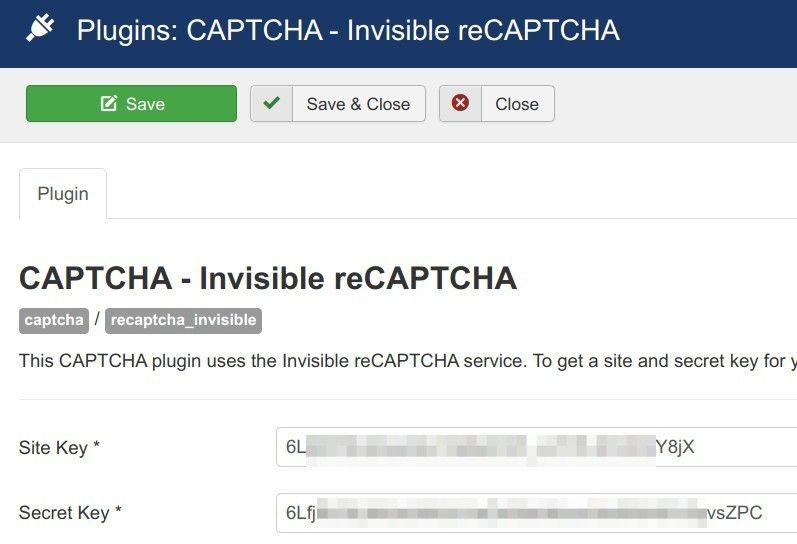
Click "Save & Close".
Excellent! This finishes the process of protecting your jInbound form from spam with Google Invisible reCAPTCHA.
Check the jInbound landing page at the frontend of your Joomla site. You should now see the Google Invisible reCAPTCHA:

What's Next?
Save $1000's when you sign up to Joomlashack's Everything Club.
You will get access to all our 31 extensions, templates, and Joomla training.

