Shack Forms is a popular Joomla form extension with more than 300 reviews at JED. One of the reasons for its popularity is its flexibility.
You can use it to create a regular checkbox. Then, with a small tweak, you can turn this checkbox into an "Agree to Terms of Service" or similar consent box with a clickable label.
When your form submitter clicks this label, they will see a popup modal box with a text of your "Terms of Service". In this blog post, I will give a guided tour of this feature.
You may have many reasons to create an "Agree to Terms of Service" or similar checkbox field in your Shack Form.
Your form submitter will view this field as a checkbox with a clickable URL:
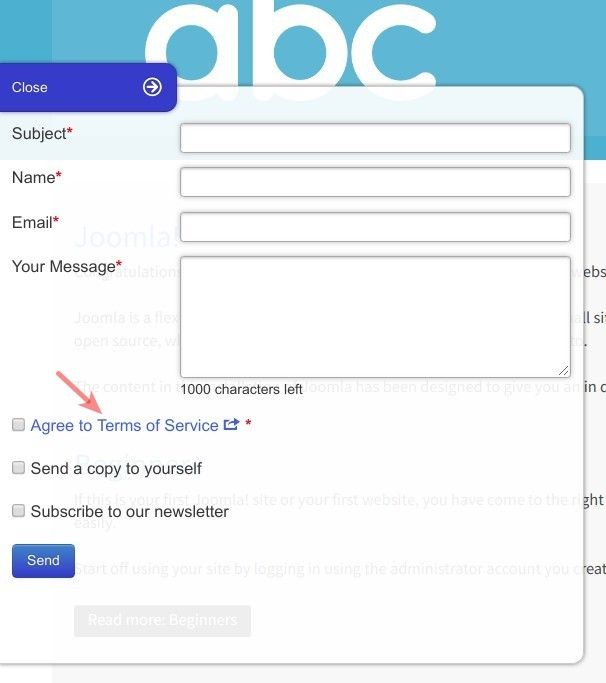
Once they clicked the URL, they will see a pop-up modal box with the text of your "Terms of Service" or similar text:
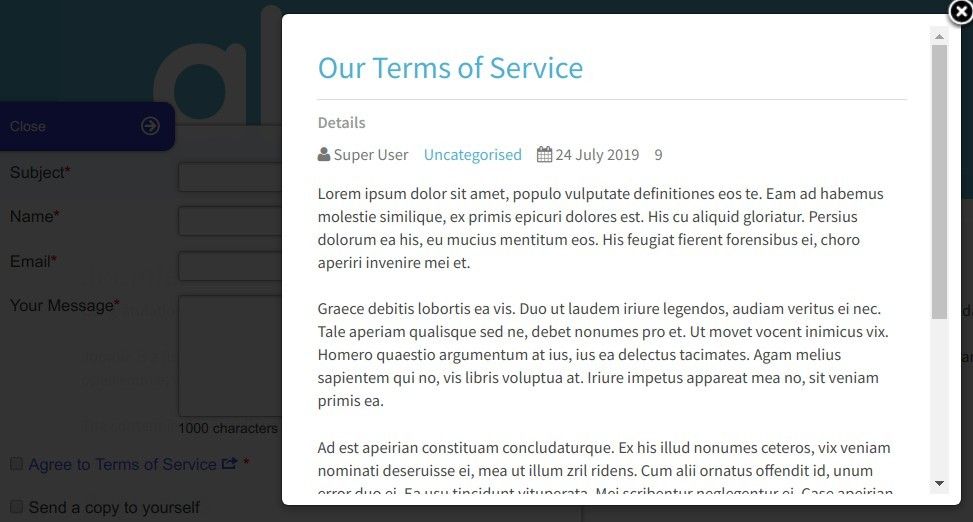
Creating such a field is a three-step process:
- You create a Joomla article with your "Terms of Service".
- Then you create a menu item for this article.
- You finish by creating "Agree to Terms of Service" field by the "Single checkbox" type.
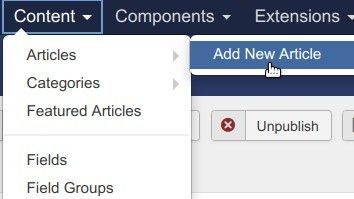
You start off in your Joomla administrator panel, by going to Content > Articles > Add New Article:
You create a regular Joomla article with your "Terms of Service". For my demonstration, I created an article with the title "Our Terms of Service":
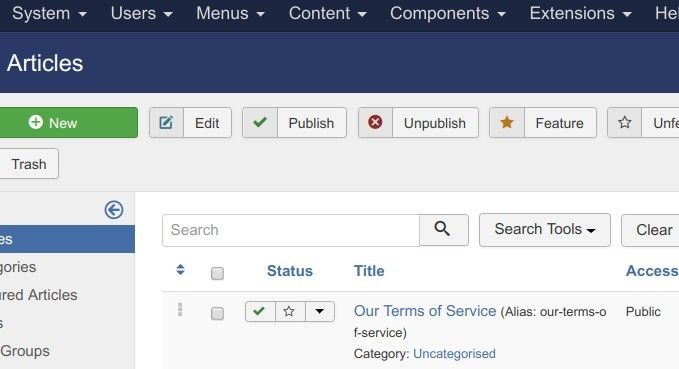
You now have a Joomla article with your "Terms of Service". To be able to display this article to your Shack Form submitter, your Shack Forms extension needs to know the article's URL.
To get the article's URL, you would create a menu item, pointing to this article. The menu item doesn't have to be displayed if you create it purely for your Shack Form. It can be hidden.
Very often, as a Joomla site growth, it needs a few hidden menu items. A good practice is to create a separate menu to keep all such hidden menu items in one place.

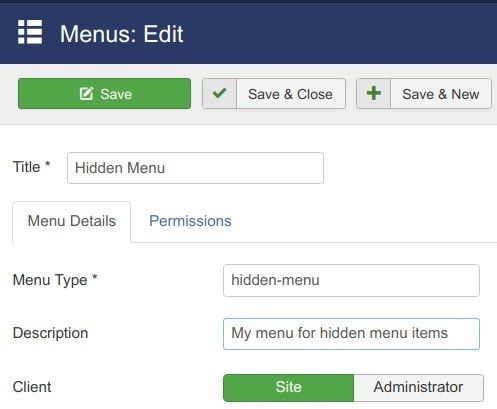
There you would create a new menu. I called mine "Hidden Menu":
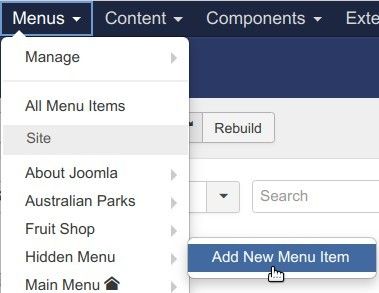
Then you would create a new menu item in this new Hidden Menu:
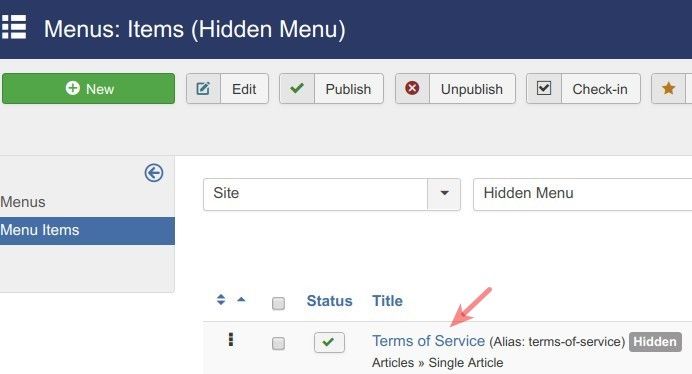
You would point this new menu item to your "Terms of Service" Joomla article. For my demonstration purposes, I called my hidden menu "Terms of Service":
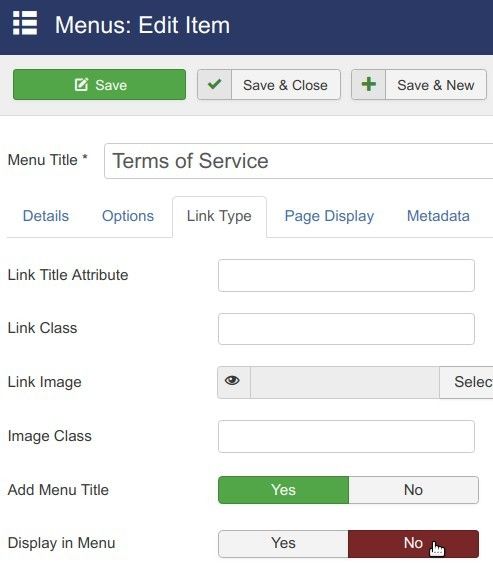
Note: to make this menu item hidden, you need to make sure to set its "Display in Menu" setting to "No" under the "Link Type" tab:
Keep in mind: you created this menu purely to get the URL of your Joomla article "Terms of Service". To get the URL, you would need to click Save.
Once you do, you will the URL in the "Link" field:
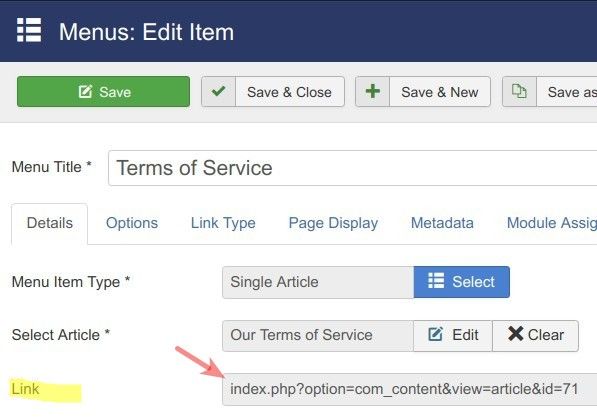
Excellent! You now have the URL of your "Terms of Service" Joomla article. You are now ready to create the "Agree to Terms of Service" checkbox field.
As with any field, you create it with the "Add new field" button:

You give this field a label. The label could be, for example, "Agree to Terms of Service".
Then you would go to the "Field type" and select "Single checkbox":
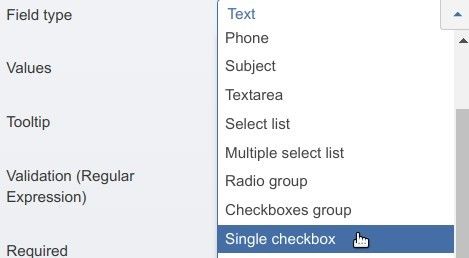
Once you click the "Single checkbox", you will see that the "Validation (Regular Expression)" gets replaced by "Agree to rules URL or HTML element ID":

You would go to this field and paste in it the URL you copied in the previous step. You also add at the end of your URL &tmpl=component. You end up with having in this field URL resembling index.php?option=com_content&view=article&id=71&tmpl=component.
Now all you have to do is to click "Required" and "Save & Close" to finish the process.
Excellent! Now when you check your Shack Form, you will notice the clickable "Agree to Terms of Service" checkbox, as you saw in the screenshot at the beginning of this tutorial.
When you click on it, you will see your Joomla article with Terms of Service in a modal box, once again, just as you saw in the screenshot at the top of this tutorial.
What's Next?
What's Next?
Save $1,000's when you sign up for Joomlashack's Everything Club.
You will get your hands on our extensive range of over 20 extensions, plus legendary support!

