So you want to set up an image gallery on your Joomla site?
There are many options for a gallery component. We're going to look at one option called Event Gallery.
Event Gallery features a fully responsive, adaptive layout system, and will get you started in no time. This article will deal with the basic setup. The best thing for you: the main component is available at no cost.
Before we start, I want to introduce you to some basic terms. I'm the developer of Event Gallery and it started as a component to display images of events.
So when using Event Gallery, see an event as a folder where you can store images in. Don't be afraid, you can use Event Gallery for almost every kind of gallery.
As with Joomla! articles there is no initial hierarchy. All events are located at the same level; there is no nesting at all. You can use categories, tags and menu items to create any hierarchy you like.
Thumbnails are always delivered to the browser using the correct size. Unlike other components, there are many different thumbnail sizes available to reduce the necessary bandwidth to a minimum. Thumbnails are created on demand and are cached to avoid any performance issue. Original files are never used to display them directly on the page.
Step #1. Download and install
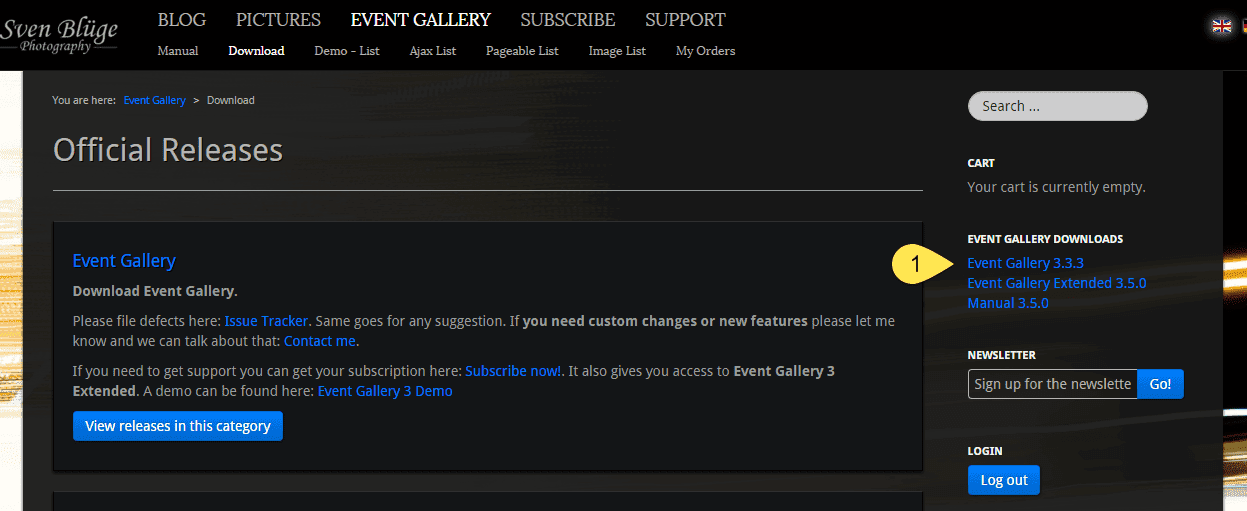
At first, you need to download the install package. Just open Joomla Extension Directory and click the Download button. You can find the download in the right column of the page which opens now.
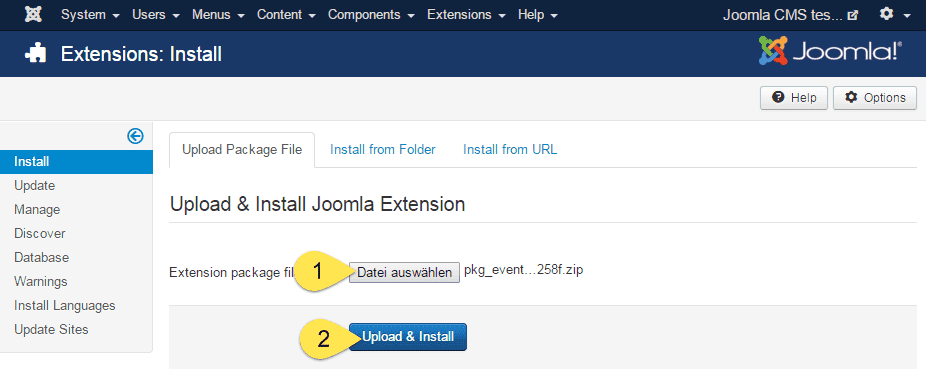
Now grab that downloaded package zip file and install it using the Joomla! Extension Manager. Don't extract the zip file. Just install it as it is.
Congratulations, you installed Event Gallery. So far this was easy, and it will stay that way.
Step #2. Add images
Event Gallery manages your images in a flat hierarchy just like Joomla! articles. You can create new events (aka album or folder) in the Joomla! backend.
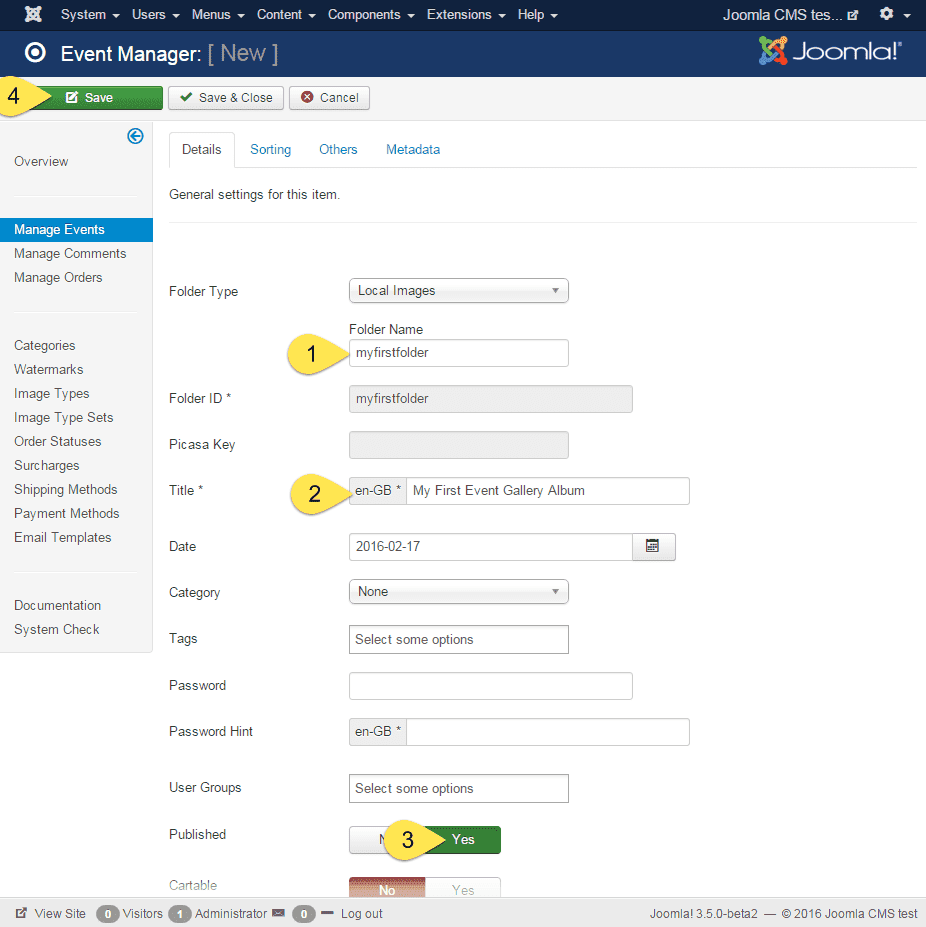
Use the components menu in the main menu, select the menu item Event Gallery and click on Manage Events in the left column. You see an empty list so firmly press the New button in the top toolbar. For now, you just have to enter the folder ID (1, basically the name of the physical folder where we upload the images later on), a title (2) and you should mark this event as published (3). Hit the Save button if you're done.
Images can be located on your servers disk, in a Google Picasa/Google+/Google Photos Album or a Flickr imageset (starting with Event Gallery 3.5).
Now we can upload the first images. After you saved the event for the first time, new buttons will appear in the toolbar.

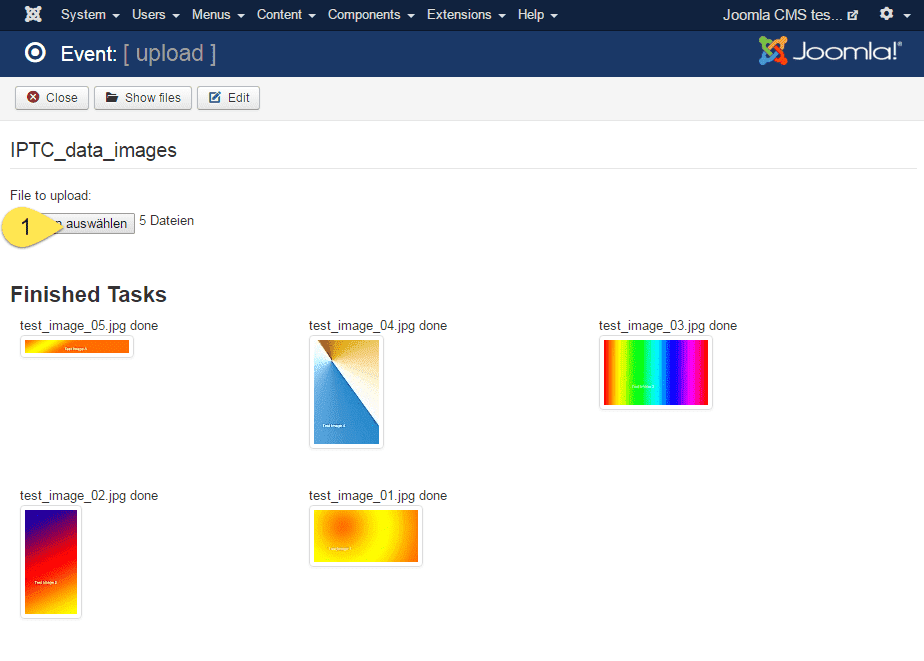
Use the file selection button to select the files you want to upload. The upload will start automatically.
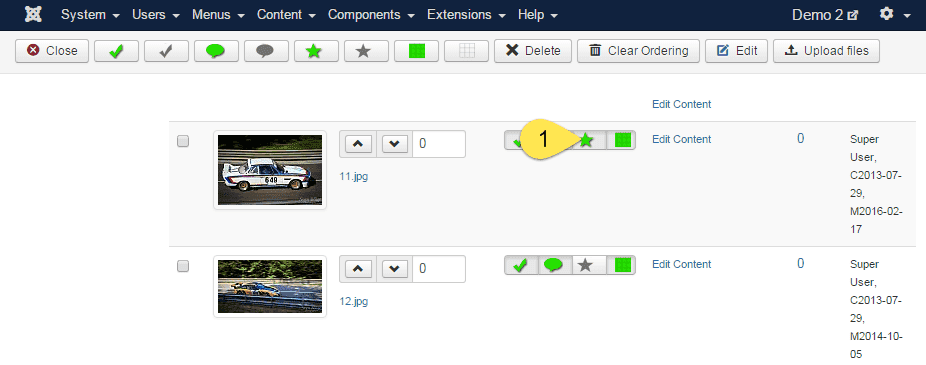
If you want to select a special image as the main image of the event/album, just click the Show Files button in the top toolbar. Use the star button next to the image you want to select to mark it as the main image.
Now we're ready to visit the front end for the first time. Let's create a menu link in the next step.
Step #3. Create a menu item
Now we need a new menu item to display the gallery. There are several options: we can link to a list of events or to a single event only. Let's link to a list of events for now. Create a new menu item using the Menu Item Type Events - List.
Now you can access Event Gallery with a new entry in your menu in the frontend. Check the different tabs of the menu item so see all the different options. There are multiple layouts available which you can configure in the components global options or at the menu item. Don't forget that if you change a global setting and don't see any change. You might have overridden this setting with the menu item.
If you want to learn more about the available layouts please have a look at this page: Event Gallery Layouts. Here are some examples:


Special features
There are a lot more features to discover:
- protect your events using a simple password or make them visible just for a special user group
- add a watermark to your images
- enable social sharing by X / Twitter, Facebook and others
- use categories to create a hierarchy
- tag your images (with native Joomla! tags starting with Event Gallery 3.5
- multi-language support
- display an event directly in an article (Event Gallery Extended)
- use modules to display images on every page (Event Gallery Extended)
If you can't find an option to configure a layout aspect you can add some lines of CSS to your templates custom CSS file and fine tune the layout of Event Gallery. Check the manuals FAQ section if you need some hints.
Sell your images
Now you can already display your images on your site. But what now? Do you want to sell them as well? No problem. Just mark an event as cartable, enable the cart and show the components cart in the components options. Doing this will allow people to add images to an shopping cart and buy them. To define different formats create image types. Combine them to image type sets and assign this set to an event. Some examples are already there so you can play with the options right from the beginning.
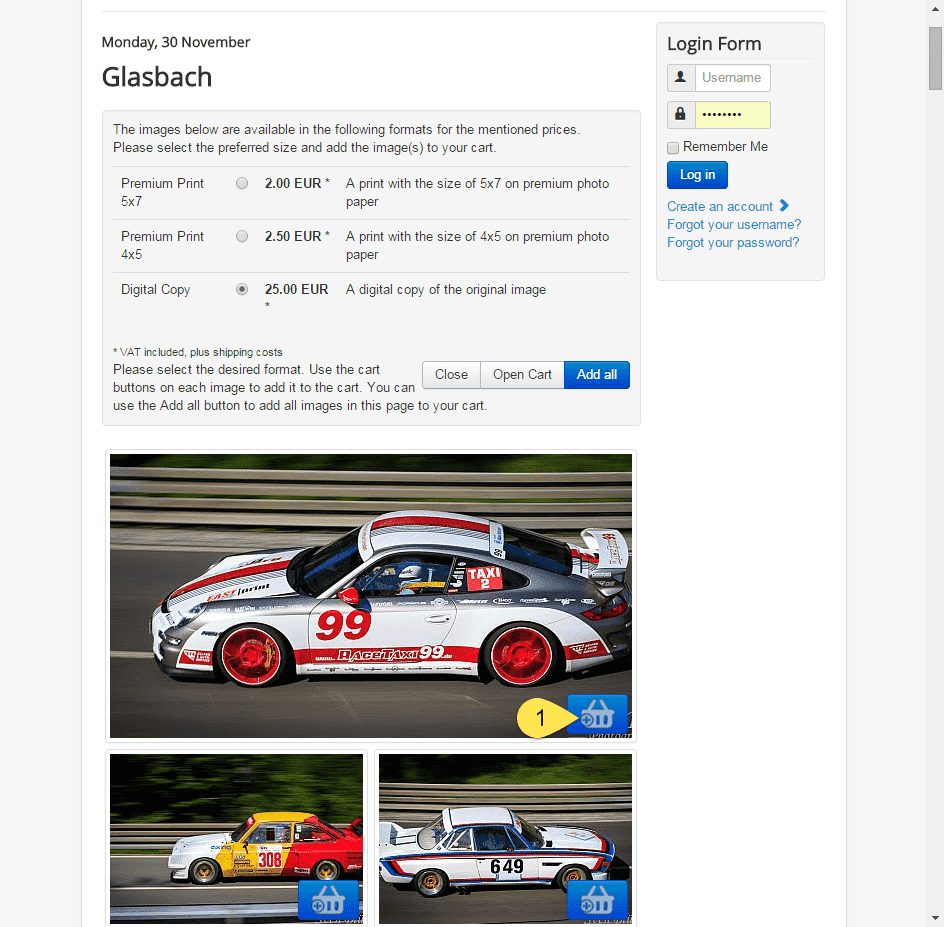
Event Gallery Extended offers some additional features here. There are plugins for Paypal payment and direct downloads available so you can sell your stuff automatically. A module can display the cart on every page. Even if you don't charge money for your images you can use the cart to let people collect the images they want, let you know about them by mail or download them directly.
Summary
Event Gallery is a free Joomla! gallery components which allow you to use local images as well as images from Picasa and Flickr on your site. It's easy to use and offers a lot of layout options.
If you need more features, the latest version or modules and plugins grab Event Gallery Extended.
