 Not all of the pages on your Joomla sites need to look alike. Some sites have different colors and layout for different topics. Some sites even have radically different desigs for different areas of the site. Joomla allows you to do both.
In this tutorial we'll show you how to use different templates, or different styles of the same template, for different parts of your Joomla site.
Step 1: Understanding Joomla's Default Templates
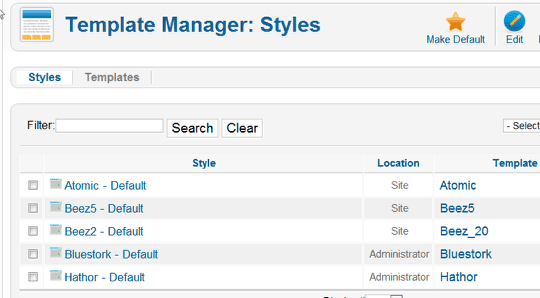
Joomla comes with three basic templates pre-installed: Atomic, Beez5 and Beez2.
These three are labeled as "Site" and are ready for public display. Bluestork and Hathor are labeled as "Administrator" and only for your admin area. You can also install other templates from commercial sources or develop or customize you your own.
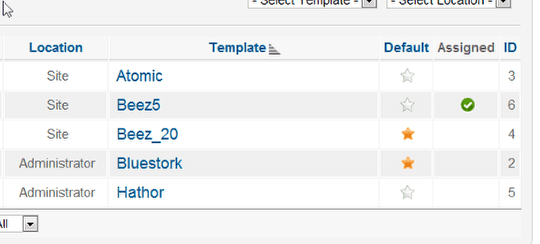
There will always be a default template assigned. You will know which one is the default template by the gold star that is in the Default column as in the image below:

You can change the default template at any time just by clicking on one of the blank stars, and when that one becomes gold, that is now the default template.
When you first install Joomla, the default template is set for Beez2. If you click the template name, you will be able to edit the template options.
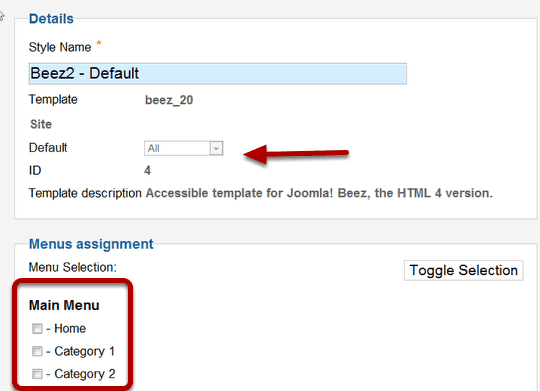
You can see, in this example, next to Default it says All and that the boxes under Menus Assignment are blank. If it's the default template, you don't need to assign it to anything, it will automatically be used unless something else is specified.
Step 2. Putting a Different Template on Different Joomla Pages
Let's take a look at the editing selections on another template and see how to assign it to a specific category.
- Close the Beez2 template.
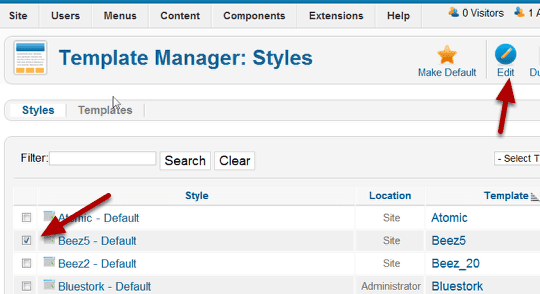
- Open the Beez5 template for editing.
- Click the checkbox.
- Click Edit.
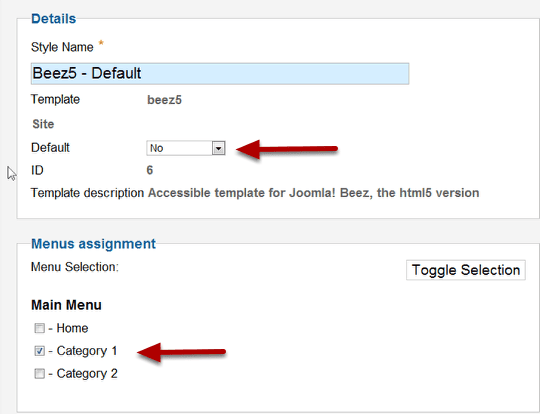
- The system of placing different templates on different pages is based entirely on menu links. Go to "Menu assignment" and you can choose which menu links this template will appear on.
- Default is set to No because we already have another template set as default.
- Click the check mark next to Category 1 or whatever category you might have to use.
- Save this assignment and then check your website.
- After you save you will see that you have Beez_20 set as default.
- Beez 5 is assigned and that is indicated by the green check mark.
- Here's what the home page looks like with the default template, Beez2:

- Here's what the Category 1 landing page looks like with the Beez5 template:
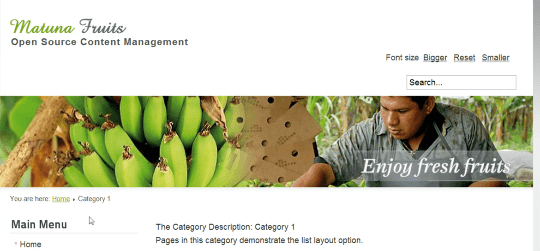
At this point it's worth reminding you that changing the template will not change the content. However, it will change the header image, logo, typography and the module positions. This means that you can't just make a switch without doing some extra work.
In this case you will need to modify both the template logo and the module positions to suit your overall style.
Step 3. Understanding Different Module Positions with Different Templates
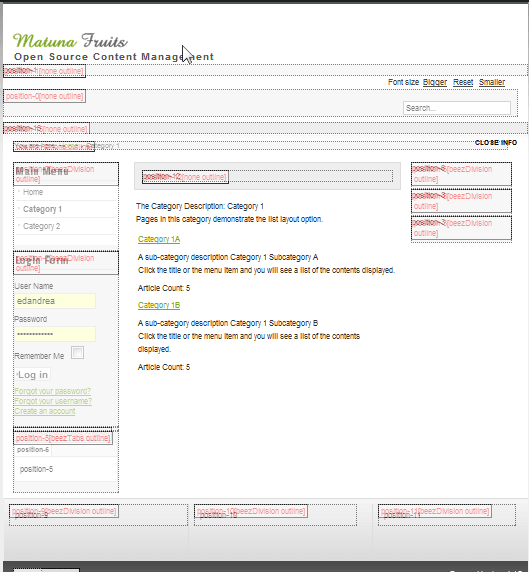
The module positions for Beez5 (above) and Beez2 (below) are almost the same, so it's not a big transition. However there are differences.
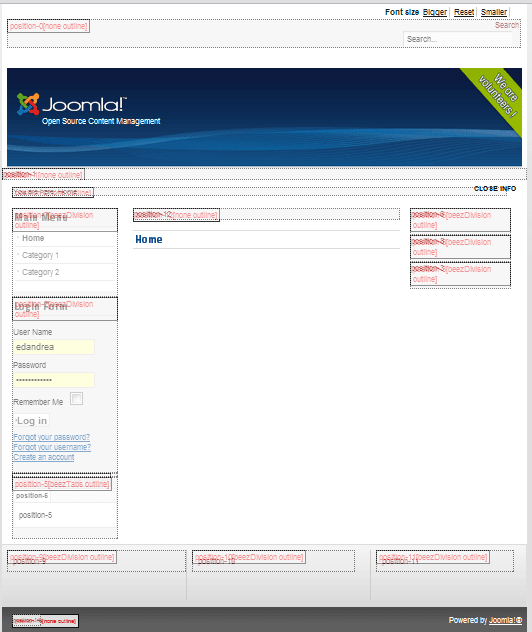
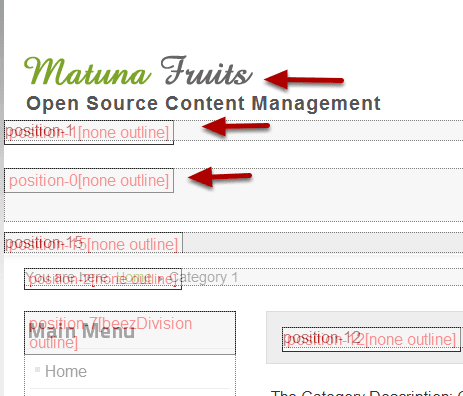
In Beez 2, position-0 is above the logo and position-1 is below:
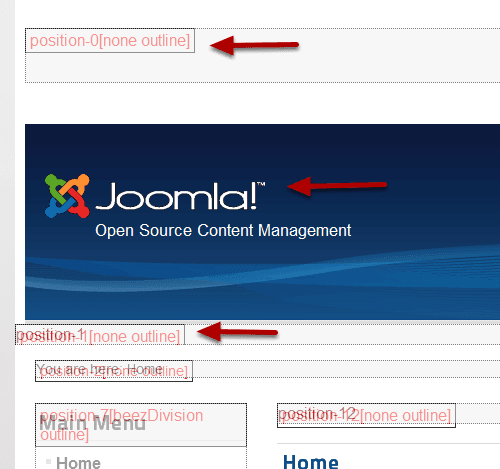
This is a fairly minor change but a good example of how templates can differ with their module positions. In this case it's a relatively simple example because all the modules also have the same names.
But what if the module positions are completely different, in different places with different names?
- Go back to the Template Manager and assign the Atomic template to another category. I've assigned it to Category 2 on my sample site.
- You will now see the Atomic template live on your some pages of your site. It has completely different module positions as you can see in the image below:
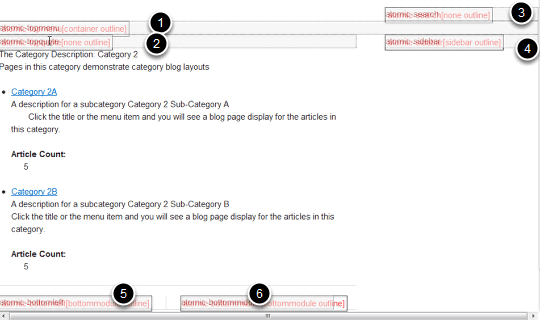
The only module positions showing on this page are these:
- atomic-topmenu
- atomic-topquote
- atomic-search
- atomic-sidebar
- atomic-bottomleft
- atomic-bottommiddle
If you want to have this template on your site, in addition to Beez2, you will need to do more work. There is almost no chance that a module position that works with Beez2 will also work with Atomic.
Step 4. Add a Menu Module for the New Template
- Go to Extensions > Module Manager and click New.
- Choose Menu.
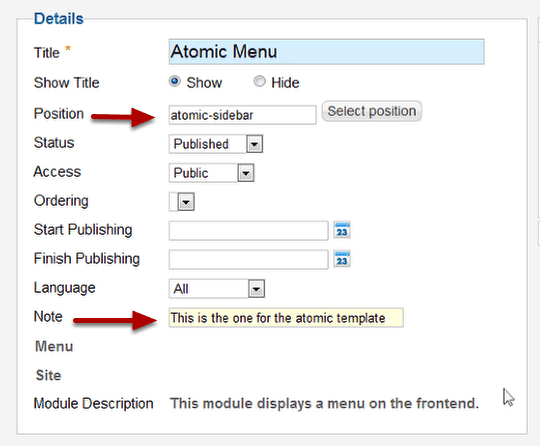
- Assign your new module to the atomic-sidebar position.
- A new feature in Joomla 2.5 is the Note section. This helps you keep track of modules as you get more complexity.
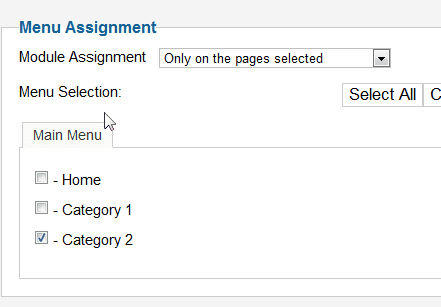
- Now we're going to assign the module to specific pages.
- Choose "Only on the pages selected".
- Check the box next to the pages you want.
- Now I have the menu assigned to the sidebar. You might notice that it is a horizontal menu and the space for it is somewhat limited. We'll need to try again to find a better fit.

- Go to your Module Manager and move the menu to the atomic-top menu position. It should now look like the image below:
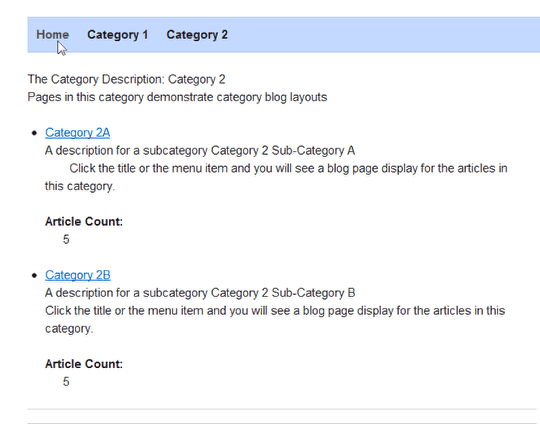
That choice was much better. I did this just to illustrate the kinds of problems you run into when you start adding templates without research. There are some ways around this that make it a little easier. One way would be to use templates based on a framework system. They are ideally suited to this type of modification because the module positions from one template to another always stay the same. The only things that change are the graphic design and the color scheme.
Some examples would be the Gantry Framework, the JA-T3 framework, or the Blueprint framework. The atomic theme is actually built on the Blueprint framework and is intended as a base theme.
You may already have a wonderful template that is not based on a framework and want to use that. Probably a lot easier than changing everything from the ground up. Here's how you can use a copy of an existing template. Use it as a theme for alternate sections or pages. The big advantage is that everything will be in the same place, and you can get the changes you want with CSS and avoid major reworks.
Step 5. Template Styles vs Different Templates
Rather than use an entirely new template for different pages on your site, it is possible to simply create a slight variation on your default template. This is a new feature in Joomla 2.5. It allows you to create more subtle differences on each page without needing to do all of the steps we outlined above.
- Go to the Template Manager.
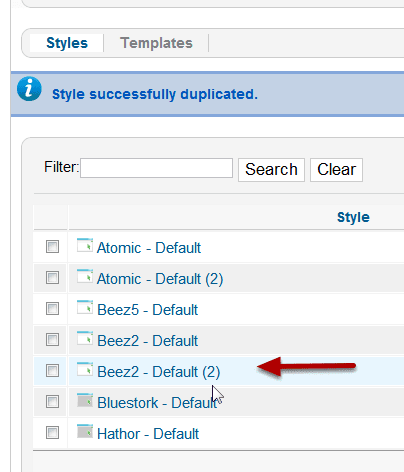
- Place a check next to the one you want to duplicate. In this case we'll use Beez2.
- Click the Duplicate icon.
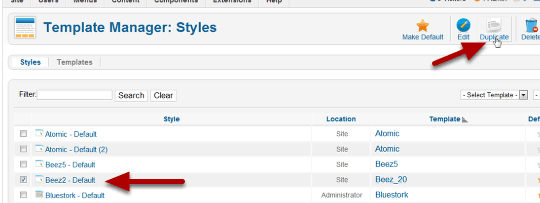
- Put a check next to Beez2- Default (2).
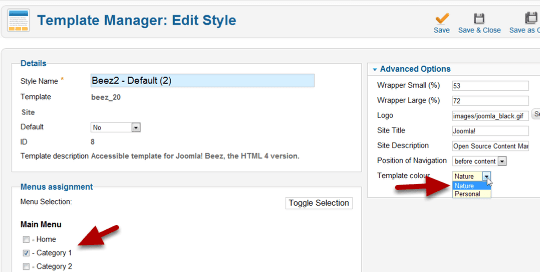
- Click Edit.
- Beez2 comes with two color schemes, Personal and Nature. Choose Nature from the dropdown.
- Assign the template style to a category under Menu assignment.
- Note that there are other options you can change such as the logo, site title, and position of the navigation.
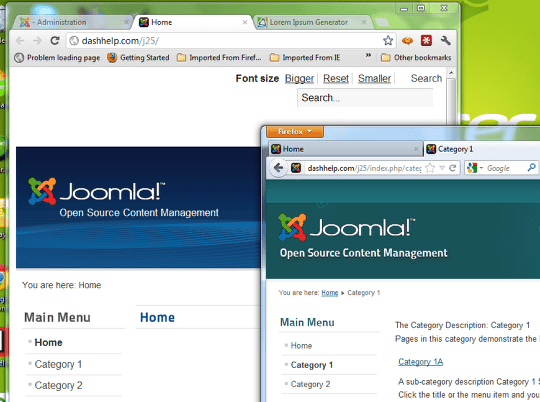
- You now have one site two different styles of the template assigned to different menu links.
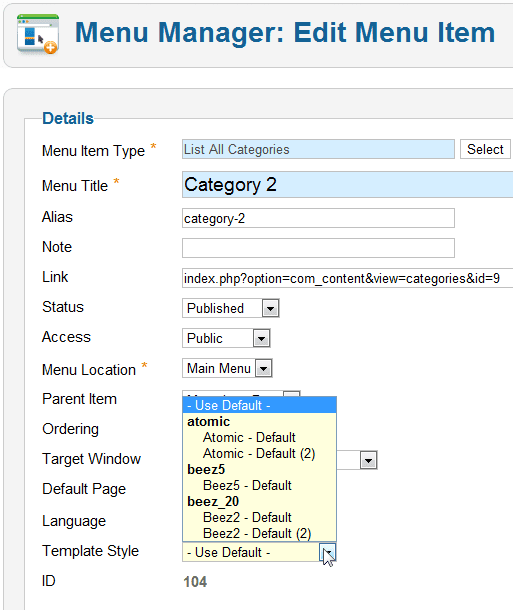
- You can also do the template assignments as you create the menu items.
- When you are in the menu manager, you can assign the template style as you create the menu item.
