 During the last 8 years, developers have created 10,000's of components for Joomla.
Some of the work involved in creating an extension can be fairly tedious. There are installation packages to build, database tables to created and layout files to generate.
Component Creator from Jensen technologies allows you to automate all of those tedious tasks. It will help you to create your own installable components without typing a single line of code.
Here's how Component Creator works:
Step 1. Create an account
- Create a user account at https://www.component-creator.com.
It is free to use Component Creator for simple components, although they do charge for some additional features and for support.
Step 2. Create your first component
- After logging in, click the button: "Add component".

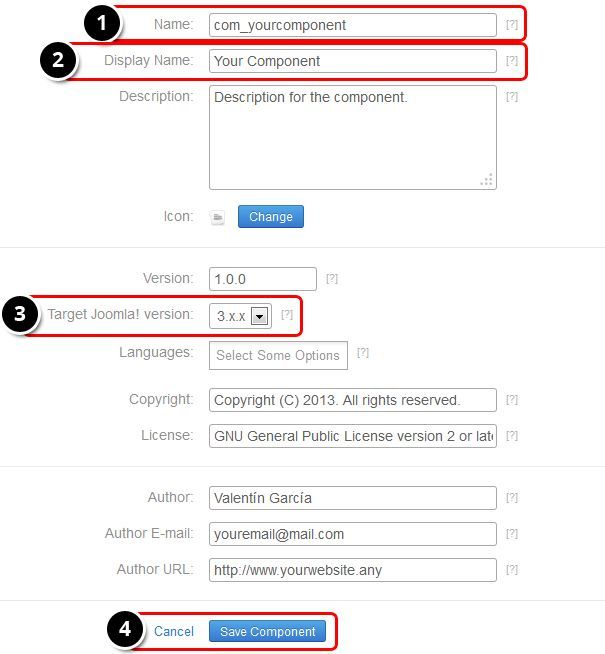
Add the basic information. The most important fields are as follows:
- The name, use the prefix com_ like: com_yourcomponent - be sure you use a unique name in this field.
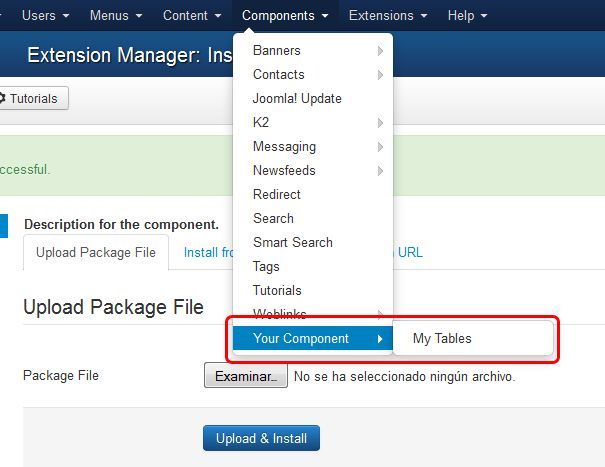
- The displaying name. This one will be displayed in your menu under Components >> Your Component.
- The target version is the compatibility for Joomla. Supports 1.6 to 3.1.
- Be sure all the fields are filled before clicking "Save component"
- You will get a success message at this point:

Step 3. Add tables
Adding a table is the way that you will get a backend and frontend interface for managing content.
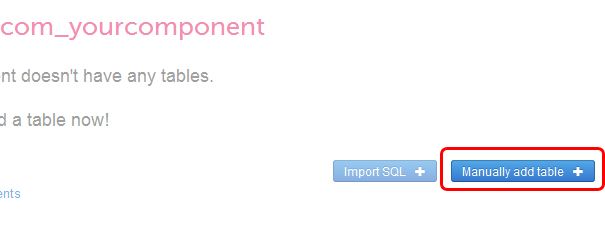
- Click "Manually add tables".
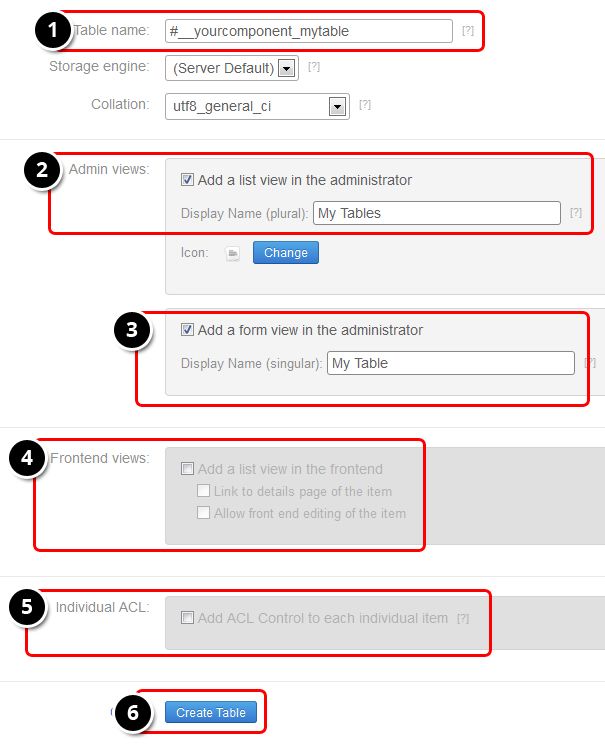
- Add the table's name using as prefix #__yourcomponent_ like: #__yourcomponent_mytable
- Mark the checkbox to create the list view in administrator. Use the plural of the name to displays a label, like: My Tables
- Mark the checkbox to add the form view in administrator. Place the label name for this one.
- Mark the checkbox to enable the Frontend view.
- Mark the checkbox to enable the ACL Control.
- Be sure the fields are filled properly before clicking "Create table"
You will get a success message. Also, some standard fields are added automatically, such as id, ordering and state.

Step 4. Add fields to your table
You may need to add custom fields to manage and display custom content.
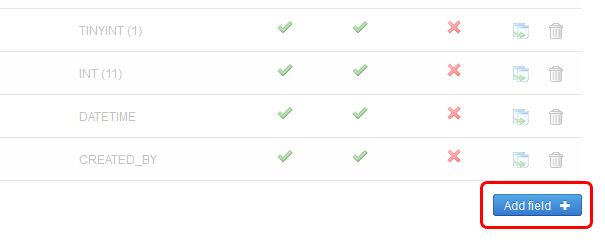
- Click "Add field"
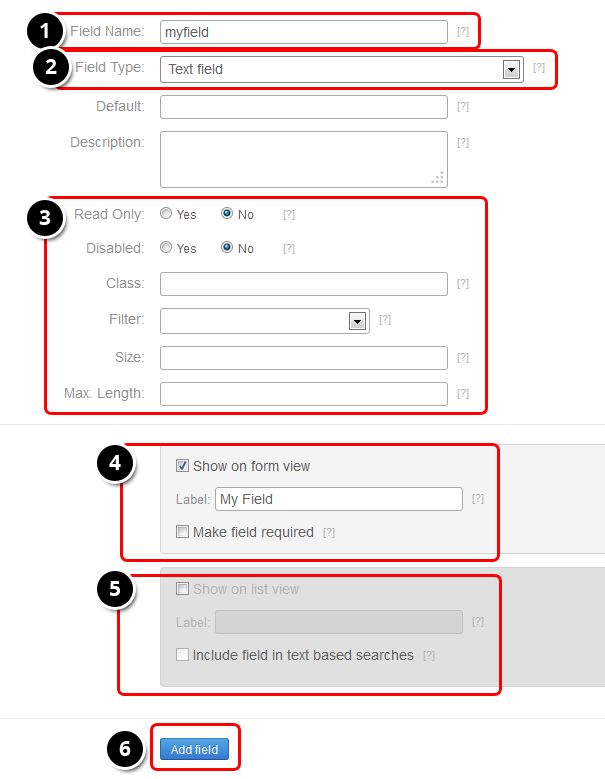
- Field name is the unique name; use lowercase without spaces.
- Fieldtype; like text, textarea, checkbox, radio buttons, etc.
- Optional fields.
- Mark the checkbox to enable the form view and assign a custom name.
- Mark the checkbox to enable a list view.
- Be sure the fields are filled properly before clicking "Add field"
Step 5. Build the component
Now, we have a custom component with a single table. Now its time to generate the installer zip package.
- Click "Build" on the right or in the list of your components.

You'll get a message saying the the extension was created. The next extension file will have a name like this: com_yourcomponent-1.0.0.zip.

Step 6. Install the component
The component can be installed in the regular way. Go to Extensions >> Extension manager >> browse the zip file >> Upload & Install
To see your component in action, go to Components >> Your Component.
