The Joomlashack Blog
Change Your Joomla Database Login
- Written by Steve Burge Steve Burge
- Published: 26 May 2010 26 May 2010
This tutorial will show you how to change or verify the database login to your Joomla site. People will sometimes need to do this if:
- Their site can't access the database
- They've been hacked and need to make the site more secure
Login to Your Hosting Account
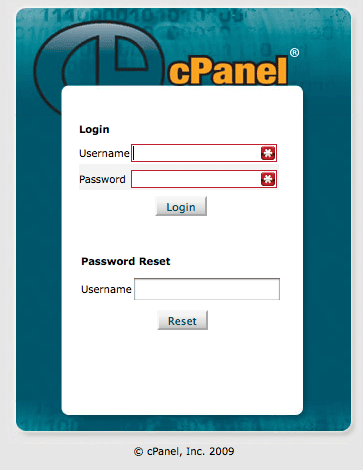
Access Your Database Area

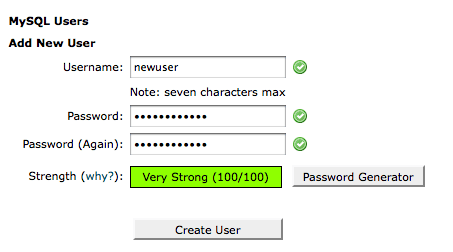
Create a New Database User
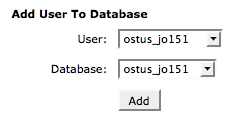
Add The New User To Your Database
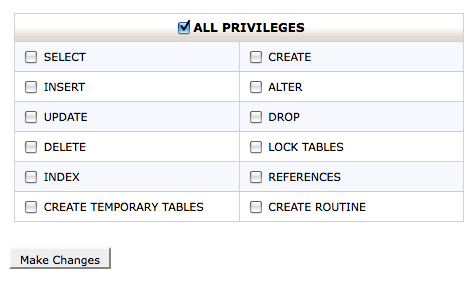
Give the New User All Privileges
Login To Your File Manager
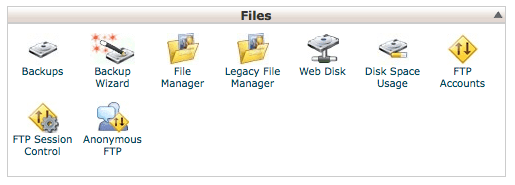
Open Configuration.php
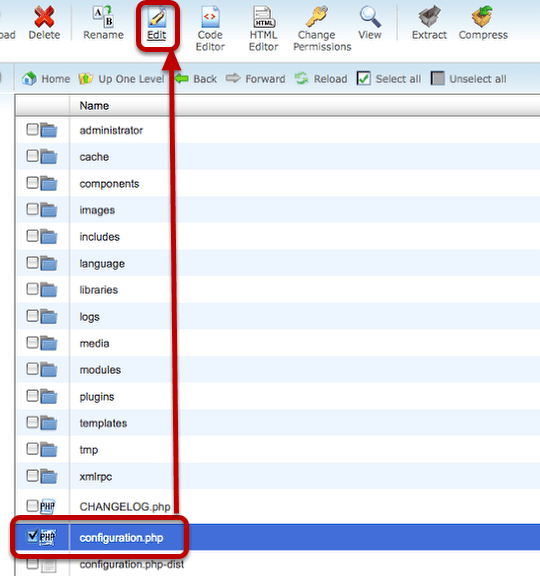
Update the User and Password Details
Take Your Joomla Site Offline
- Written by Steve Burge Steve Burge
- Published: 26 May 2010 26 May 2010
This is Part 1 of a series of tutorials on Joomla's offline page:
- Part 1 (Beginner): Take your Joomla site offline
- Part 2 (Intermediate): Customize your Joomla offline page
- Part 3 (Advanced): Create a new Joomla offline page
Joomla has a very nice feature that allows you to test your site in complete privacy. You might just need your site offline for a few minutes, you might want to show it privately to a client, or you might want to keep the site offline for weeks while you build it. Either way, this is a good solution.
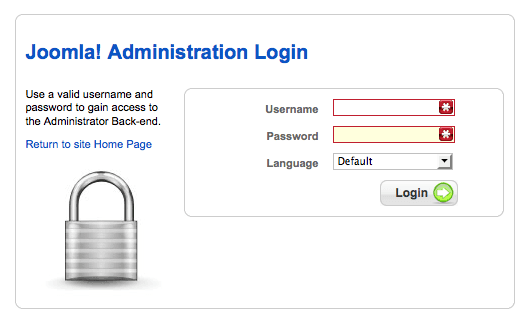
Login To Your Joomla Site
Go to Global Configuration
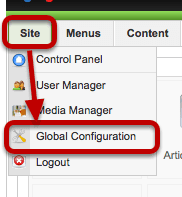
Click on Site then Global Configuration
Site Offline

Set "Site Offline" to "Yes" and then click Save
Visit Your Site
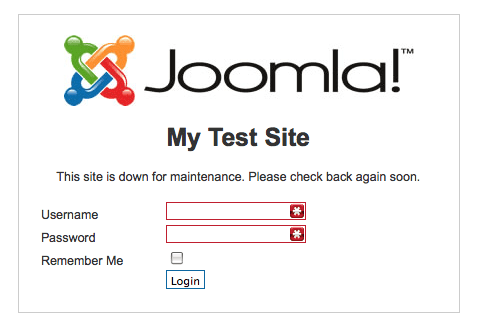
Now when you visit the front of your site you'll see a screen like this. Anyone who has a Super Administrator, Administrator or Manager account can login and view the site as normal. Everyone else will only be able to see the splash. You can keep search engines, rivals and all other unwanted guests out of your site until you're ready.
If you'd like to take this one step further and customize your offline page with a new logo and text, click here for the next tutorial.
Video Showing How to Take Your Site Offline
Joomla Save and Apply Buttons
- Written by Steve Burge Steve Burge
- Published: 13 May 2010 13 May 2010
Save and Apply Buttons
Many, many screens in a Joomla site have both "Save" and "Apply" Buttons. This tutorial will show you the difference between the two.
Go to SIte >> Global Confiuration
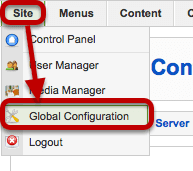
Change the Site Name Field
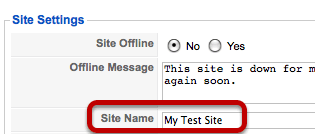
Change the "Site Name" field to something different (this is just an example, you can try changing anything on any page with a Save and Apply button).
Click Apply

- Click on Apply
- Notice that there's a message "The Global Configuration details have been updated"
- Notice that you're still on the same "Global Configuration" page
Click Save
This time we'll try clicking the "Save" button.
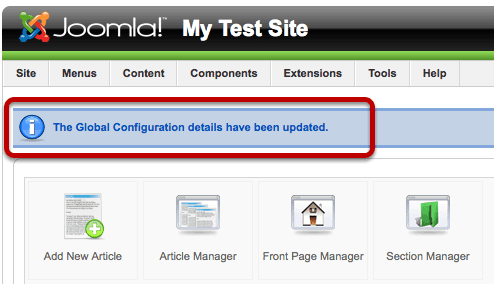
This time you still get the "The Global Configuration details have been updated" message but now you've been logged out of the screen.
So what's the difference between Save and Apply?
- "Save" saves your changes and forces you out of the current screen
- "Apply" saves your changes but keeps you on the current screen
Joomla Text Wrapping Around Images
- Written by Steve Burge Steve Burge
- Published: 13 May 2010 13 May 2010
This tutorial will show you how to get text to wrap neatly around your images inside Joomla articles.
Place Your Cursor in an Article
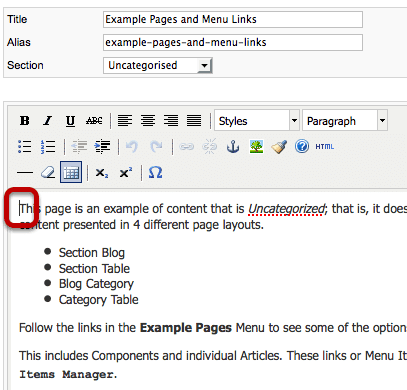
I want my image to appear at the top of the article so I'm going to place my cursor before the first text.
Use the Image Button

Scroll to the bottom of the article and click on the Image button
Click on an Image
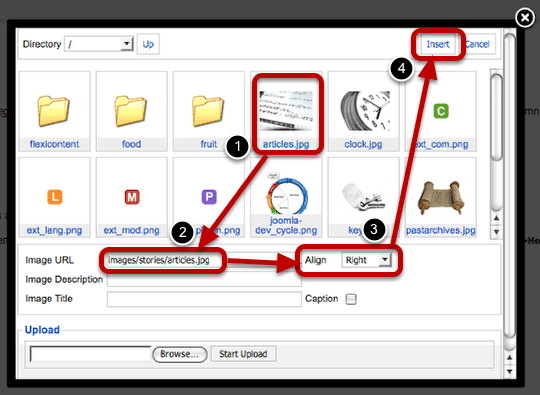
Click on the image you want to use and its location should appear in the "Image URL" field. Then (and most importantly) chose either "left" or "right" from the "Align" dropdown. Finally, you can can click on "Insert".
Example of Align Right
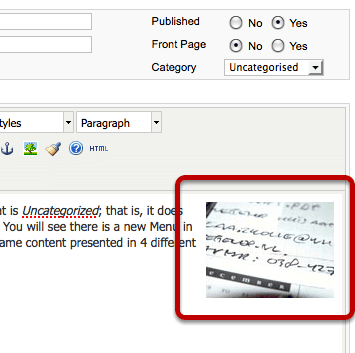
This is what your image and text will look like if you choose "right" in the "Align" dropdown.
Example of Align Left
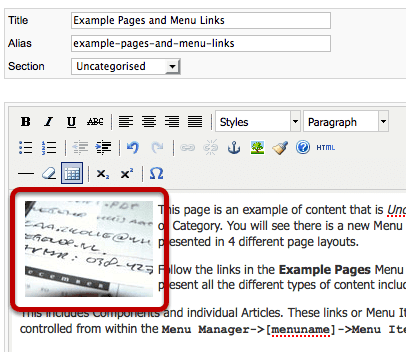
This is what your image and text will look like if you choose "left" in the "Align" dropdown.
Add Code to Your Joomla Site Footer
- Written by Steve Burge Steve Burge
- Published: 11 May 2010 11 May 2010
This will show you how to add code to your Joomla site footer. Often websites such as Google Analytics will ask you to place code at the very bottom of the your site. They do this so that if their code doesn't load, your site still will. If the code was at the top of the site and had a problem, your whole site would go down.
Login to Your Joomla Site
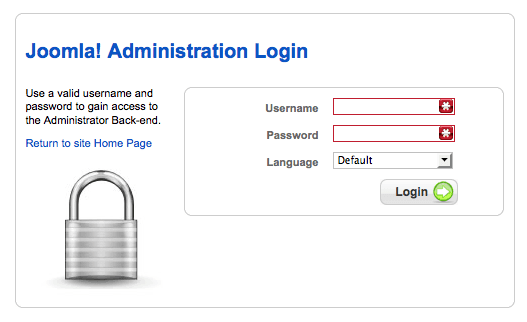
Go to example.com/administrator and login to your site.
Go to the Template Manager
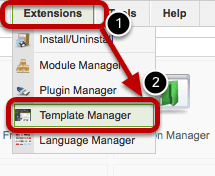
Click on "Extensions" and then "Template Manager"
Open Your Default Template
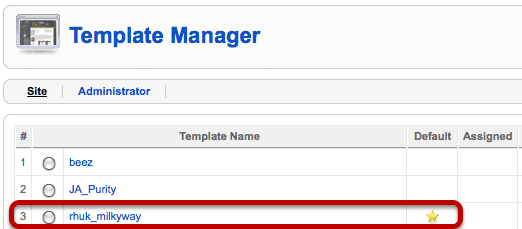
rhuk_milkyway is my default template so I'll click on that name.
Open the Template Files
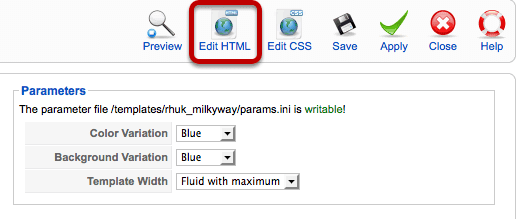
Click "Edit HTML" in the top-right corner.
Enter Your Code

Scroll all the way to the bottom of the page and post your code right above the final lines: . Then click "Save" in the top-right corner and you'll have finished.
Adding a Joomla Template Variation
- Written by Steve Burge Steve Burge
- Published: 10 May 2010 10 May 2010
This tutorial was written for a student who wanted two copies of this template - one narrow and one wider. More advanced frameworks such as Gantry can do this, and Joomla 1.6 will be able to do it.
However, the easiest way to do this in Joomla 1.5 is to make two copies of your template that you can modify separately. Here's how to do it:
Login to Your Hosting Account
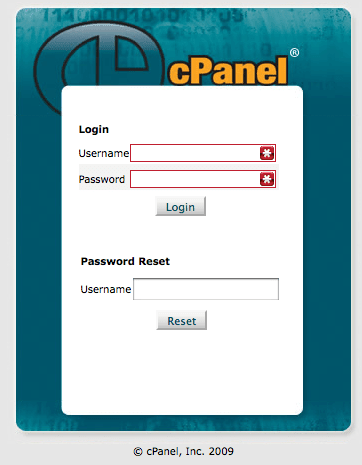
You can login via your hosting company's site or you could go via FTP. Essentially you just need a way to get to your files.
Find Your File Manager
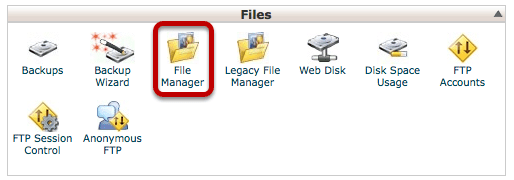
Every hosting company should give you access to your files, althought the access may be in different places with each host. This is an example from the popular CPanel software.
Find Your Templates Folder
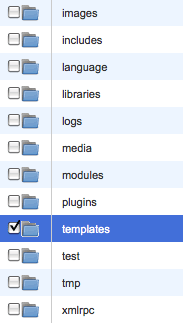
We're going to open up the folder that contains our templates.
Copy Your Template
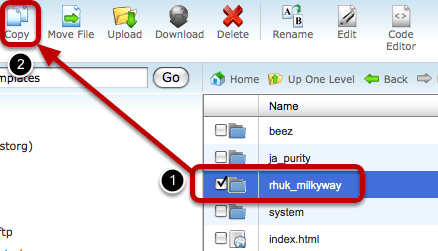
Select the "rhuk_milkyway" folder and click "Copy"
Choose a New Template Folder Name
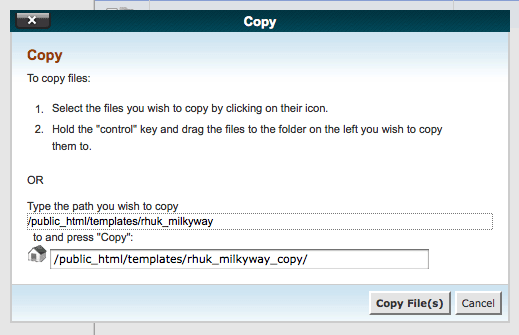
Choose a new name for the folder. In this case, I'm simply going to call it "rhuk_milkyway_copy" and click "Copy File(s)"
Open Up Your New Template Folder
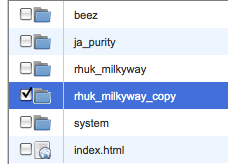
Open Up the templateDetails.xml File
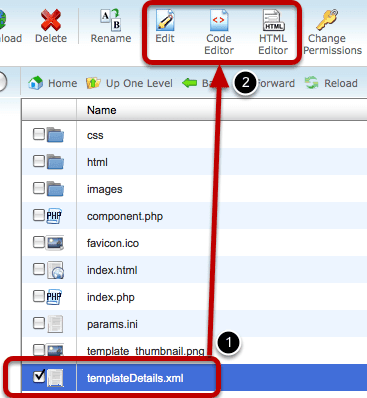
Check the box next to "templateDetails.xml" and select any of the editing options. templateDetails.xml is the table of contents for our template and contains all of the identifying information that Joomla needs.
Change the template name
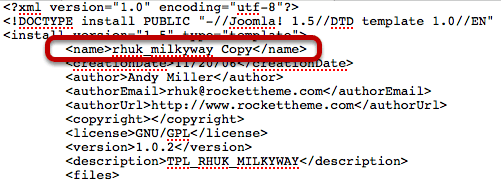
Inside the fields, change the name of the template to something that clearly identifies it as a copy.
Access Your Template Manager
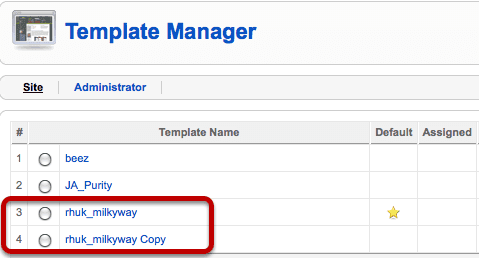
Now if you go to Administrator >> Extensions >> Template Manager you should see the two copies of the same template.
Move a Joomla Site from Test Directory to Live
- Written by Steve Burge Steve Burge
- Published: 06 May 2010 06 May 2010
This tutorial will show you how to move a Joomla site from one directory to another using CPanel. One common reason for doing this is to move Joomla from a test folder and make it live. Joomla 1.5 makes this process very easy.
Login into your CPanel
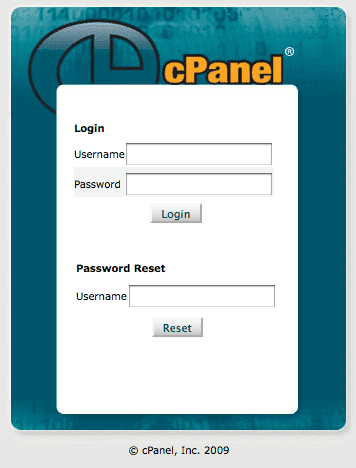
Often you can access your CPanel just by adding /cpanel to your domain name ... example.com/cpanel
Access the File Manager
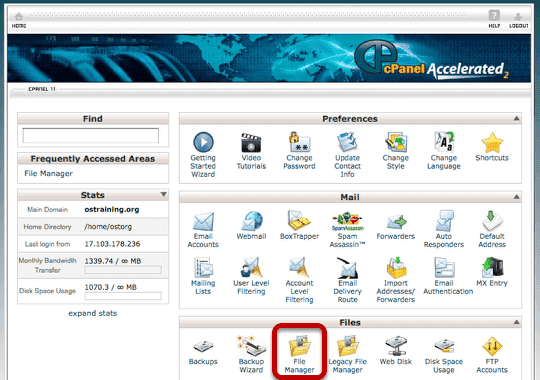
Although your screen may not look 100% identical to the one above, every version of Cpanel does come with a "File Manger" option somewhere.
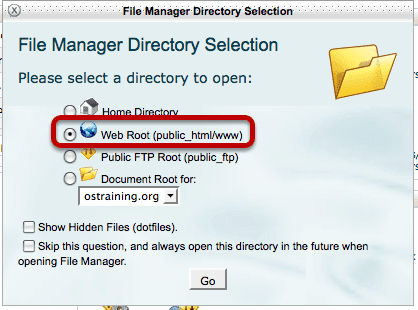
Choose to Go to the Webroot
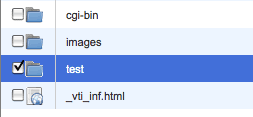
Open Your Test Folder
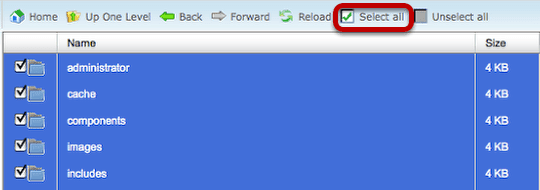
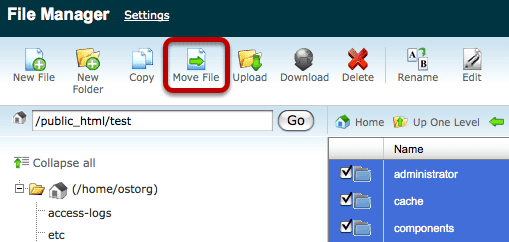
Select All the Files
Click on Move File
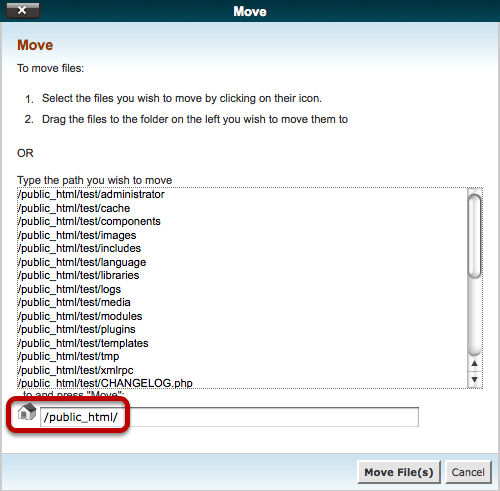
Move to /public_html/
Check Your Site
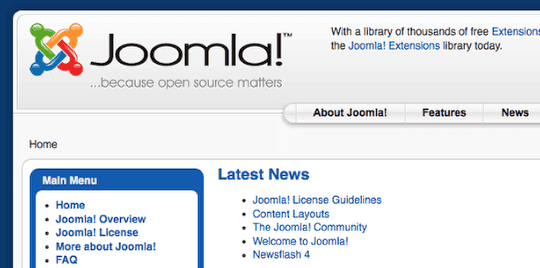
Visit the front of your site in its new location and verify that everything is working correctly.
Login to Your Joomla Site Administrator
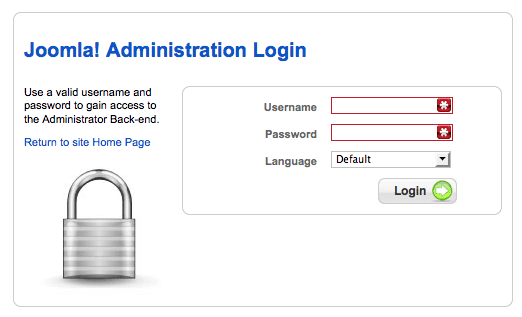
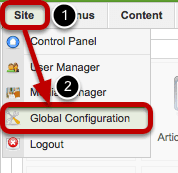
Go to Site >> Global Configuration
Change Path to Log folder
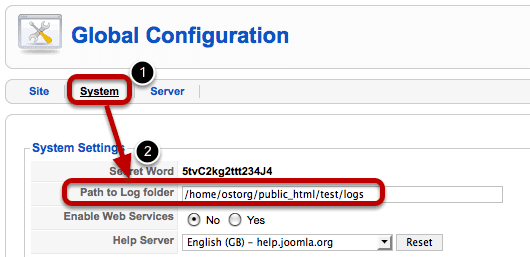
Change that setting to remove your /test/ folder
Change Path to Temp-folder
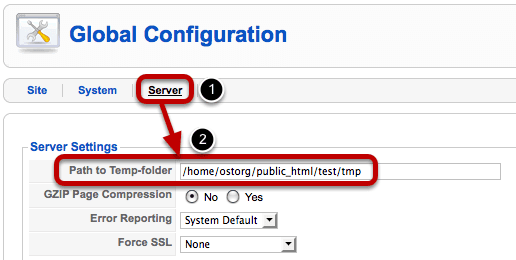
Change that setting to remove your /test/ folder. Click "Save" in the top-right corner.
Find the Right Width for Your Site
- Written by Steve Burge Steve Burge
- Published: 01 May 2010 01 May 2010
This tutorial will show you how to find the right width for your site.
Find Your Own Screen Width
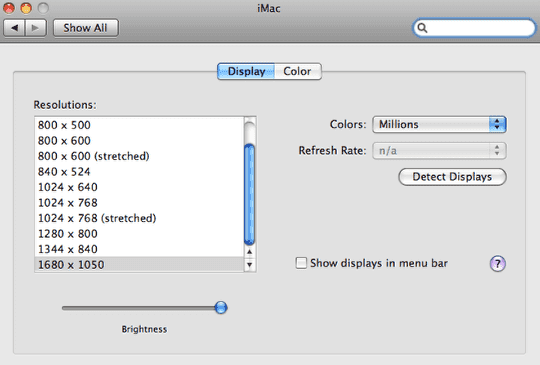
First, we'll find the current width of your screen so you can have an idea of how large these sizes are. Most of the time it will be in your computer settings:
- For my Mac its Apple icon >> System Preferences >> Displays
- For my PC its Start >> Control Panel >> Display >> Settings
In this case my screen is 1680x1050.
Find Your Visitors Most Common Screen Sizes
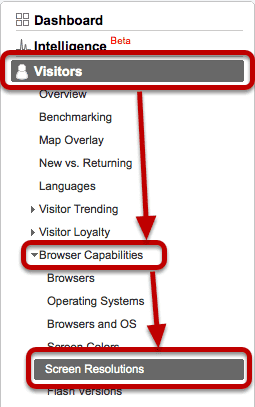
Your own screen probably isn't the best width to use. I'd go to Google Analytics and check what the most common screen sizes are for your site visitors. Go to Visitors >> Browser Capabilities >> Screen Resolutions.
Examine the Screen Sizes

Generally the more tech-savvy your visitors, the large the screen. In this case it wouldn't make much sense to have a narrow website width. Ideally our site will be at least close to 1000px. Increasingly widths of around 960px are common.
404 Not Found in Joomla Administrator - JSecure
- Written by Steve Burge Steve Burge
- Published: 30 April 2010 30 April 2010
This is one common solution if you're getting a "404 Not Found" error when visiting your Joomla administrator area. The problem often lies with a good and useful product called JSecure. You normally have to remember a specific URL that was set in the administrator area. For example: mysite.com/administrator?mysecretcode. This stops people from trying to guess your login, but if you forget your secret code ...
Do you see this screen?

If you do, the problem is JSecure. Have you really forgotten your secret code? If so, read on ...
Login to Your Hosting Account
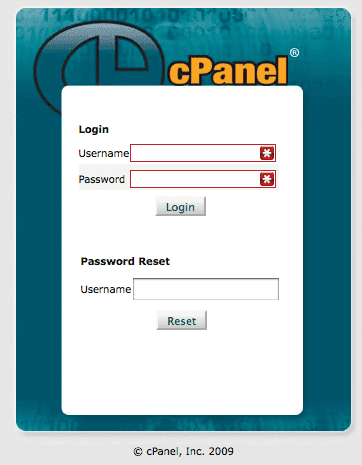
Or you could go via FTP. Essentially you just need a way to get to your files.
Find Your File Manager
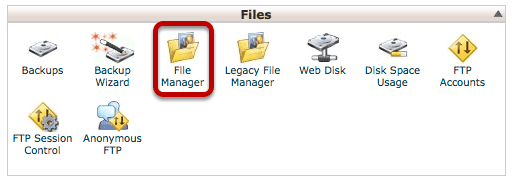
Every hosting company should give you access to your files, although the access may be in different places with each host. This is an example from the popular CPanel software.
Browse to /Plugins/System/
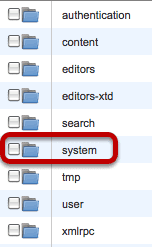
You need to access the /plugins/ folder than then the /system/ folder.
Find JSecure.php
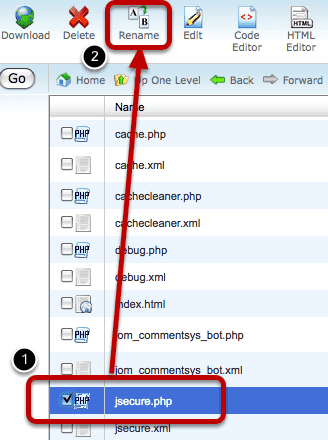
Rename the File
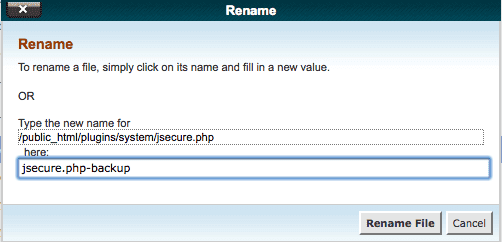
Just give jsecure.php a different name and save it. Next time to try to access your site, the 404 error should have gone.
Find and Edit Joomla CSS Problems
- Written by Steve Burge Steve Burge
- Published: 30 April 2010 30 April 2010
This purpose of this tutorial is to show you how to find and fix problems with your Joomla templates. We're going to focus on CSS (or Cascading Style Sheets) because they control very common issues such as fonts, colors and padding.
Download and Install Firefox

No question about it, Firefox is the best tool you can find for fixing problem on your website. Download from https://www.mozilla.com/firefox and install.
Install the Web Developer Plugin
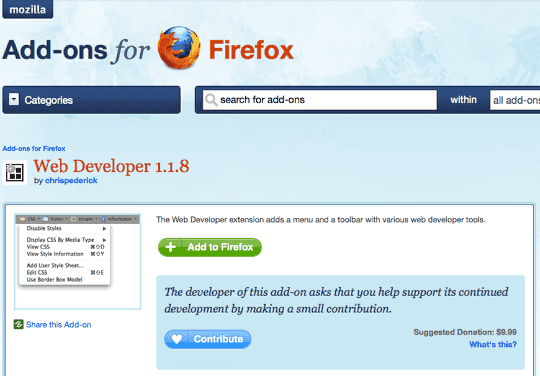
Firefox is useful for the same reason as Joomla ... it has 1000s of amazing addons. The one we're going to use is called "Web Developer". Visit https://addons.mozilla.org/en-US/firefox/addon/60 in your Firefox browser and click "Add to Firefox".
Visit Your Joomla Site
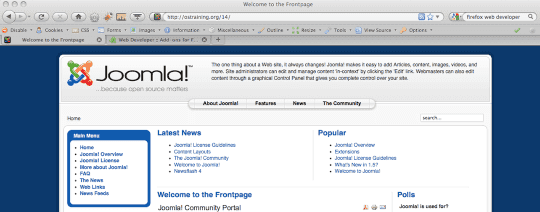
We're going to use the default Joomla for this tutorial.
Diagonse Your Problem
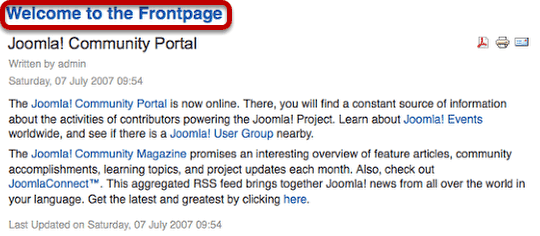
In this example, our welcome message is too small. We'd like to have "Welcome to the Frontpage" in larger text.
Start the Webdeveloper toolbar
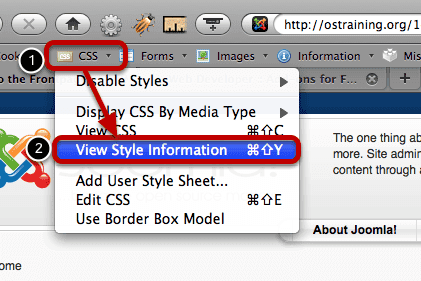
Click "CSS" in the toolbar and then click "View Style Information"
Click the item you want to edit

Hover your mouse over any part of the page and a red box will appear around it. Click on that area.
See the CSS Code at the bottom of the page
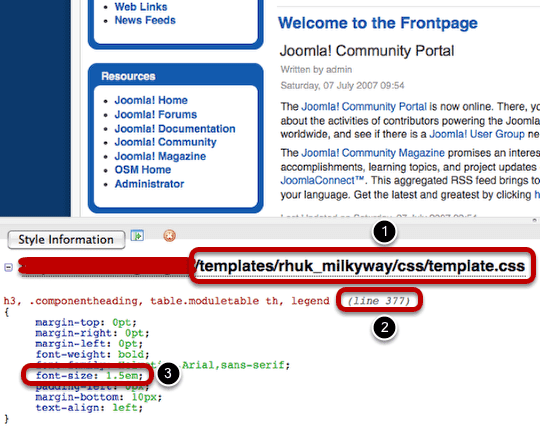
At the bottom of the page you'll get a lot of information about why that item on your site looks like it does. Here's what's controlling the "Welcome to the Frontpage" line:
1: The file with it's exact location
2: The exact line number inside that file
3: The code at that line number
In this case you can see that the font-size is 1.5em. We'll need to increase that number.
Login to Your Joomla Site
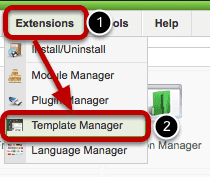
Go to Extensions >> Template Manager inside your site
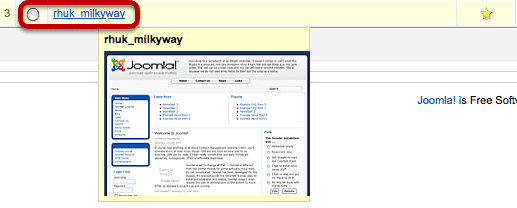
Click on Your Template Name
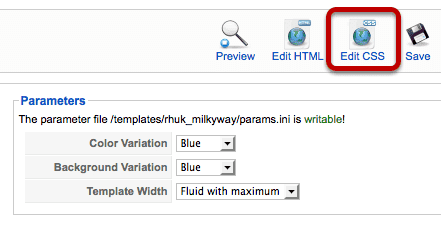
Click "Edit CSS"
Open Your Template' CSS File
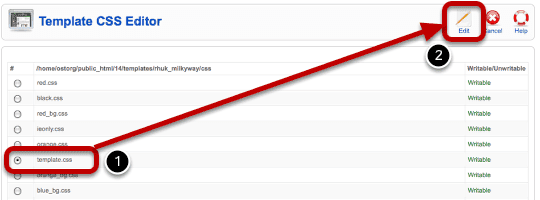
Browse down to find the template you saw in the previous step called "Find the CSS code at the bottom of the page". Click "Edit" in the top-right corner.
Copy Your Test into an Editor
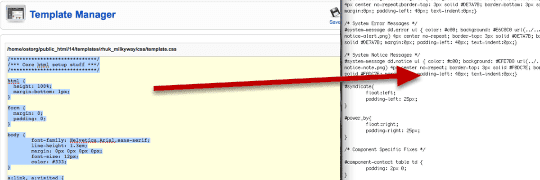
I'm using Notepad in this example, but any text editor will do. If you have a code editor with line numbers, even better!
Backup, backup, backup, backup, backup, backup!!!
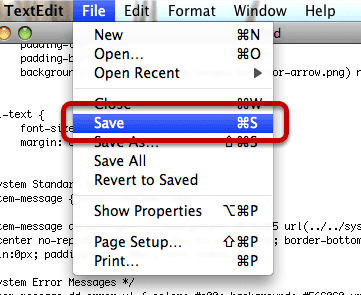
If you're doing this for the first time, you will make mistakes. Backup your file so that you can roll back those mistakes when they happen.
Find Your Code to Change
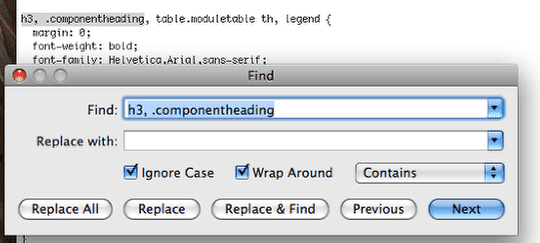
Search for the code that you find earlier in the tutorial.
Change the Code
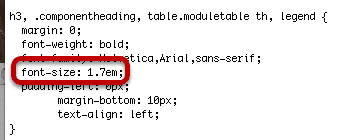
Especially when you're getting started, this may involve some trial and error. In this example, I'm going to increase the font-size from 1.5 to 1.7.
Paste Back into Your Joomla Site

Paste the code back into your Template Manager and click "Apply".
Check the Change

Great - in this case the change worked and text is larger. If you the change isn't just what you want, you'll need to go back a few steps to "Change the Code" and try again.
Some Notes
1) This is a process of trial-and-error. Don't expect to get it right first time, ever time.
2) Make one change then check. Make one change then check. If you do that, it's easy to spot a mistake. However, if you make wholesale changes before checking, it will be very difficult to find where you went wrong.
3) If you want to move faster, get an FTP Editor that will allow you to edit this files more quickly and accurately. That however, is for another tutorial :)
